Custom Credenza with Parquetry

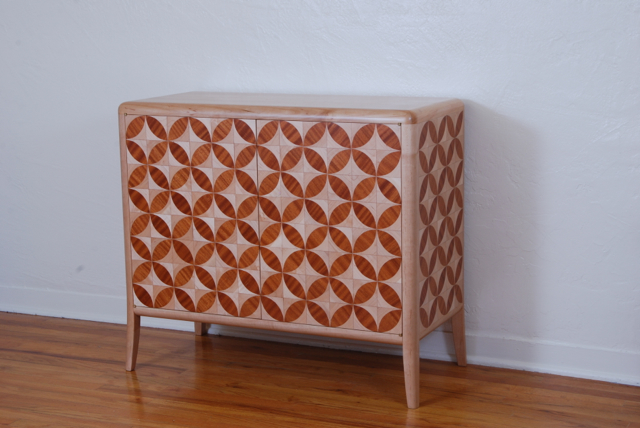
The great jazz saxophonist John Coltrane was known for taking musical phrases and exploring them from every angle. Forward, backward, inside out. He would try out every combination of notes to see where it would lead him. As a designer and builder of custom furniture I like to do the same thing. Sometimes it's a certain shape of leg mixed with a molding that can be pushed up into an armoire or squished down to be a credenza. I've played with curves that were almost straight lines and others that were nearly circles. It's part of what makes this business so interesting. I like to try different permutations of the same idea and see where I end up. Recently I've been fooling around with the parquetry pattern on this custom credenza. I first used it to decorate a handful of thresholds for a client near Santa Fe. That got me interested in trying it out on some furniture pieces.
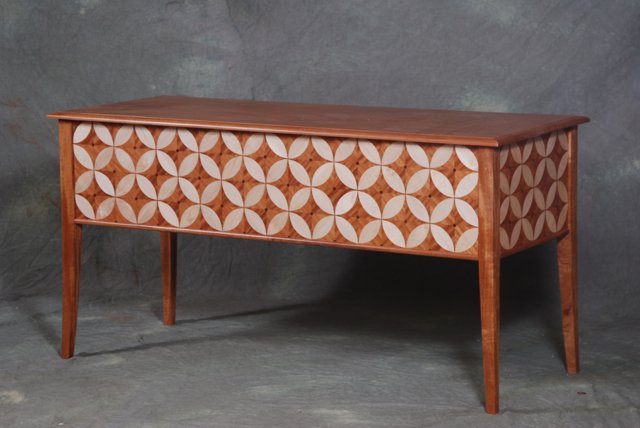
This style of parquetry is called Boule work. In this kind of work you stack up veneers of both species of wood, tape them into packets and cut multiple pieces at the same time on the scroll saw. This gives you equal numbers of all of the parts in each species. The result is that in the end you have two sets of faces in opposite color patterns. The desk below was made with the 'scrap' from the credenza. As Coltrane would've told you, turning the same parts around can give you a completely different feel.
This article is only going to cover the making of the credenza. I wrote companion article about making the desk that covers the specifics of the parquetry work that went into both pieces.
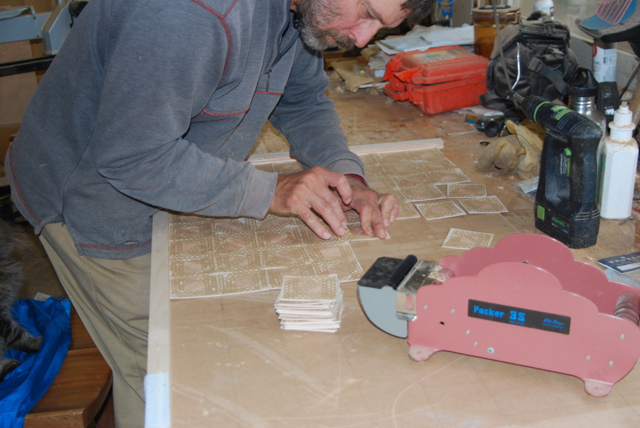
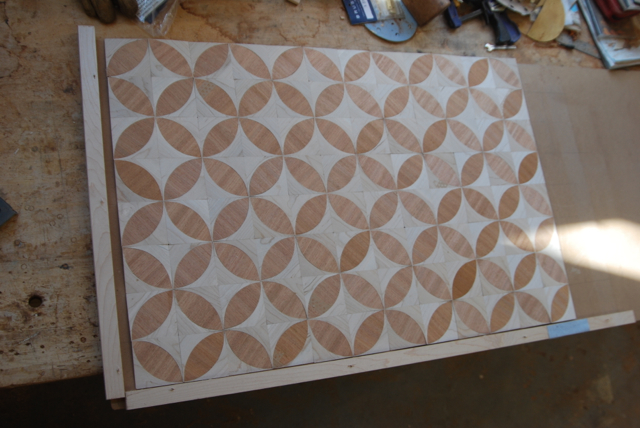
With all of the 3" squares that make up the pattern taped up I used a square jig to hold all of the pieces in alignment while I taped them into sheets. It was really important that all of the faces were square and the same size. The panels can only be cut to the pattern of the parquetry. If the parquetry ends up being out of square or the wrong size then your cabinet will be off as well. There's no room for fudging it, they have to be right. Here's how the door faces looked when they were all taped up.
The edges of the cabinet parts were going to either get trim or be attached to the legs. That meant that it was OK for the plywood substrate to be exposed. The doors, however, needed to have a wood nosing put on to hide their plywood edges and that nosing had to go on before the faces were glued down. The nosing was just maple strips that were mitered at the corners and glued on to the edges of the plywood.
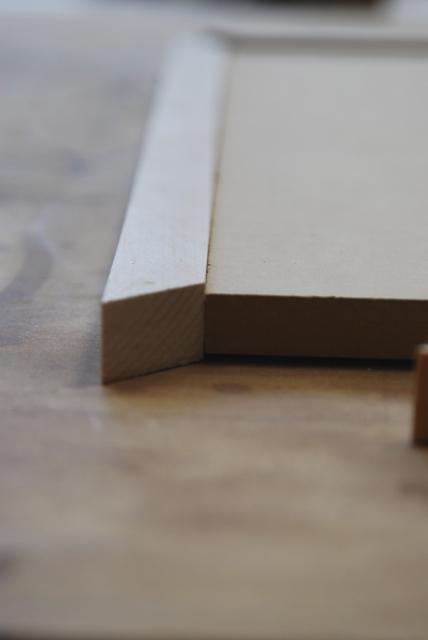
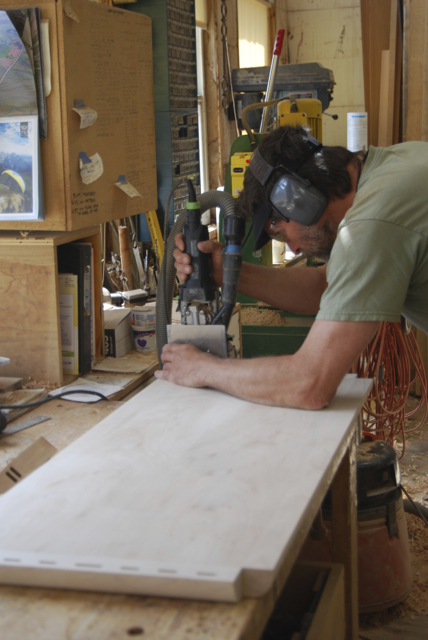
I made the nosing strips about an eighth of an inch taller than the plywood to make the glue up easy and then I used a lipping planer to flush the nosing to the plywood. If you do much work with plywood that has nosings a lipping planer is a good investment. I say investment because these tools aren't cheap. They sure do a great job, though. Flushing solid wood nosings to a veneered plywood can be a tricky thing. The veneer on those sheet goods is only 1/42" thick and it is really easy to quickly ruin a piece by sanding, planing or routing through the veneer. The lipping planer makes this fussy procedure a cinch. The lipping planer is like a power planer, but it's cutting head is set off to the side of the sole of the machine instead of being inside the sole.
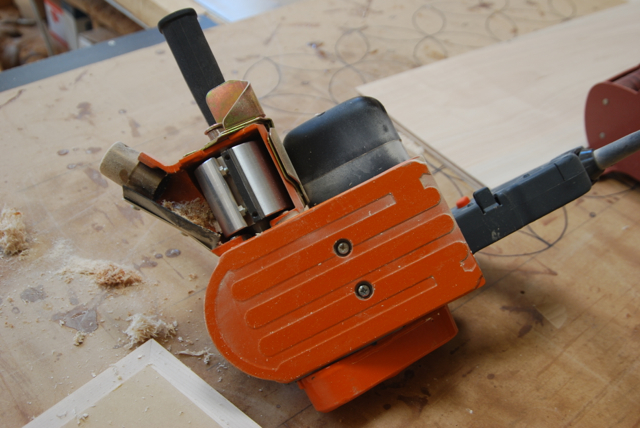
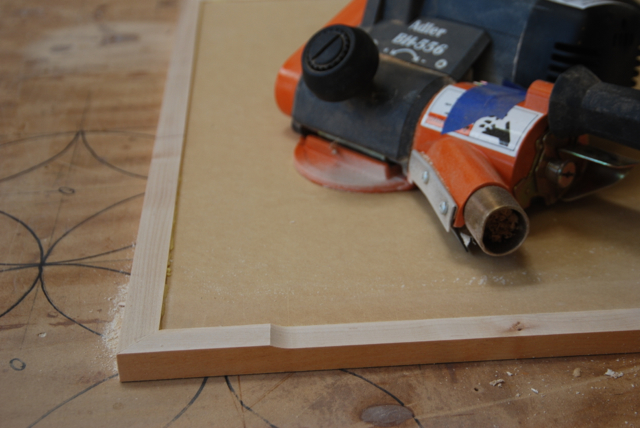
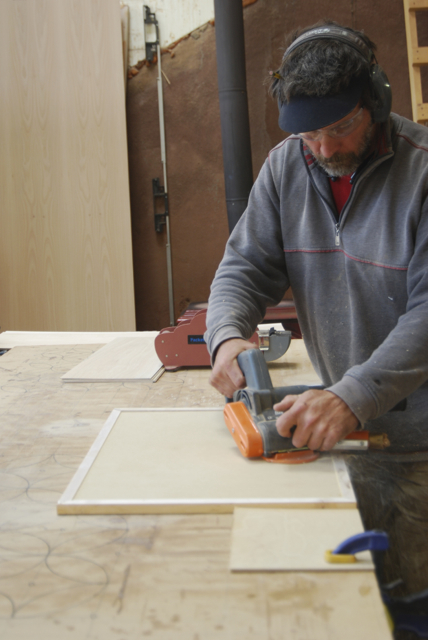
You adjust the machine with a knob so that the knives are EXACTLY in the same plane as the sole. Then you simply put the tool down on the work surface with the cutter head over the nosing and run around the panel cutting the nosing perfectly flush to the plywood. If, like me, you've done your time flushing nosings with hand planes, routers or sanders, you're going to absolutely love using a lipping planer.
Once I had the door and side panel faces taped up it was time to laminate them to their substrates.
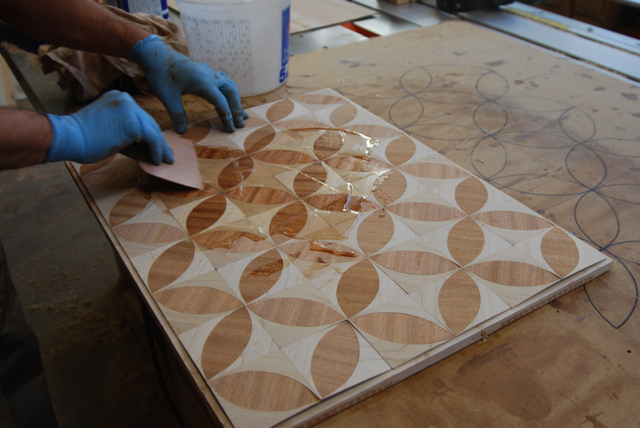
I like to use West System epoxy when I'm doing laminations like this. It has a nice pot life, sands well and it is gap filling, making it great for filling up the small voids between the different parts of the parquetry. Since it isn't water based it doesn't curl the veneer as you work.
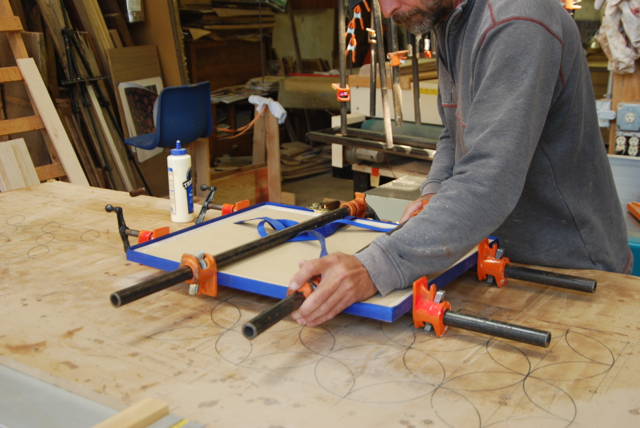
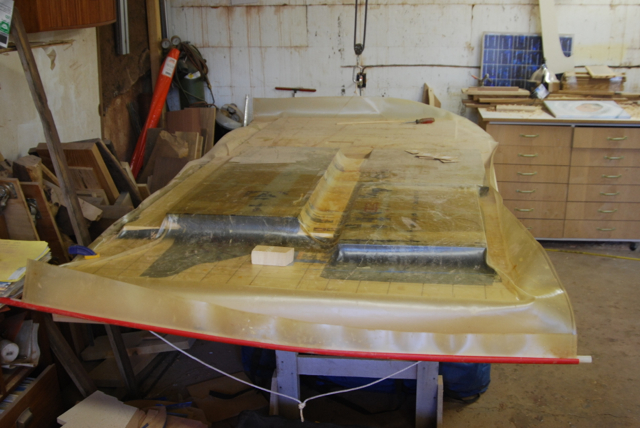
With glue on both surfaces I aligned the faces carefully with the square edges of the plywood and taped them down really well to keep them in place while they were in the vacuum press.
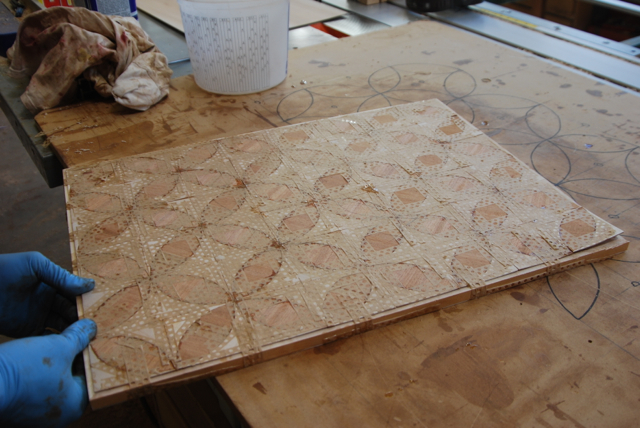
I like to put the panels into garbage bags before loading them into the vacuum bag so that they don't adhere to each other, the table or the vacuum bag while the glue cures.
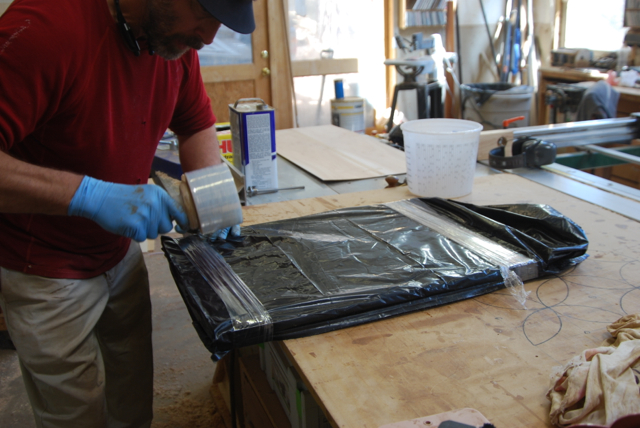
Then I pop them into the vacuum press. You could clamp panels like this with cauls and cover sheets but it is kind of pesky and doesn't do nearly as good a job as the vacuum bag.
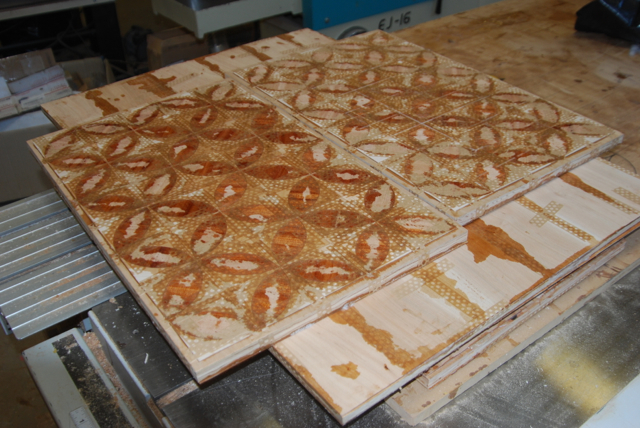
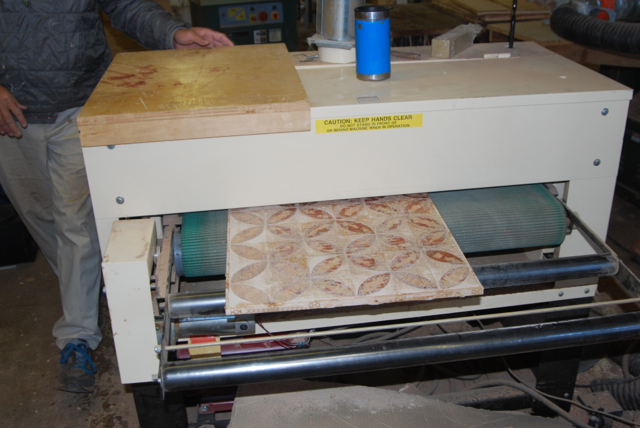
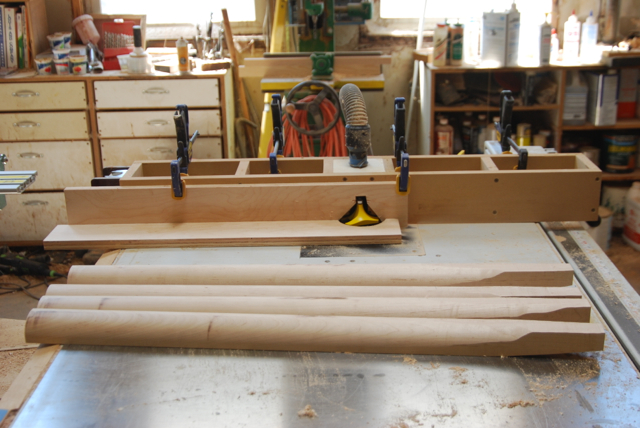
This is how the panels look when they come out of the vacuum bag. I ran them through my drum sander to grind off any glue squeeze out and level the surface.
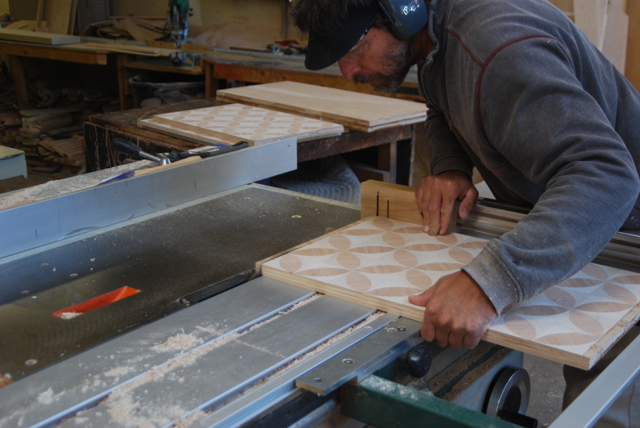
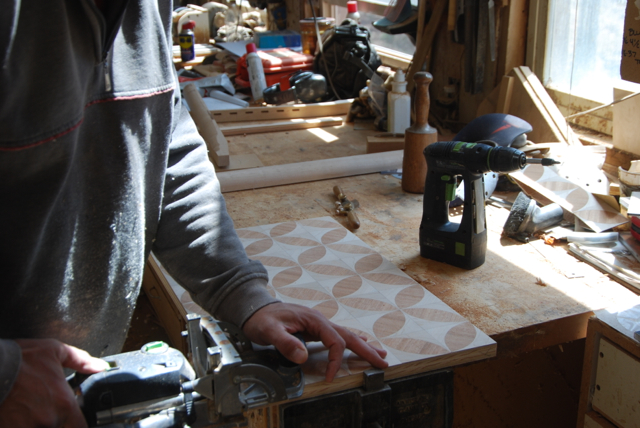
With the panels sanded I took them to my panel saw to square them and trim them to size.
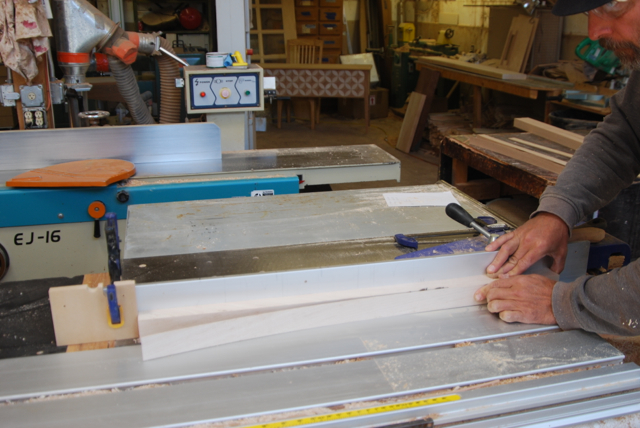
Then it was time to make the legs. They were going to be 1 1/2" x 1 1/2" in cross section, have a round corner, a taper at the ends and do a little flare below the cabinet. Parts like this are always a little chess match. Do the steps out of order and you can work yourself into a corner pretty quickly.
Because of the little flare at the bottom, the leg blanks had to be 1/4" bigger in width than the final size. I made up a quick leg template to use for laying out the blanks and used it to draw the leg profile on two sides of each leg blank. Then I made a stopped cut on the table saw that took me down to the beginning of the taper and flare. I could have also done this cut on the bandsaw and kept right on cutting the curving flare, but the table saw gives such a clean, straight cut that in the end it saves time to do this in 2 steps.
With the bulk of the legs cut down to their final size I could take them to the bandsaw and cut the curving, tapering flare.
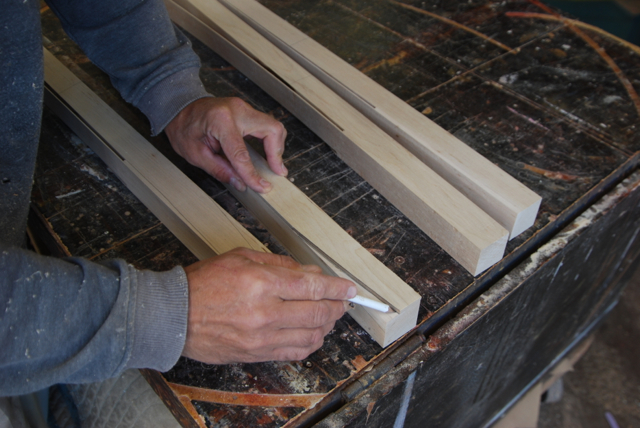
When you are making legs like this that curve in 2 directions you lay out your curves on two adjacent faces. When you cut off the material on one face you also remove it's layout marks. Below you can see the legs after one face has been bandsawn.
The next step is to re-attach the pieces that you've just cut off so that the stock is back to square and your layout lines are back in place. You can tape those pieces on but I find it easier to use a couple of small dabs of hot melt glue.
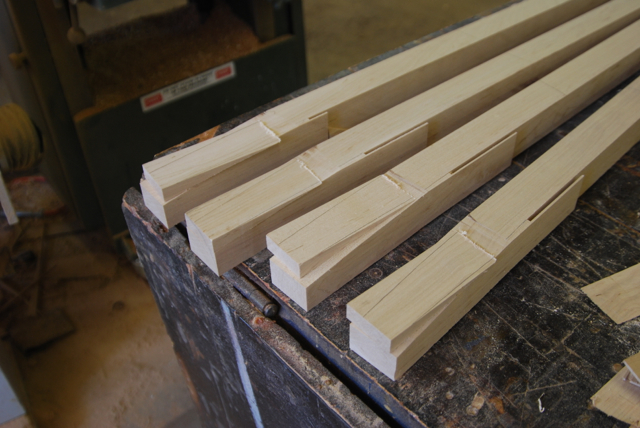
With your blank back together again you are ready to bandsaw the other side of the leg.

When the legs were roughed out I drew the outside curve onto the top of the leg and checked with my Domino machine to make sure that when I plunged my domino mortises I wasn't going to be cutting through to the outside of the leg.
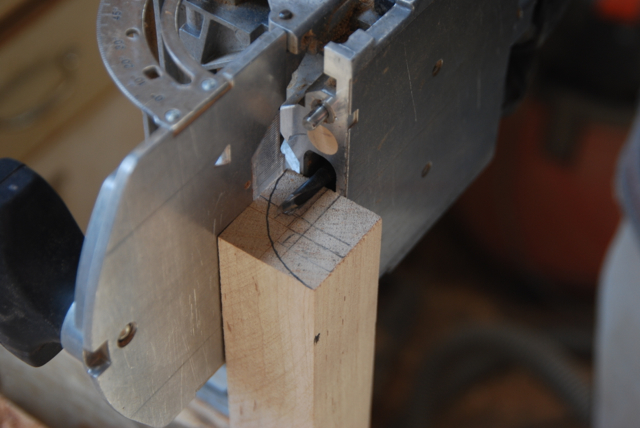
Then, while the legs were still square, I plunged all of my mortises for the leg to side panel joinery.
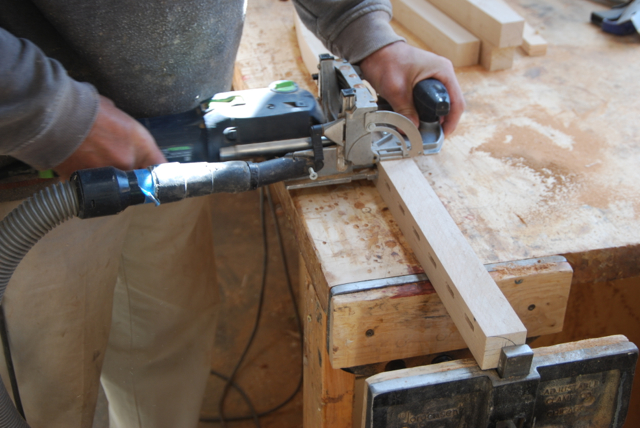
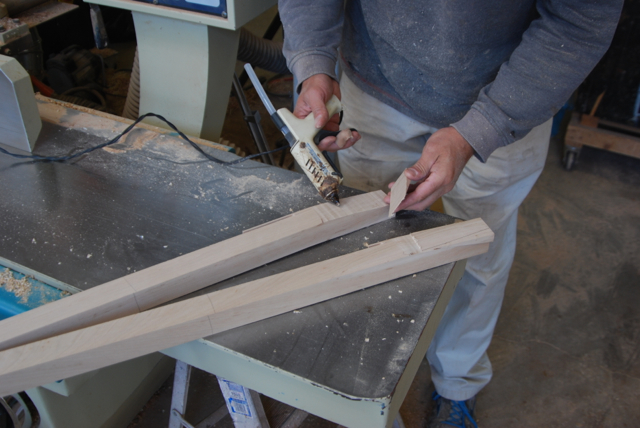
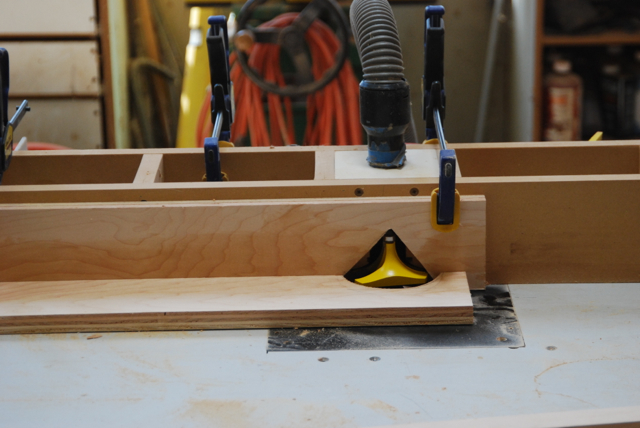
The next step was to cut the quarter round onto the outside corner of the legs. Because of the flare at the bottom of the legs I couldn't just run it on the router table. I had to make a little jig to lift the leg up enough to let the flare clear the table while I routed the edge..
Then it was a simple matter of making a stopped cut from the top of the leg to where the flare started.

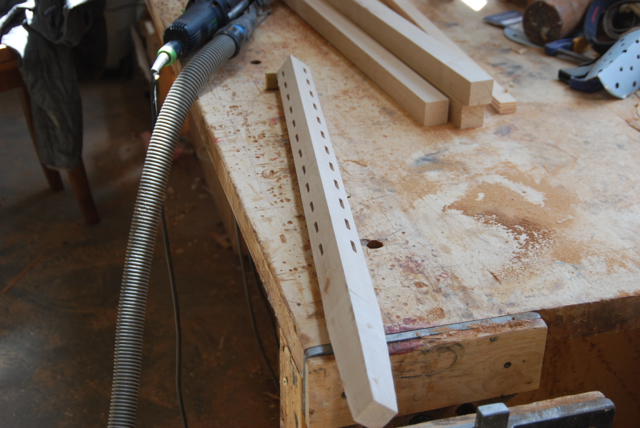
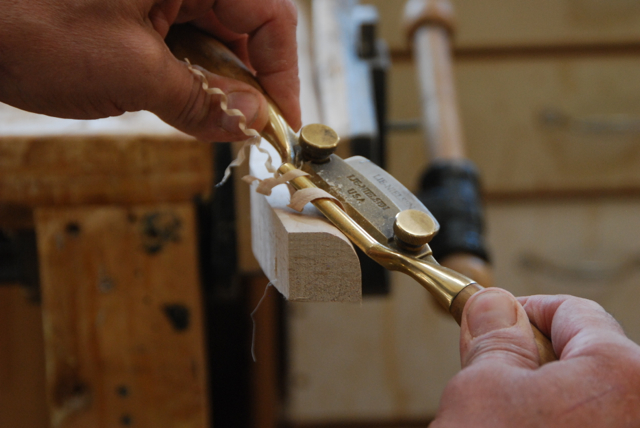
The end of the leg, where the machining stops, was finished with a spoke shave.
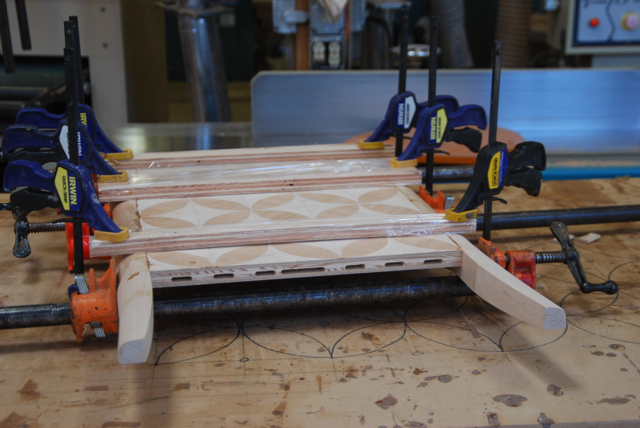
With the legs done I ran mortises in the side panels to match the ones on the legs and got ready to start gluing up the carcass.
Because the sides of the legs were rounded over it was hard to get good clamping pressure on the front of the joint. To keep the legs from being pulled down by the bar clamps I used some quick grip clamps and cauls to put upward pressure on the legs. That gave me a nice tight joint on the outside of the panel.
While the side and leg assemblies were in the clamps I made my top and bottom panels. They were both plywood panels with 1 1/2"x 1 1/2" nosings on them. After the nosings went on I used the same roundover bitt that I had used on the legs to round off the sides of these parts. The bottom panel had the corners removed to make room for the legs to go through. Both panels were mortised with the Domino for attaching to the sides of the carcass.
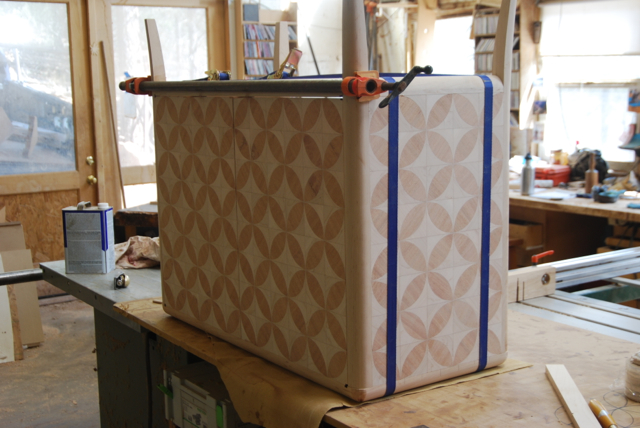
With all the joinery done it was easy to glue the sides to the top and bottom panels. In the photo below I have wedged the doors into their opening after glue up just to see how they looked.
Here it is next to the desk which hadn't gone out to the finisher's yet.

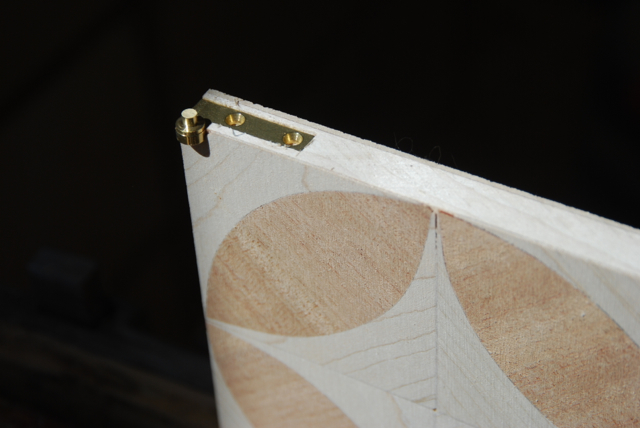
I was using knife hinges and touch latches for the doors on this piece. I love how they look but I'll be the first to admit that they are fussy to install. A euro hinge, on the other hand, is super easy to install and has lots of adjustments, but I thought a cabinet like this deserved better. Before I glued up the cabinet I had mortised the top and bottom for the knife hinge leafs. I used a trim router with a fence to cut the hinge mortises. I left the set up where it was and then used it again on the doors.

The back was plywood, veneered in the same maple and glued into a rabbet in the back. Once the entire cabinet was glued up with the back in and doors swinging I could take the doors off, detail the whole piece and haul it off for finish. Both the desk and the credenza got a lacquer. I usually have my finisher put on a pre-catalized acrylic on most of my furniture, but I wanted the little hint of yellow that the lacquer was going to give to these pieces.
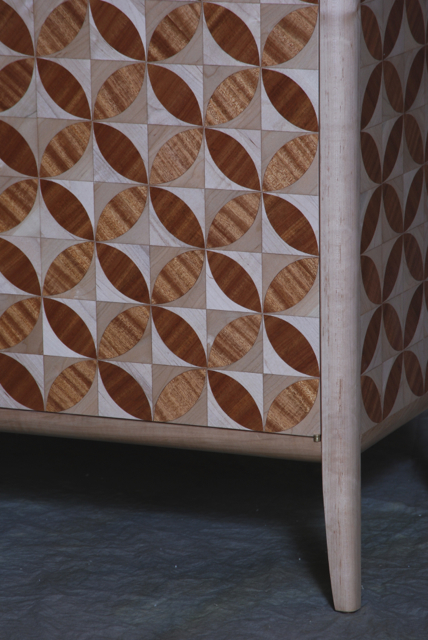
You can see in the photo below how the reflectivity (AKA chatoyance) of the ribbon mahogany and the maple make the wood pop differently depending on which way the grain is running. This gives the piece a very real sparkle. As you move around it the darks pop light and the lights go dark. It's a pretty nice effect.
You can see more of my credenza's and custom desks in the galleries on this website.
Both the desk and credenza were built as spec pieces. Contact me for pricing.