


Furniture Blog
Custom Furniture Gallery
Flying Woodwork


I don't know about you, but when I think about what airplanes are made of, I think about aluminum. That might be true for jets and airliners, but, in fact, it turns out that there are lots of airplanes that are largely made of wood and fabric, with maybe a little fiberglass and metal here and there.
After WW ll the Piper aircraft company was in tough economic shape. They had had success with the famed Piper Cub, but needed another big hit to save their financial bacon. In 6 weeks, under duress from their investors, they designed the Piper Vagabond; a two seater with cruising speeds over 100 mph. They made about 600 of them.
At some point the company Wag-Aero started selling kits to build your own version of the Vagabond. The called it the Wag-a-Bond and it was advertised as a cross country plane that was great for camping! Now, that's old school. Build yourself an airplane and take it out on camping trips. I love it.
A friend of mine bought one of these recently from a guy in California. On his way home from picking it up, he stopped in Grants, NM to fuel up, had some sort of brake issue on landing and clipped one of his wings on something. Busted it all to hell. Bummer. Since the wings are just bolted on, you can pop them off and replace them. But they aren't cheap. That's when he called me.
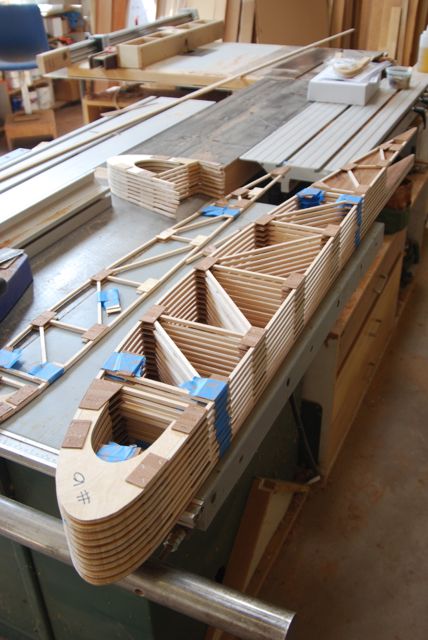
The wing on one of these things is made up of two douglass fir "beams" that run the length of the wing. Onto them are a series of trusses that define the shape of the airfoil. The trusses are made from 1/4" x 1/4" aircraft grade spruce strips held together with little 1/16" plywood gussets and epoxy. I didn't even know there was such a thing as "aircraft grade". Go figure.
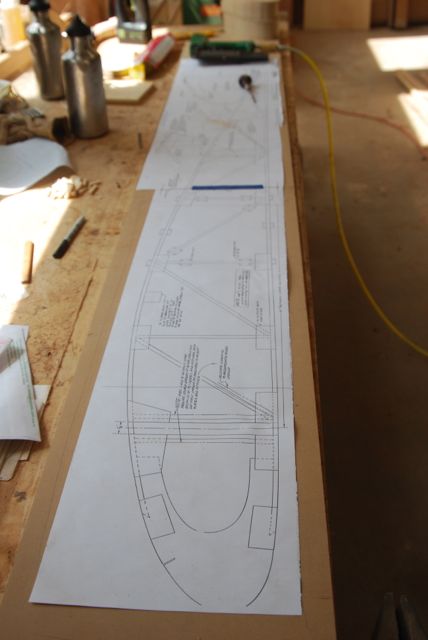
The drawing above is the plan for the wing. There were 10 trusses, each of which were slightly different in their individual details depending on where they were on the wing. To be sure that all of the trusses were exactly the same shape (as well as being the same as the ones on the opposite wing) I glued the drawing down to a piece of MDF and made a holding jig right on it that I used to locate the individual parts as I put the truss together.
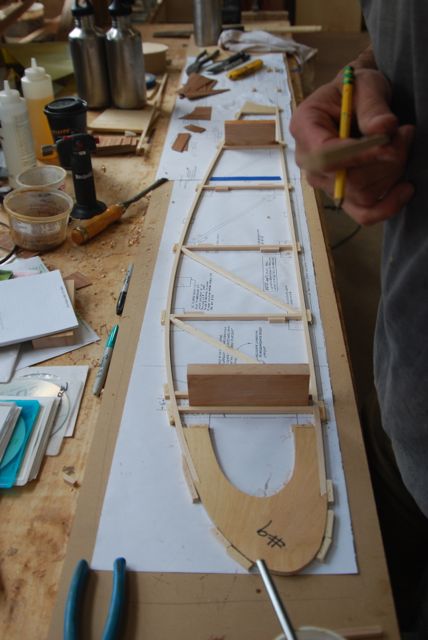
Here you can see the little blocks that I attached to the drawing to hold the pieces in place as well as the first few 1/4" strips that are being held in place by the blocks. I've also put some spacers in the locations for the beams to be sure that the trusses would fit properly.
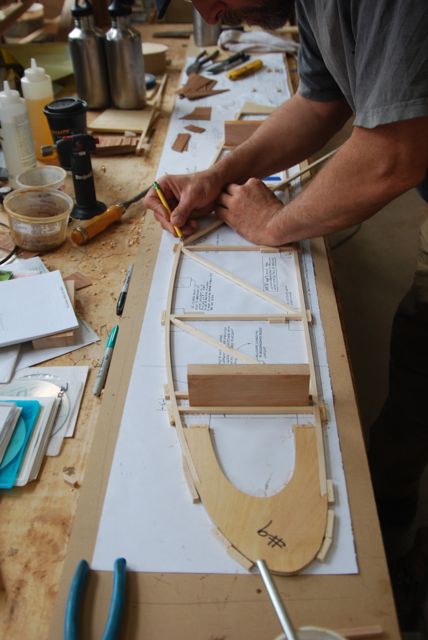
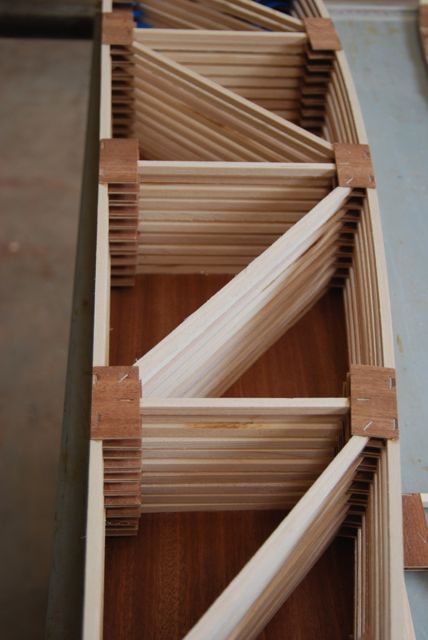
Each spruce piece was marked and fitted into it's location in the truss before I stapled and glued the gussets on.
The original trusses were glued with Resorsinol glue and the gussets were held in place by tiny nails while the glue dried. Not only was it going to take forever to hand nail hundreds of those little things, I wasn't even sure how I'd hold the 1/4" nails while I whacked them with a hammer. Instead I used a pneumatic stapler. That went really fast and it didn't split any of the strips. I used epoxy to glue it all up.
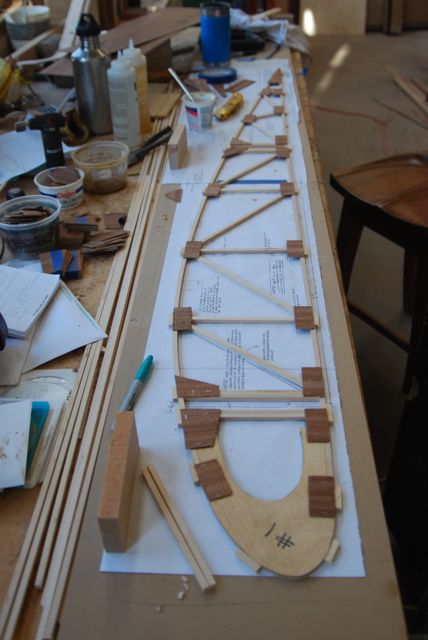
In the background of this photo you can see the tip blocks that go in between the trusses on the front beam.
Here all the trusses have been assembled on the beam, the fuel tank installed, cables added and the leading edge filled with foam and then fiberglassed. My friend did all of this assembly. 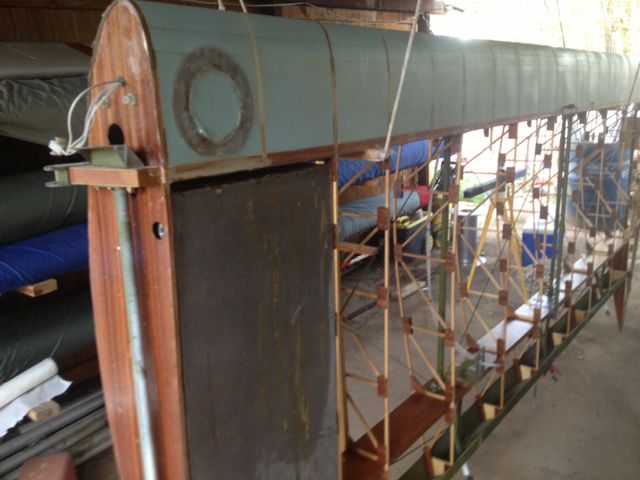
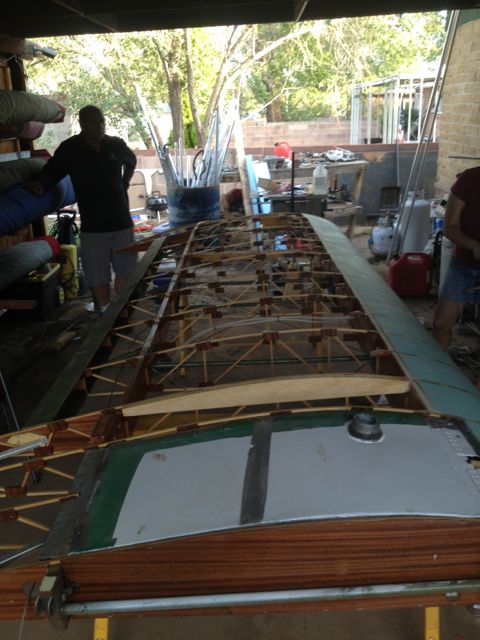
After this the whole thing gets skinned with a dacron fabric and that gets painted with a special paint that will stiffen the fabric. Bolt it back on the fuselage and, viola, off you go into the wild blue yonder.
Now that's custom woodworking in action.