


Furniture Blog
Custom Furniture Gallery
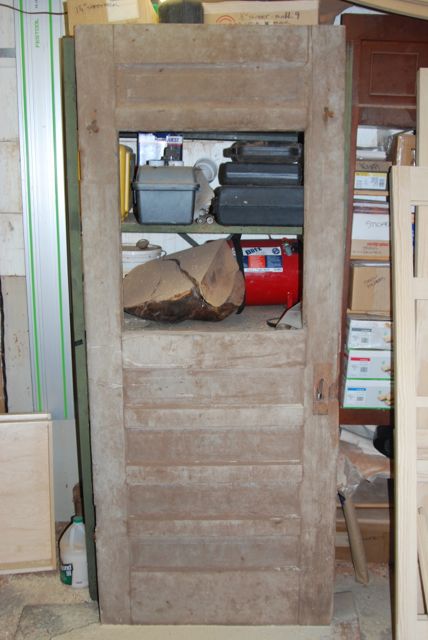
Replicating historic doors


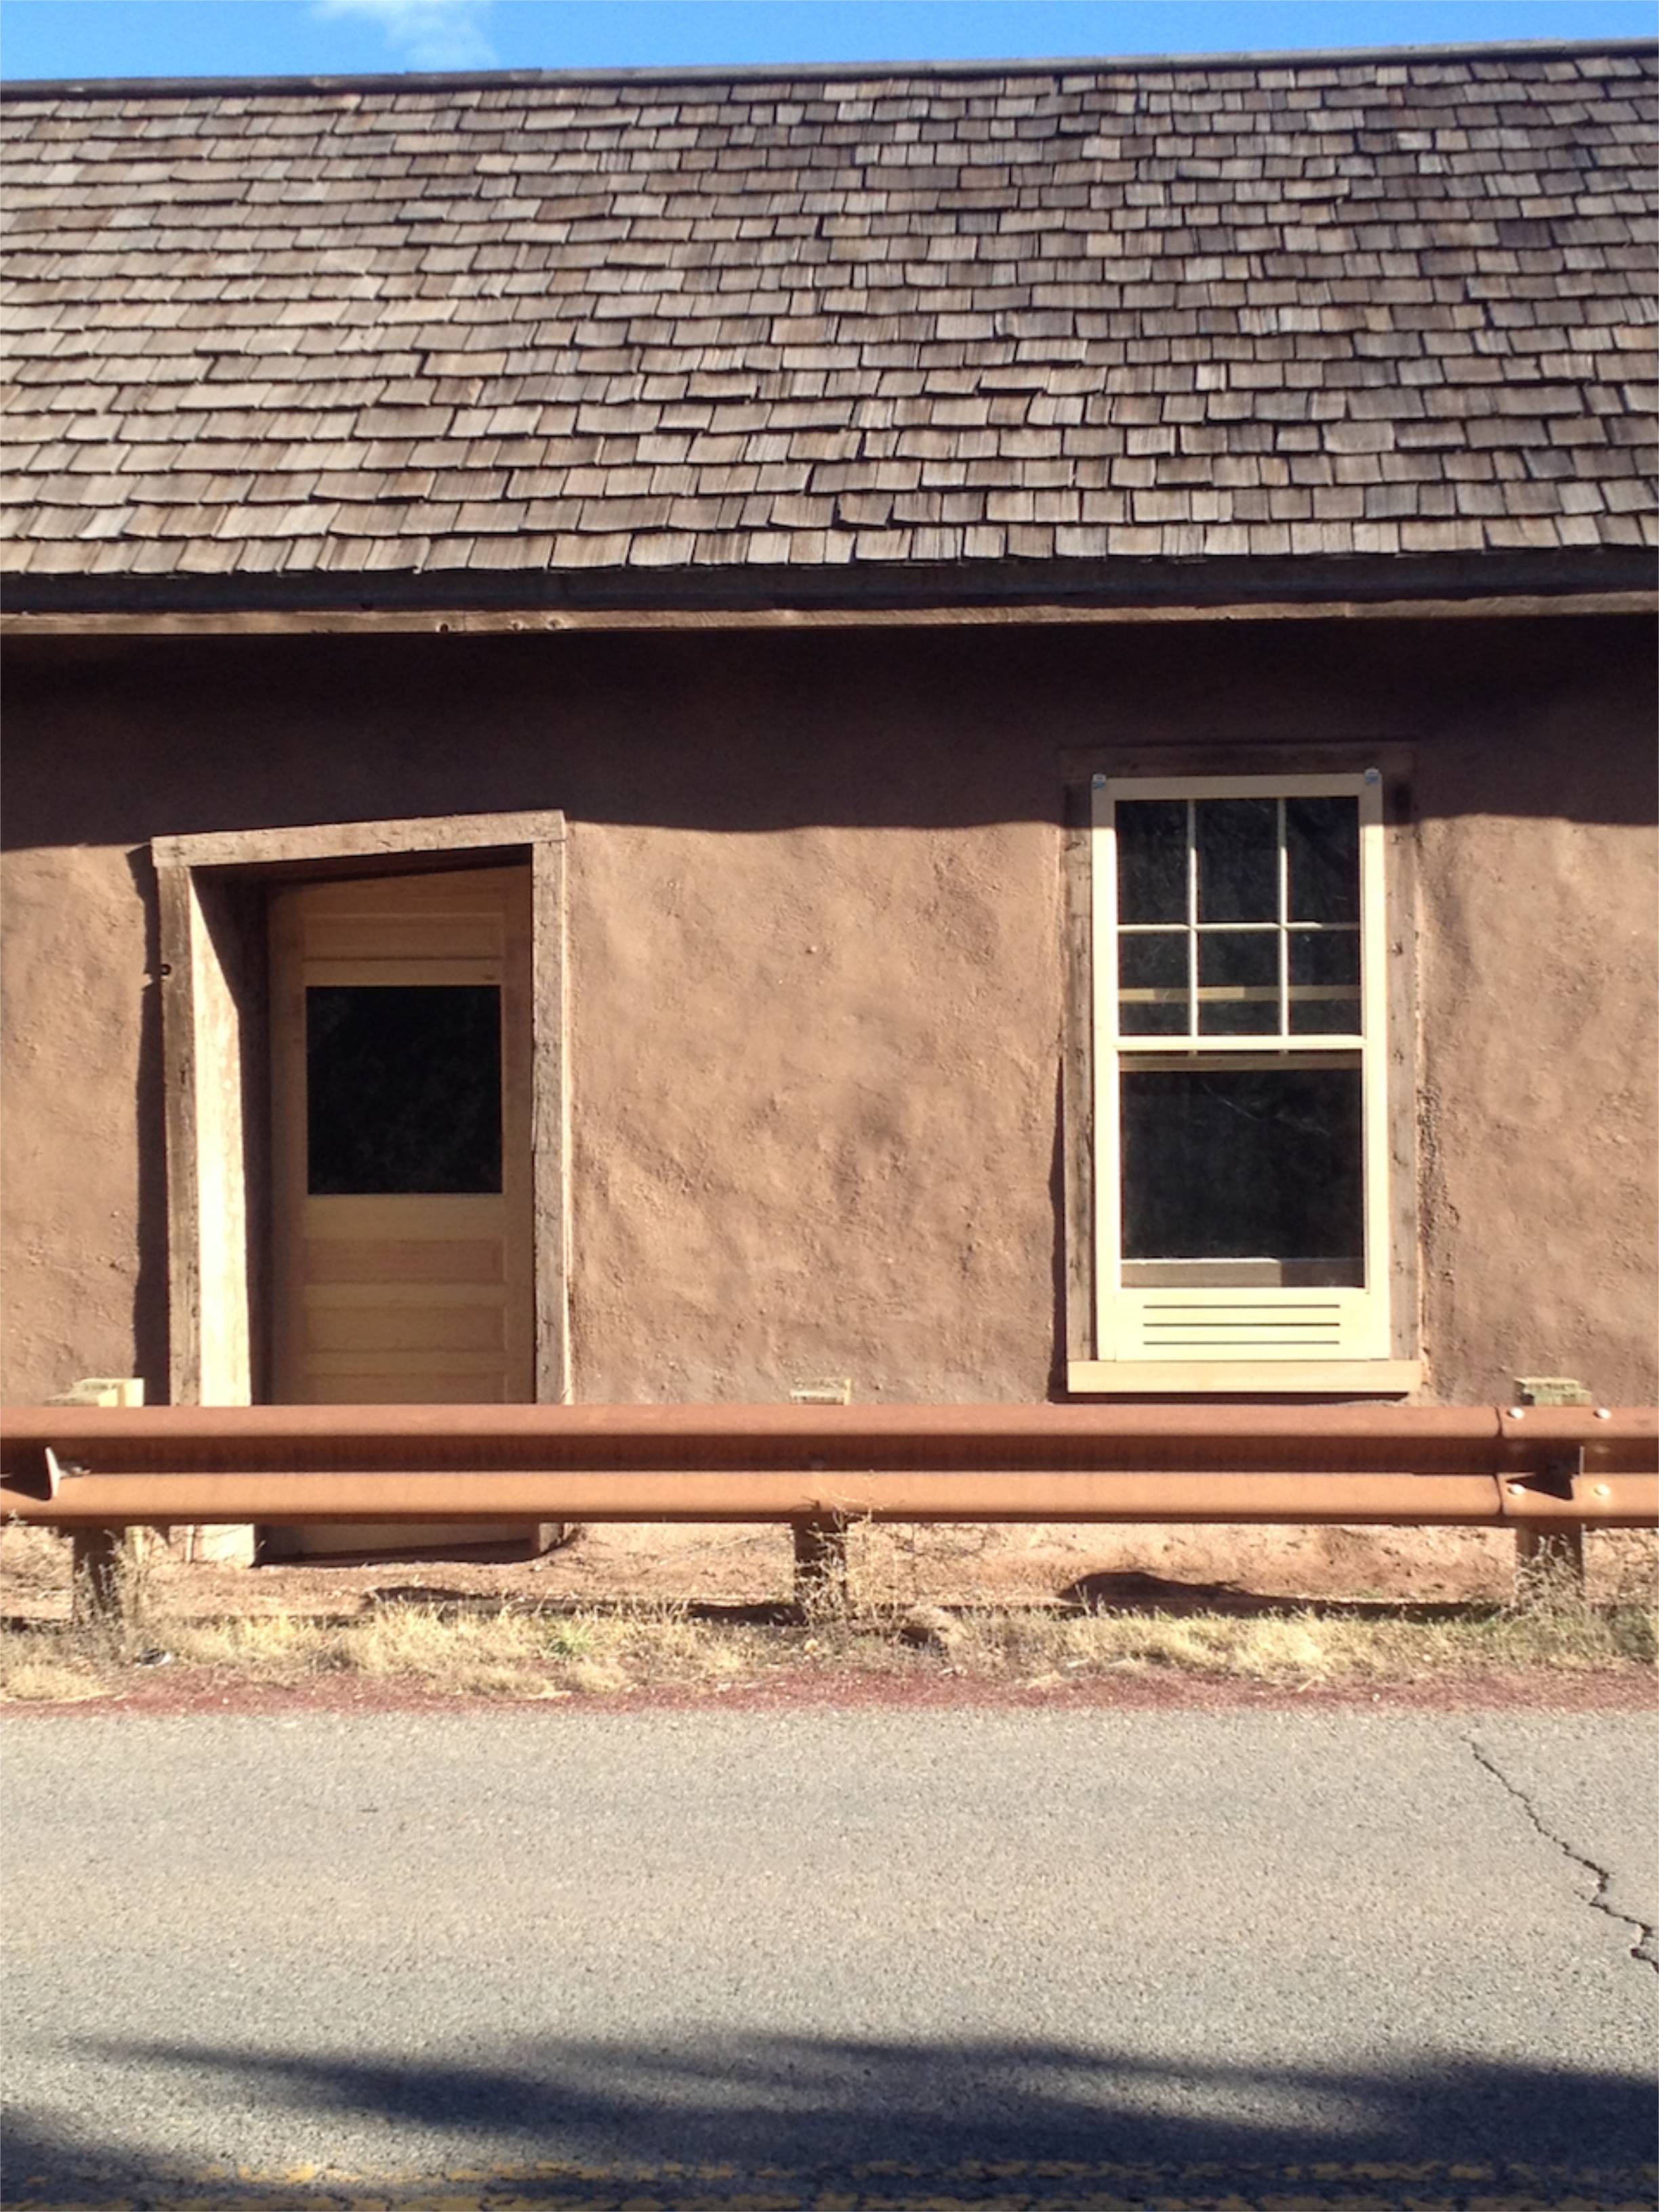
The historic Alexandre Pigeons Ranch building in Glorieta, New Mexico, is one of the last significant structures left that were involved in the civil war Battle of Glorieta. I was referred to the Pecos National Historic Park to work on repairing and replicating some doors and window sash. You can read more about the history of the building and how I replicated the historic window sash in one of my previous blog posts. This article is about how I built the doors to go in the building.
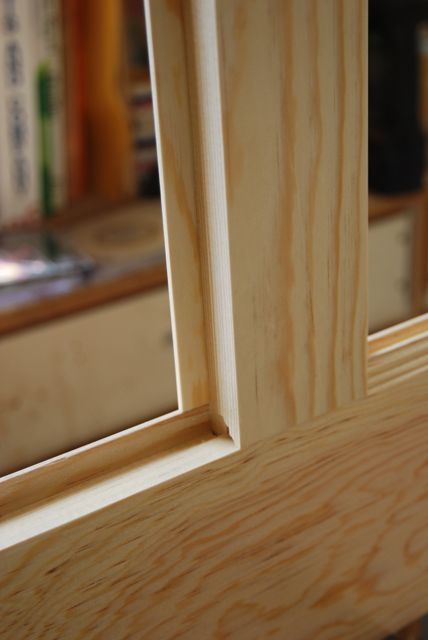
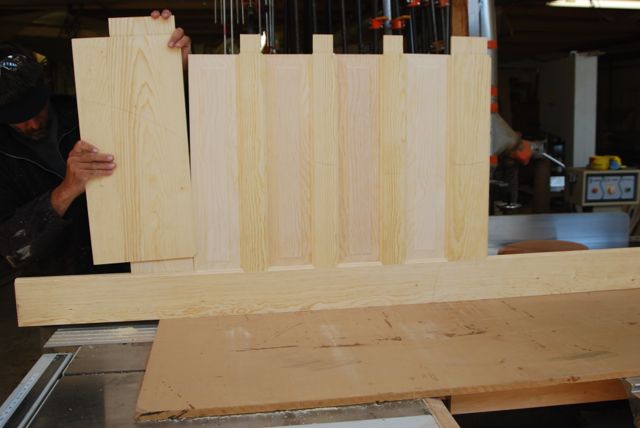
The construction of the doors is cope and stick, mortise and tenon with raised panels and one window light. The profile on the sticking was a cove and bead profile that I didn't have cutters for, so I ordered corrugated backed cutters from Connecticut Saw and Tool to go into my insert shaper heads. Instead of having entirely new heads made for each project, I have several different heads that take 5/16" thick inserts. By using the thick inserts you can safely have a pretty large projection of the cutter out from the head. This gives you lots of flexibility in what kind of profiles you can use on the heads.
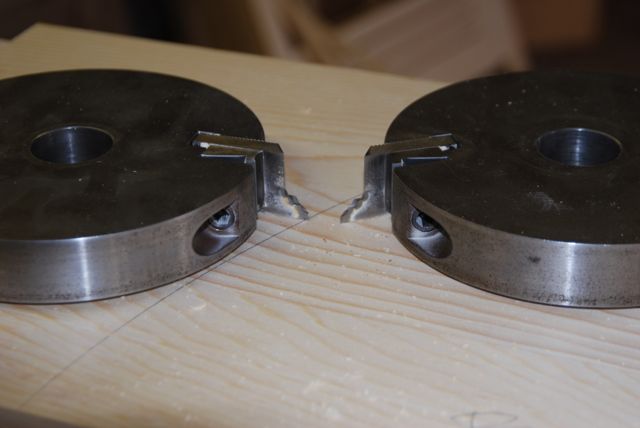
The two coping heads with the cove & bead profile inserted.
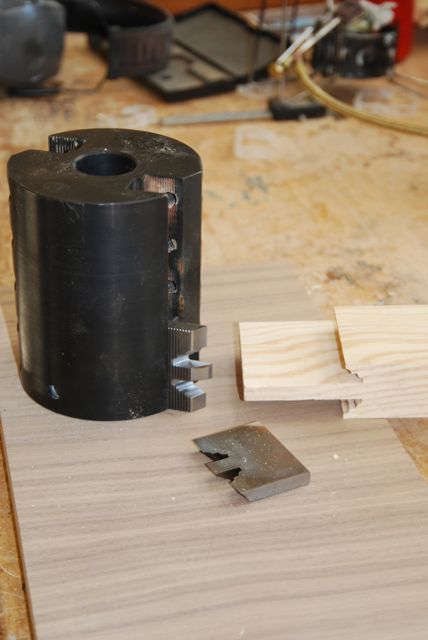
The sticking inserts going into the corrugated moulding head.
This set up saves a lot of money over the long run. The heads themselves are several hundred dollars to buy up front, but then the inserts are only in the $150 range (depending on how tall they are). If you were to have a custom, brazed head made it would be something like $800 for each head every time you had a new profile to run. Once you are set up with with the corrugated heads you can change out your profiles for less than $200 each time.
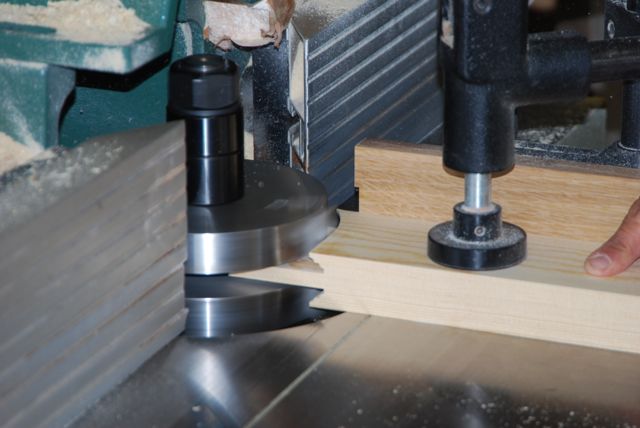
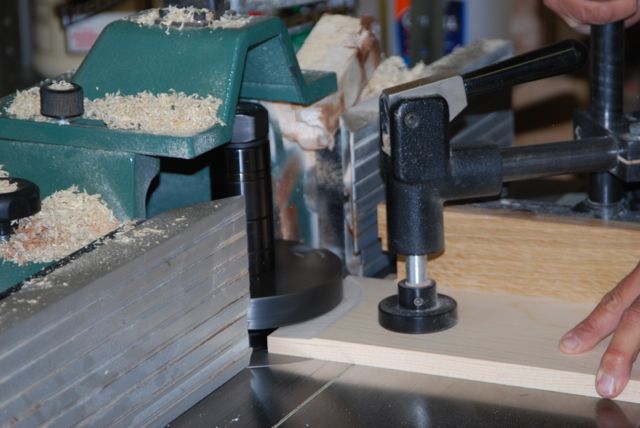
Here you can see the coping heads being used on my Bridgewood shaper to cut the tenon and it's copes in one pass. The machine has a sliding table with a cross cut fence and a big hold down clamp. This makes it easy and safe to do this kind of end grain work. The other way to do a cut like this would be with a single end tenoner, but the set up on a machine like that is much fussier than this system. The advantage of the dedicated tenoner would be that you could do longer tenons than the 2 1/2" that I can do on this shaper.
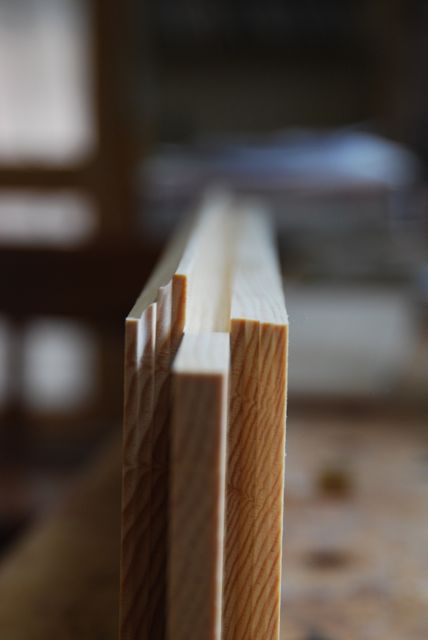
After the tenons are cut all the parts are ripped to width. This removes any tear out that might be left from the coping. Then all the stiles (vertical parts of the doors) and the rails (the horizontal members) get the sticking profile run on them. For this you use the power feeder instead of the sliding table.
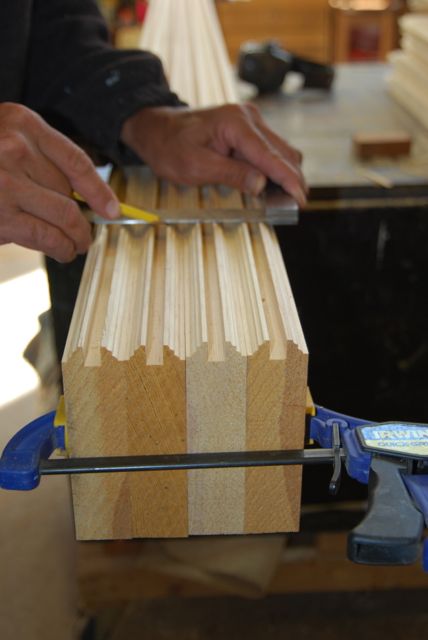
The mortises get laid out on all the stiles at the same time. I clamp them together, measure for the mortises and square across all of them at once. It saves measuring and ensures that all of the doors will be exactly the same and that the left and right stiles have their mortises in the same place. That helps to keep the door square.
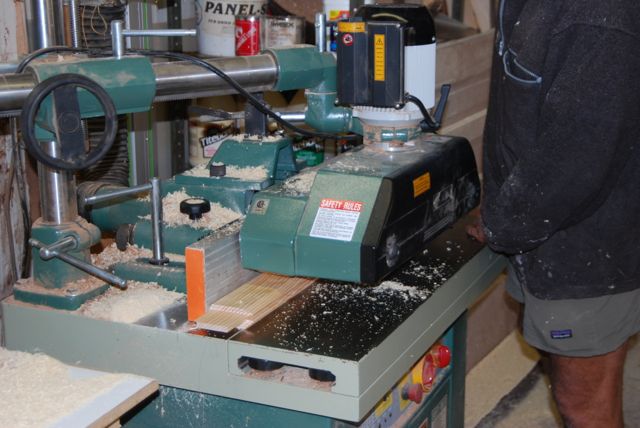
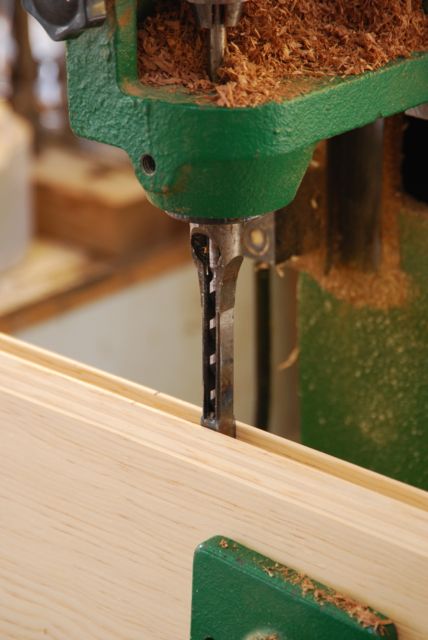
The hollow chisel mortiser with a sliding table and clamp hold down makes short work of all the mortising on a project like this.
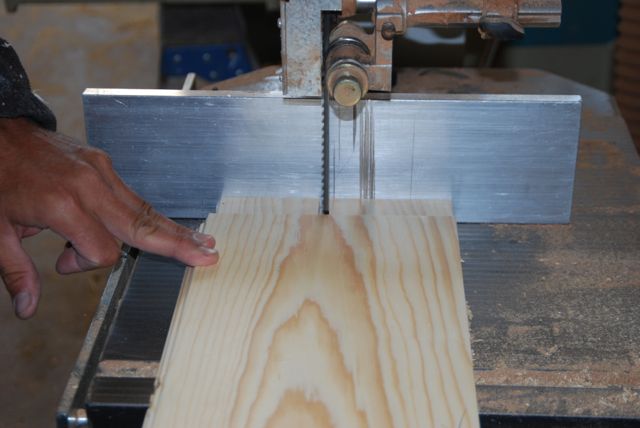
Haunching the tenons is a two step process on the bandsaw. You could do it on the table saw as well, but when the cutoff comes off it has a tendency to get thrown at you with the table saw. I like to avoid that if possible.
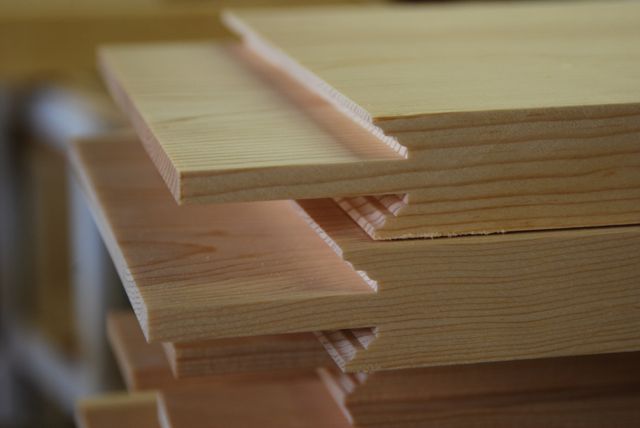
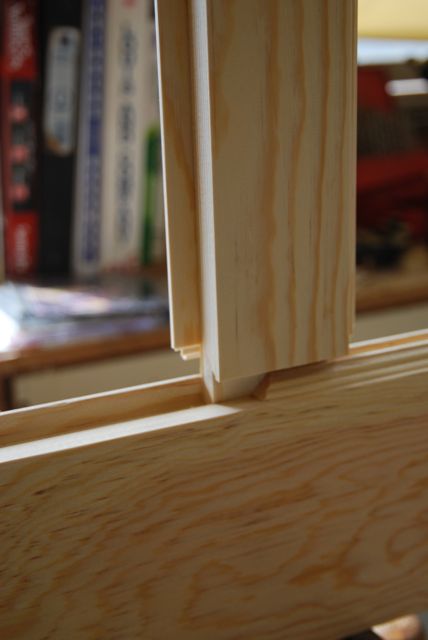
Where the glass is going to go in, the profile on the sticking has to be removed. On the rails this involves simply ripping the profile off with the table saw. For the stiles you need to do a plunge cut on the table saw so that you are only taking off the profile in the area of the glass.
Here you can see the rail being test fitted into the stile. The rail has had it's sticking profile removed all along it's length but the stile only has it removed where the glass is going. When the door is done I'll make glass stop with the sticking cutter and I'll miter it and nail it in to hold the glass.
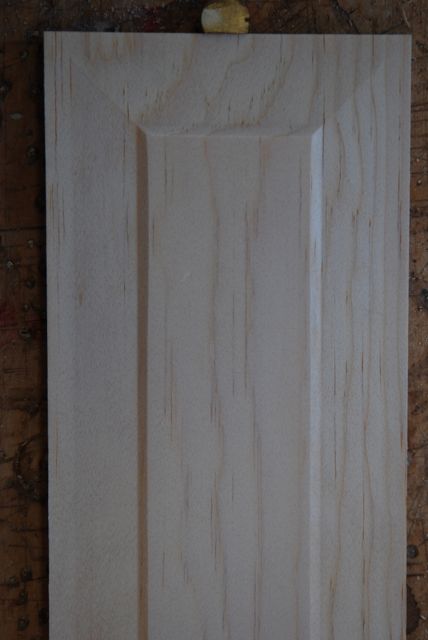
The raised panels are run on the shaper with another set of cutters installed in the coping heads. Cut the end grain first using the sliding table and then run the long grain with the power feeder. This removes any end grain tear out that might be left from raising the end grain.
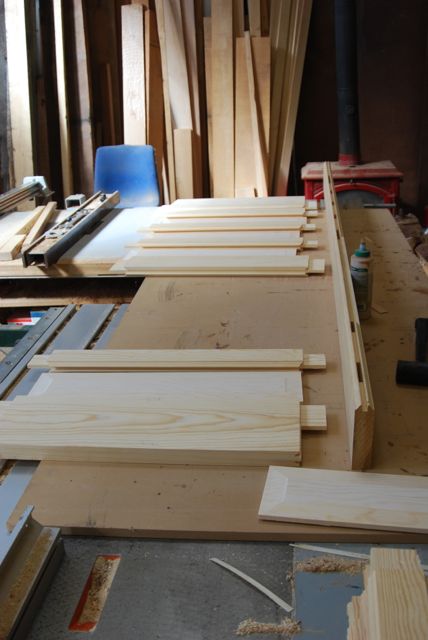
I like to lay out all my parts for a door like this in the location that they are going to go into the door before I begin to glue. This saves any confusion when you are in the heat of the glue up. I start out by gluing all the mortises in one stile since they don't dry out as fast as the tenons which get a much lighter coat of glue to avoid excess squeeze out. Then I work my way down the door spreading glue on one tenon at a time and immediately inserting it in it's mortise, knocking it in with a soft mallet to get it to seat all the way. When all the rails and panels are in I spread glue in the mortises in the other stile and then the tenons. It pays to work fast here (especially if you live in the desert) so that the glue doesn't start to skin up on you before you can get the whole assembly together.

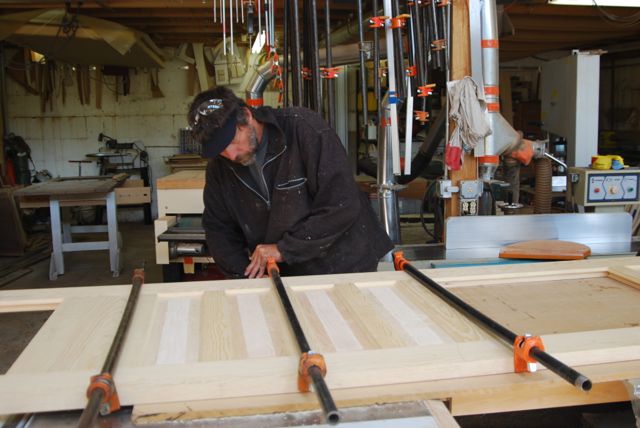
It pays to do door glue ups on a surface that you know is dead flat so that you can see if you are clamping a twist into the door. When all the clamps are on, double check it for flat using winding sticks.