Furniture Blog
Custom Furniture Gallery
Building a wood strip canoe part 2
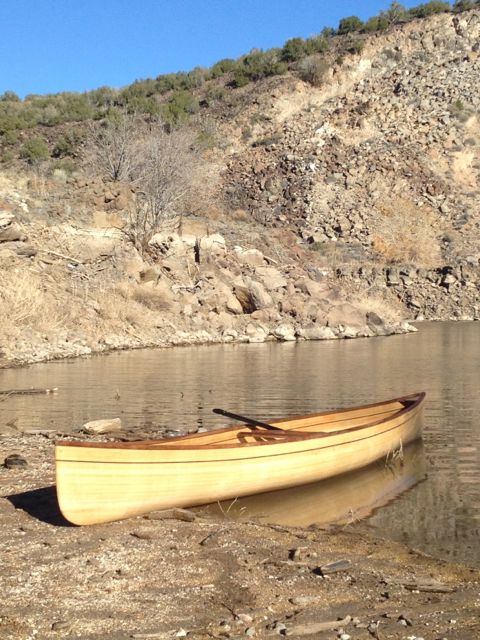
This blog post is the second half of an article about how I made a strip built canoe. If you want to catch up on the how I got to this point you can read about it in the first post. That article took us to the point where all the woodwork on the hull had been done, it was sanded and ready for fiberglass and epoxy.
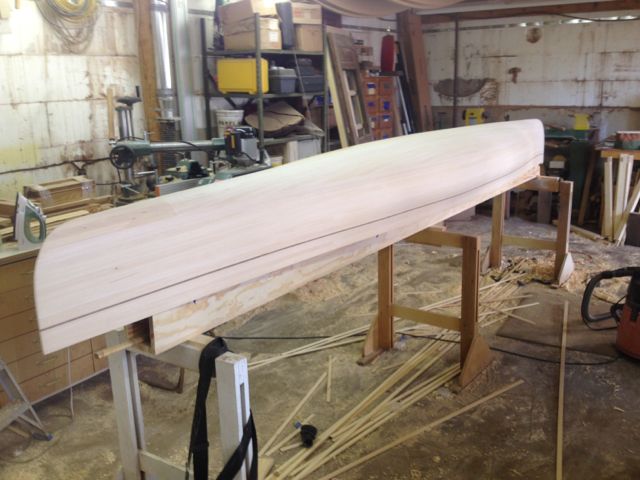
In strip built construction the wood hull is nothing more than a matrix to hold the fiberglass, which is the real structure of the boat. Well, the wood makes it look pretty hot, too.
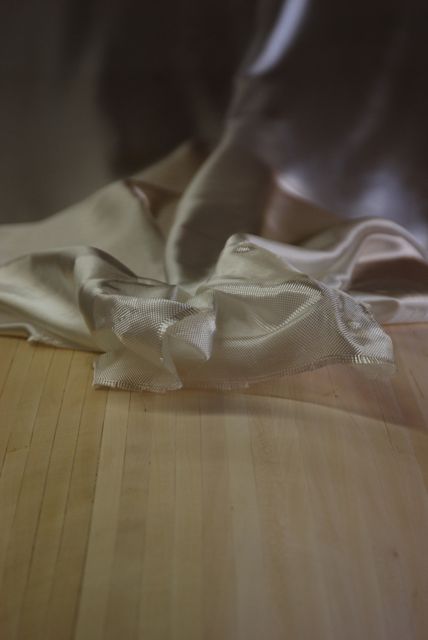
Fiberglass fabric is pretty amazing stuff. It comes in different weights, but generally has the coarse weave of burlap. I used a 6 ounce fabric for the outside of the hull. You would never guess that it is, in actuality, woven glass. It's very soft and supple.
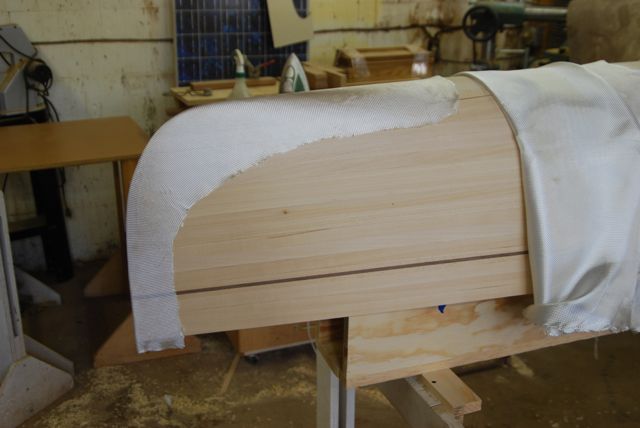
To strengthen the bow and stern of the boat I put a double layer of fabric on those spots. To make the fabric lay smoothly over these shapes you need to cut it on the bias, or diagonally out of the roll. If you didn't, you would get wrinkles.
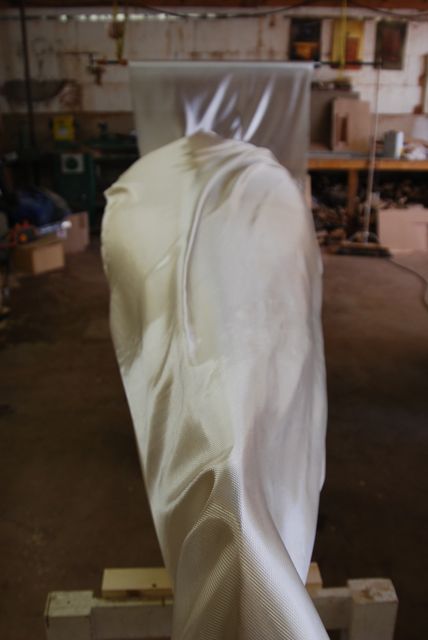
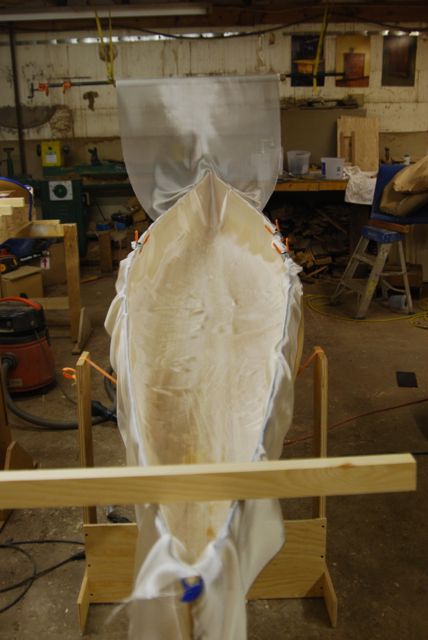
After the reinforcing strips were laid down I pulled enough fabric off the roll to cover the entire hull....
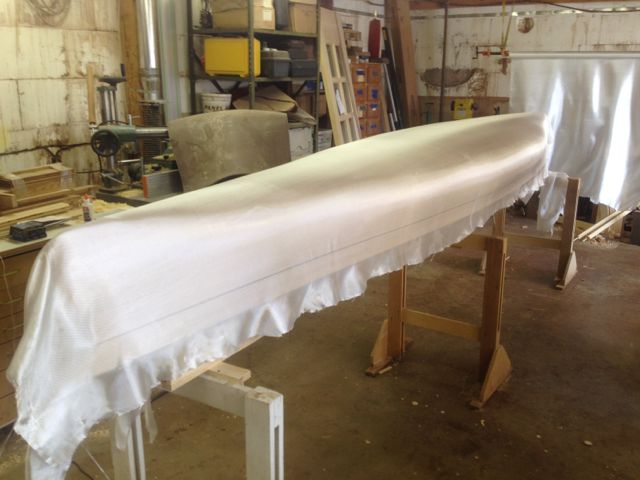
...and stretched and smoothed it until it laid out nicely without any wrinkles.
The fiberglass is what makes the boat strong, but it doesn't do you any good if it isn't held firmly to the substrate. In the early days of strip building people used polyester resin for this, but because it is so toxic (and smelly) we generally use epoxy these days. The epoxy is a little heavier than the polyester, but it's totally waterproof and easy to work with.
There are lots of brands of epoxy to choose from, but I decided to use West System for a variety of reasons. West System was developed by the Gougeon brothers in the early '60's, along with chemists at Dow Chemical, specifically for use in boat building. They created several different formulas for a variety of tasks and conditions and with different curing times. The formula that I used was their 105 resin combined with the 207 hardener. The 207 hardener is the most clear hardener that they make and I picked it because I wanted the basswood hull to stay as white as possible. Other hardeners have more of a yellow hue.
At the heart of the West System are their dispenser pumps. Since these formulations aren't mixed in a 1 to 1 ratio, the pumps make it easy to mix up your batches with the right ratio of resin to hardener. You simply count out equal pumps of each right out of the can. The other nice thing about the West epoxies is that they sand out really nicely. Some epoxies get soft and gummy when the friction from sanding heats them up, making them really pesky to work with.
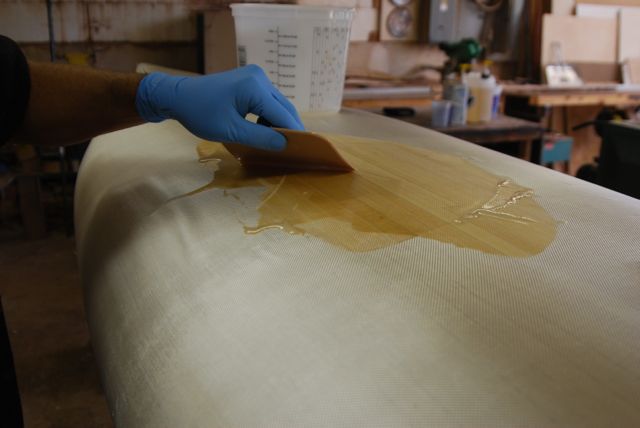
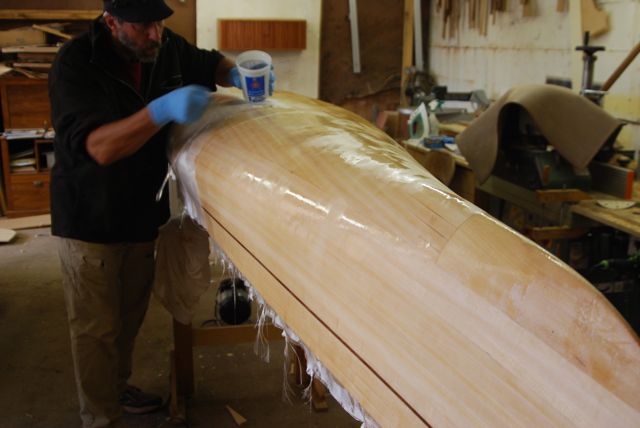
The procedure I used for applying the epoxy was to mix up smallish batches (you don't want it to start hardening up on you mid batch), pour it onto the hull and spread it with a Bondo squeegee. I started in the middle of the boat and worked my way to the ends to keep any stretching of the fabric from creating wrinkles. When you wet out the fiberglass fabric with the epoxy it makes it completely disappear and lets the wood show through.
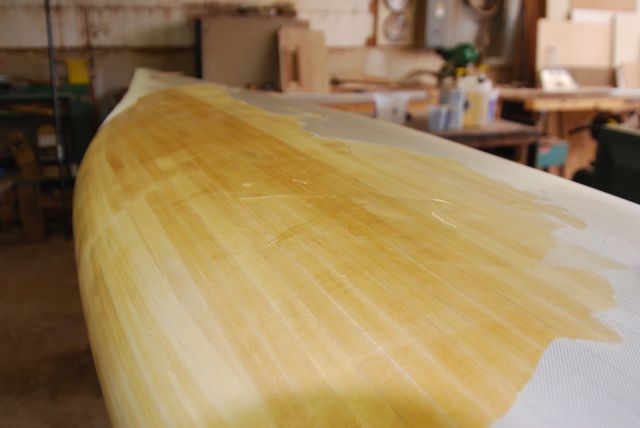
You want to wet out the glass, then go back and squeegee it again to remove any excess epoxy from under the glass. The epoxy weighs about 22 pounds per gallon, so you don't want any more on the boat than you absolutely need. This leaves you with the glass pressed close to the hull and the weave of the fabric showing. When your first layer of epoxy starts to cure up it's time to put on another coat to fill in the weave of the fabric so that your hull can be sanded smooth. In places I needed to put on a third coat. You want to get all of your coats of epoxy on the boat in one sitting since it gives you a good chemical bond between coats if the previous coat hasn't fully cured. If you wait until you have a full cure, you have to sand between coats to get a good bond. I glassed and epoxied the outside of the hull over the course of a lazy day, waiting for one coat to start to cure before putting on the next.
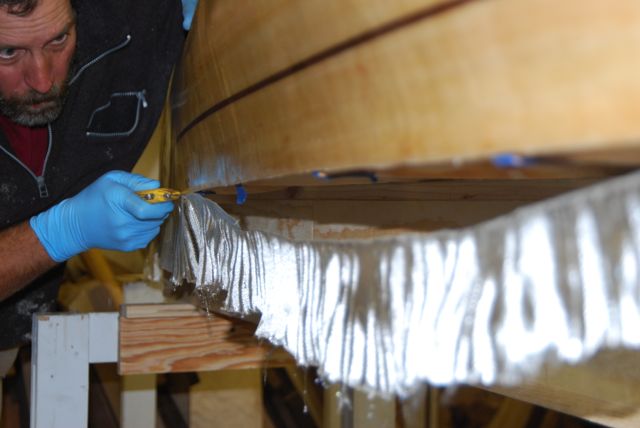
When the epoxy started getting firm, I cut the excess glass off with a utility knife.
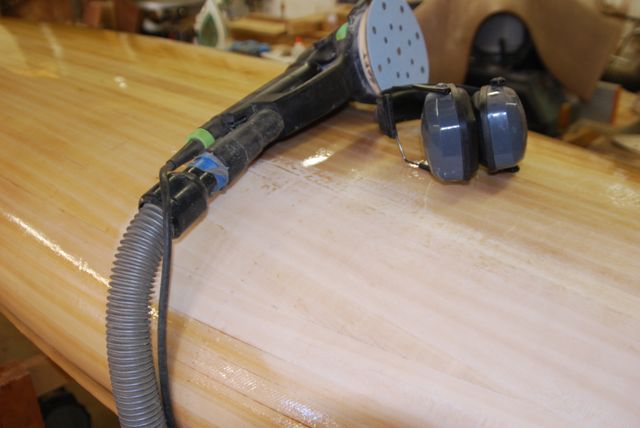
By the next day the epoxy had completely cured and I was able to sand it smooth.
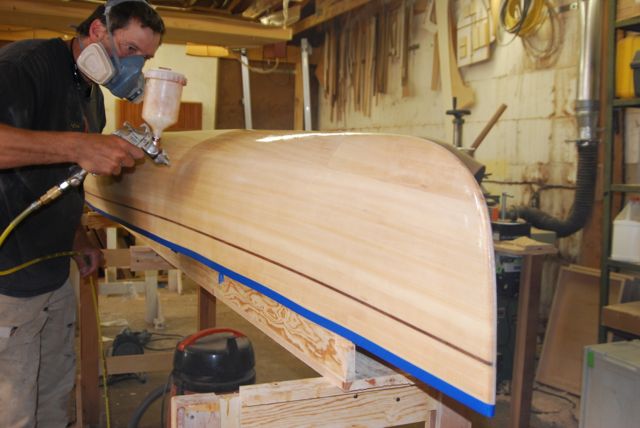
Once I had the boat sanded, I taped off the area where the gunnels were going to be glued on and I varnished the outside of the hull. The epoxy is totally waterproof but it doesn't do well with UV exposure, so you need to varnish it with an exterior varnish that has UV inhibitors. I used a water borne varnish because the water borne varnishes are very clear and colorless. Oil varnishes tend to yellow over time and, again, I wanted to keep the white of the basswood from yellowing.
With the outside of the hull completed, I unscrewed the stations from the strongback, took them out of the hull, lifted the boat off and put it into the cradles.
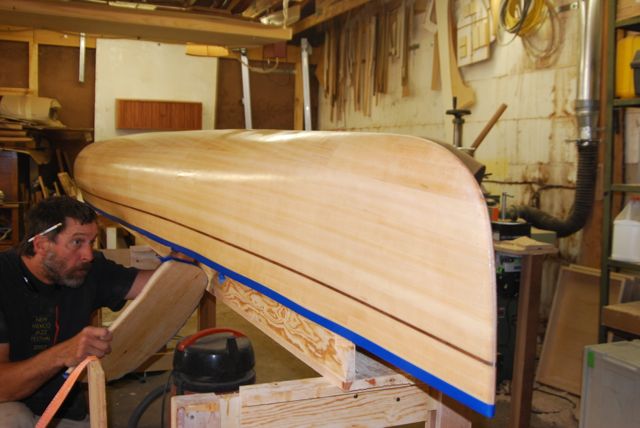
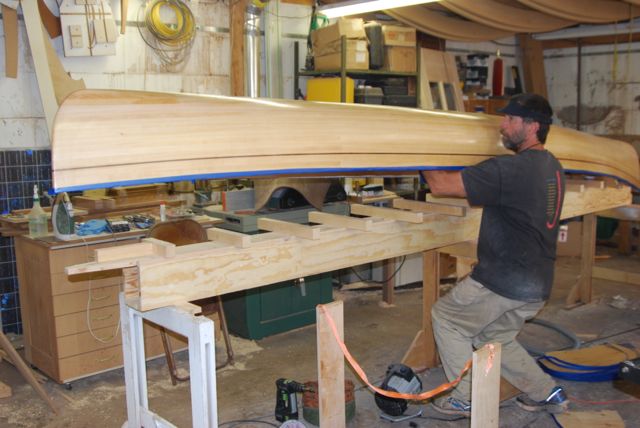
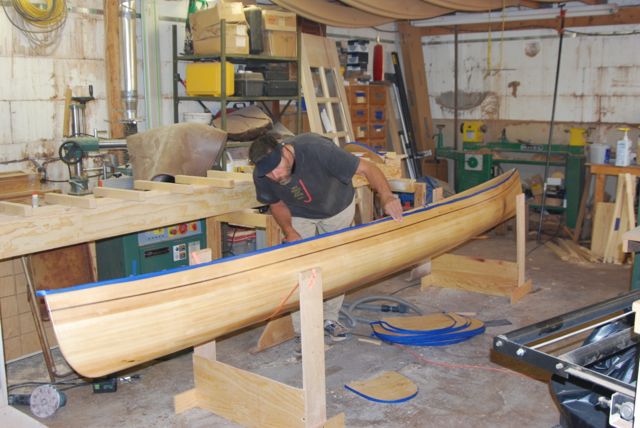
Then it was time to sand the interior.
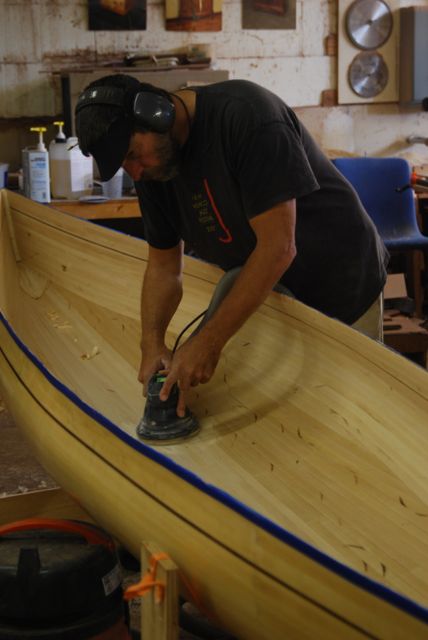
To keep the weight of the boat down I wanted to use a lighter weight (3 ounce) fiberglass fabric for the inside of the hull. Heavier fabric is thicker and that means more heavy epoxy to wet it out. Using the lighter (weaker) fabric is a little dicy because if the hull isn't strong enough you risk having it 'oilcan'. Oilcanning is when the bottom of your boat flexes up and becomes concave. To be sure that that wouldn't happen I did a double layer of fabric in the 'football' section but only a single layer on the sides.
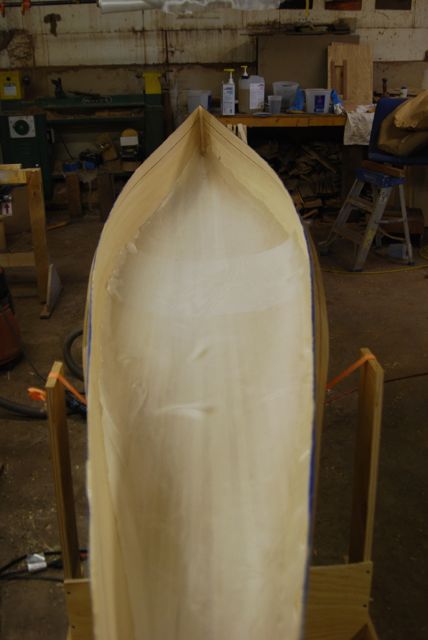
Here you can see the glass in the football section. You can also see that I lapped 2 pieces in the middle to give me a triple layer in the area I'll be paddling from.
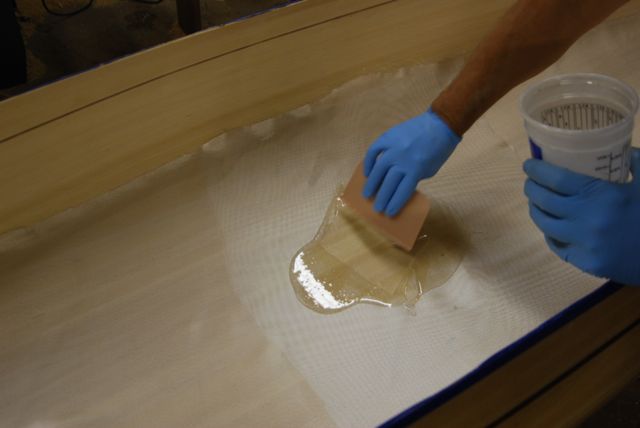
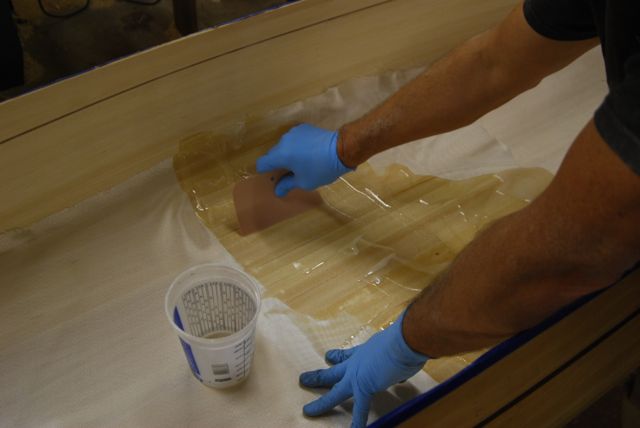
After epoxying the football I put the continuous layer of 3 ounce fabric over the entire inside of the boat, epoxied it in and varnished it. While you want the outside of your canoe to be silky smooth, you want the inside to have some traction so you aren't slipping as you move around. To get that grippy surface, you epoxy in the glass but don't fill in the weave of the fabric. Not only does this give you a perfect texture, it also uses less epoxy and helps to keep the weight of the boat down.
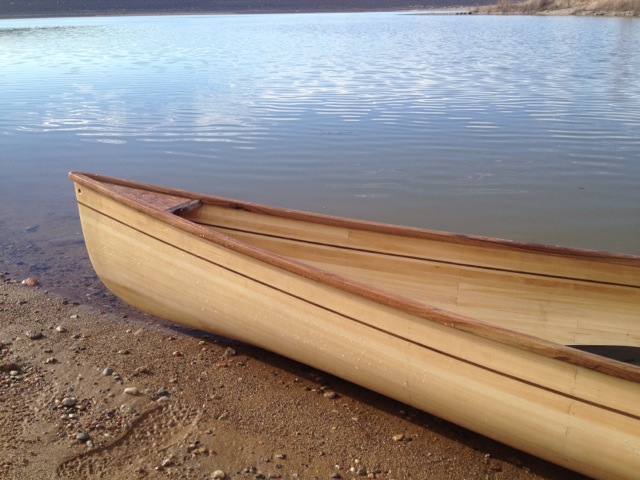
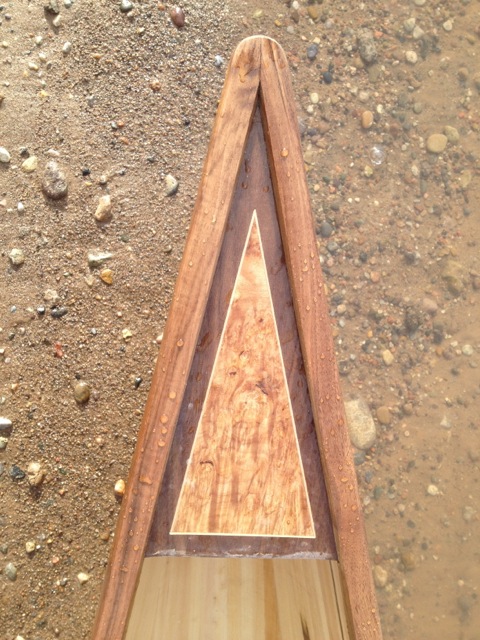
Being the wood dork that I am I couldn't resist putting a little detail into the decks. I had some maple burl laying around and I thought it would look sexy in a border of walnut with a little basswood string inlay. I was right! To keep the weight down the deck is only 1/4" thick. To make it strong I wrapped 3 ounce glass over it and lapped the glass onto the sides of the hull to make it into an integral part of the structure.
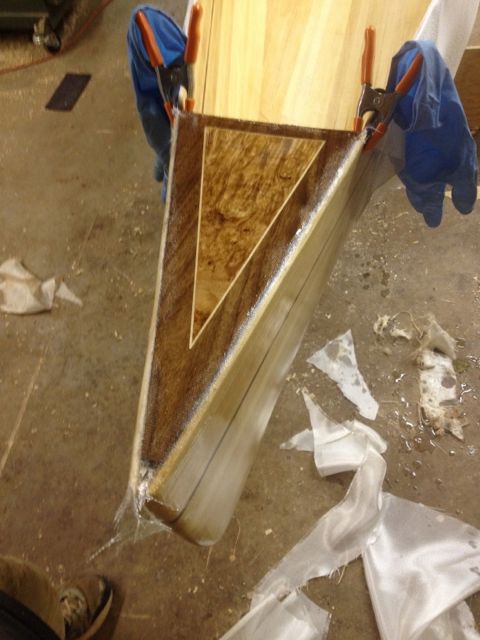
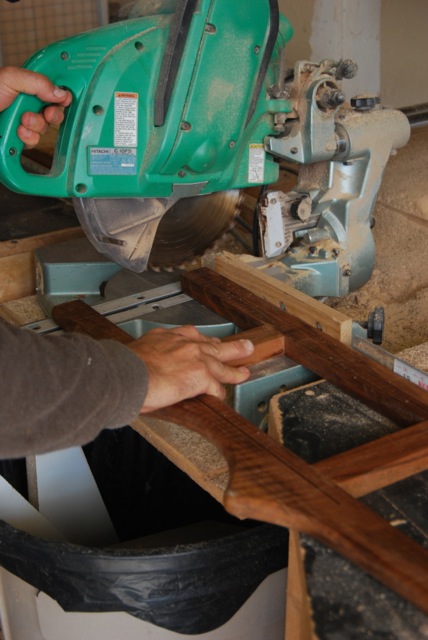
The usual gunnel detail on strip canoes is to make 2 bullnosed pieces of ash that are 3/4" thick and screw one to the inside and another to the outside leaving the top edge of the hull exposed. On my first boat I've noticed that this is a spot where the epoxy can get damaged from where the boat sits on my rack. Instead of making a 2 piece gunnel, I worked up a design for a one piece gunnel that was a little bit of a smaller (lighter) profile. This detail is a single piece of shaped walnut with a groove down the middle that slots over the top edge of the hull and miters to the opposite gunnel at the ends of the boat.
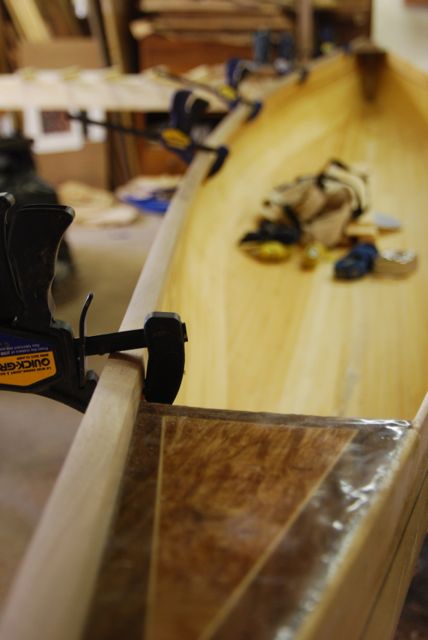
Fitting the gunnels to the decks.
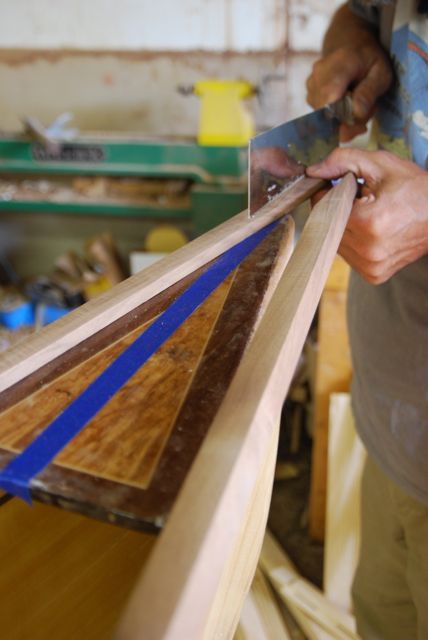
Mitering the end of the gunnels. The blue tape is marking the center line of the deck for the gunnel miter layout.
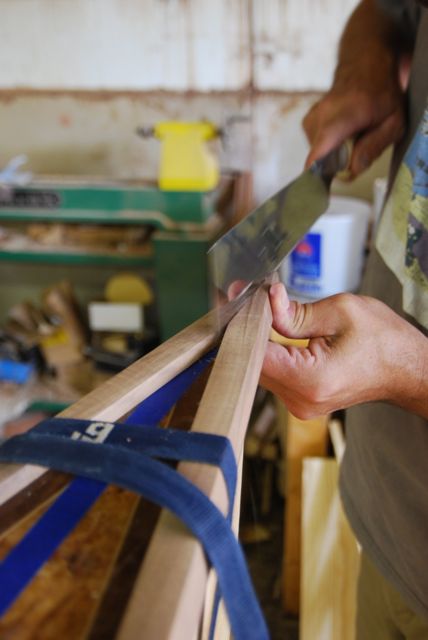
To get a perfect joint where the gunnels meet I ran a handsaw between the two pieces.
The last detail on the boat was to make and install the seat. A tandem boat has 2 seats and some sort of yoke or thwart in the middle. With this being a solo boat, the seat needed to be near or in the middle. Right where the yoke wants to be. In another fit of compromise I decided to make a yoke/seat that allowed me to paddle facing one way and carry facing the other way. It meant that either my yoke or my seat was going to be off center, making one end want to ride high when carrying or one end ride low when paddling. I chose the former and it's been working out fine.
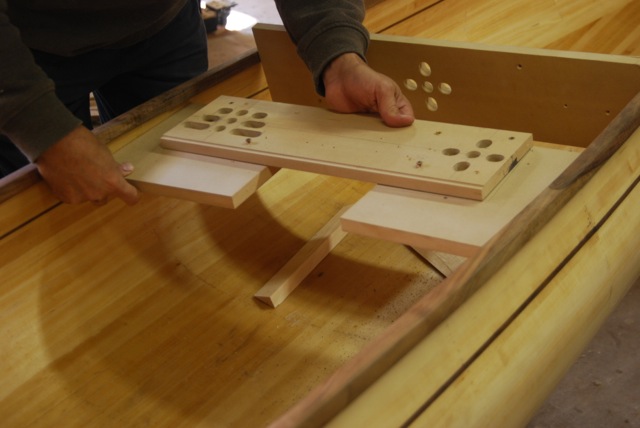
For comfort when paddling from a kneeling position, I decided to tilt the seat down a little on the front side. This made the geometry of the seat a little complicated. To make the install easy, I made a quick template jig from some MDF scrap. It consisted of 2 pieces that bumped to the inside of the hull and a cross piece that they would both screw to to hold them at the right angles. I used that jig to mark out the angled length cuts on the seat.
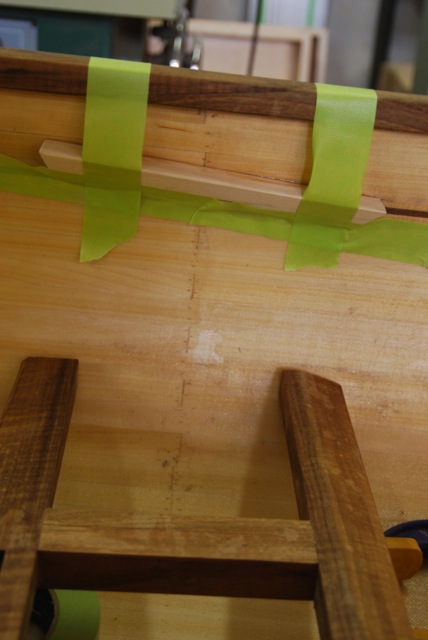
On lots of canoes the gunnels are held at the right distance from each other by installing thwarts (pieces of wood that run from side to side on the boat). These are usually ash wood. Then the seats are suspended from the gunnels with bolts. I chose to go a different route. I wanted the boat to be as open and as light as possible so I decided to use the seat as a replacement for the thwarts and attach it directly to the hull. This adds a lot of rigidity to the hull while saving the weight of adding extra thwarts. To do this, I made triangular strips out of basswood, scribed them to the hull and then glued them on to act as a ledger that the seat could set on and screw to. I taped them in place while the epoxy cured.
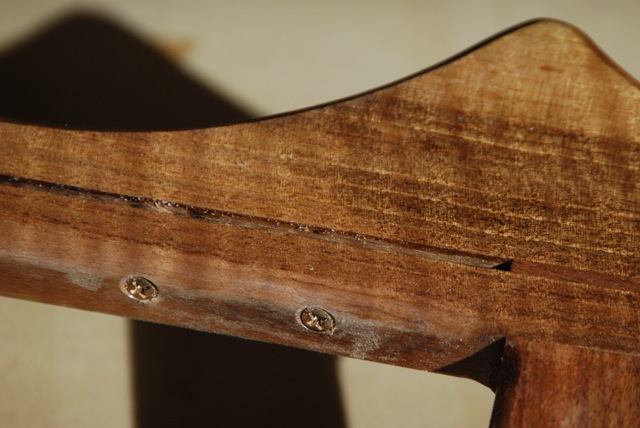
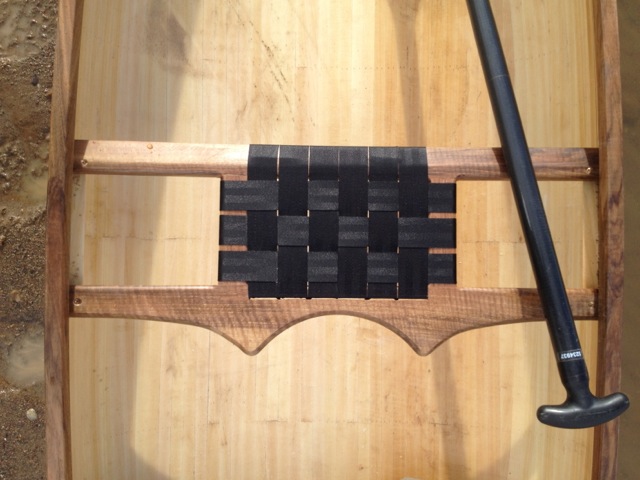
Before the seat frame got installed in the boat I needed to put the 1 1/2" flat webbing on the actual seat. Since this is a yoke/seat combination there was a question of how to wrap the webbing on the yoke side. I decided to just cut a saw kerf for the webbing to run in and reinforce it with some bronze screws.
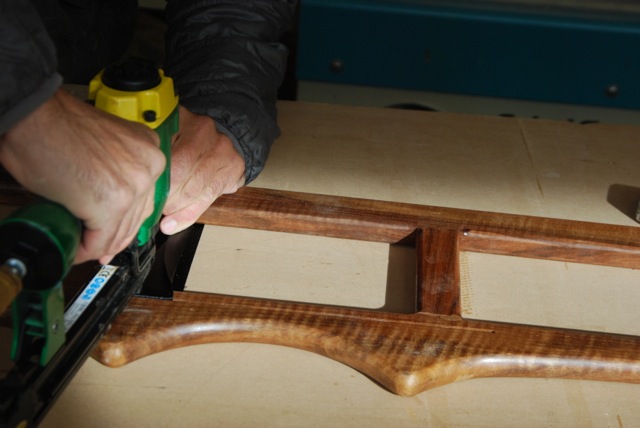
Before you stretch the webbing and staple it to the seat you want to wet it so that it expands. Then it shrinks super tight in the frame when it dries. The webbing is held to the seat frame with 1/4" crown staples. Shoot on one end, pull it as tight as you can and then shoot on the other end.
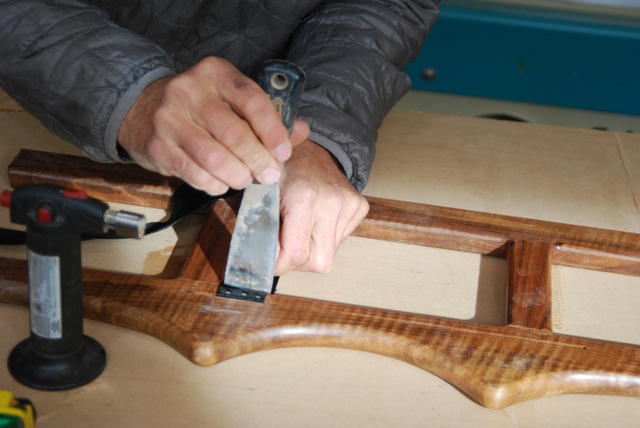
To cut the webbing and keep it from fraying, I heat a putty knife with a butane torch and slice the webbing with the hot knife.
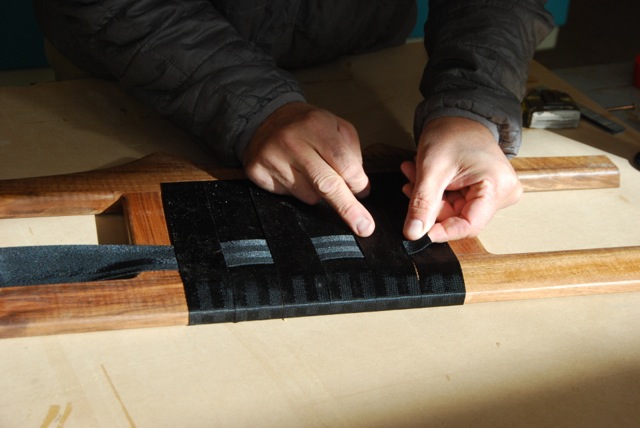
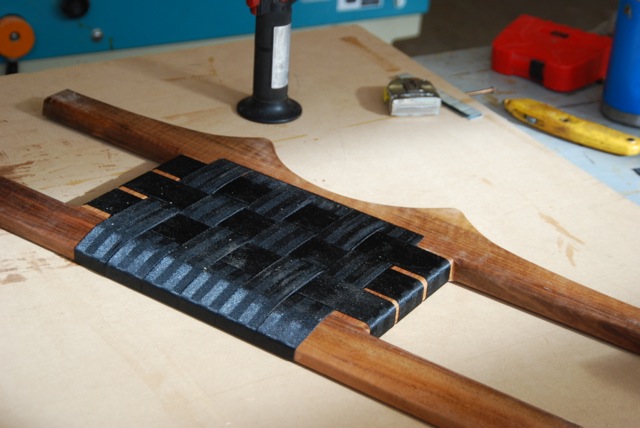
When all the webbing is on in one direction, weave more in the other direction and staple it on.
Some stats:
it took just under one gallon of epoxy
35 board feet of basswood
1200 staples
10 yards of fiberglass
I spent about $500
it weighs 42 pounds all up
it took 56 hours to build
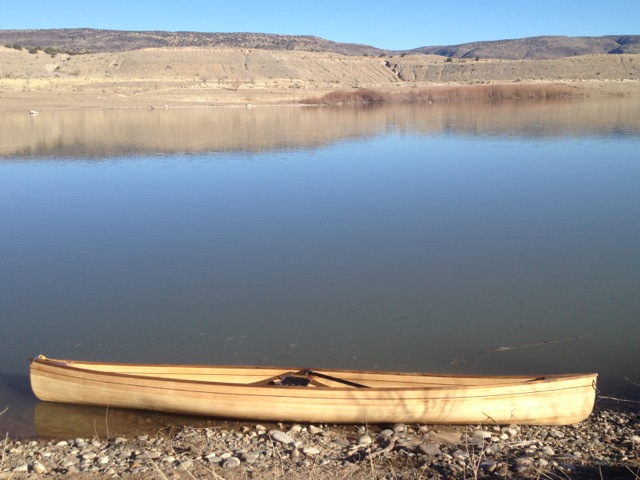
I'm sure that the suspense isn't killing you, but it was killing me. After all the planning, time and money that went into the boat I couldn't wait to see how it was to paddle. I mean, they are really fun to make, but you're going to spend a lot more time paddling them over the years than you did building them and it would be a bummer to find that you had built yourself a real dog.
As a narrow, solo boat, I figured that the Northwest Passage Solo was going to be "lively" to paddle and it is. Another way to put that is that it's a little twitchy or tippy feeling. That's good because it means that you can control it with your hips and a hull that feels like that is a fast hull. How a canoe "tracks" is really important. You want it to be easy to make it go straight. On the lake, the Passage tracks nicely and is barely effected by a breeze due to it's low profile. When I took it out on the Rio Grande on a flat water stretch of moving water, it really excelled. The boat has enough rocker to allow it to turn really well and good acceleration for putting it just where you want it. It paddles well sitting or kneeling. So far I haven't tried to paddle it with a load. I don't think it's going to be the choice for long camping trips with a lot of gear, but that's not what I built it for. I already have a boat for that. This is the sports car that you take out for a zippy ride with the top down on a nice day. It's perfect for that.
Now, back to the woodshop.....


Comments
-Hope
RSS feed for comments to this post