


Furniture Blog
Custom Furniture Gallery
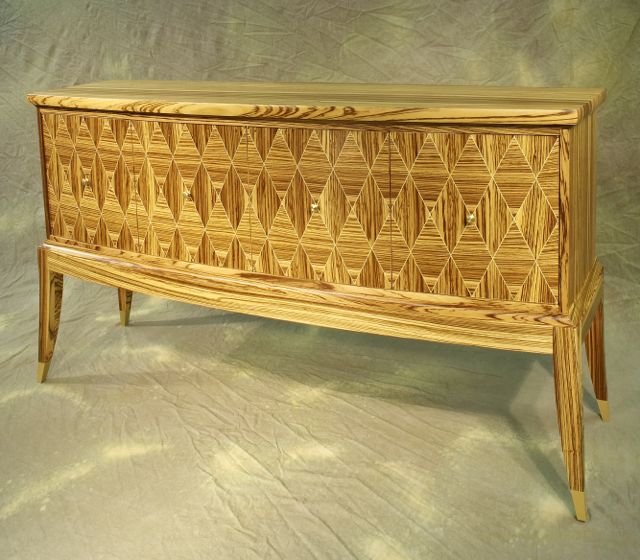
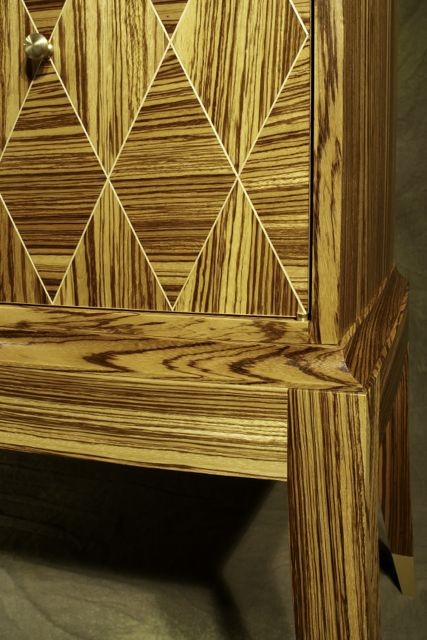
Parquetry on a bow front Custom Sideboard


parquetry |ˈpärkitrē|
noun
inlaid work of blocks of various woods arranged in a geometric pattern, esp. for flooring or furniture.
This custom sideboard was inspired by a media cabinet that I built some years ago. That cabinet also had a diamond pattern across it's doors and alternating grain in the diamonds. The zebrawood used for the parquetry on this piece has a very strong linear grain that really makes the pattern pop in interesting ways.
The carcass of the cabinet itself was relatively straight forward; a top and a bottom dovetailed to two sides. The top and bottom panels both have a bow cut on them, and the sides are made from thick material that is also shaped to a curve. The box sits on a curved cove moulding and is attached to the bowed leg assembly.
It was the parquetry on the four doors that was the fussy part of the project.
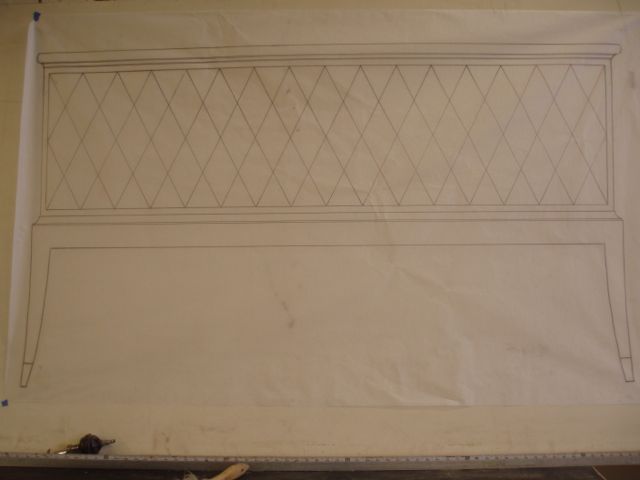
I started with a full scale drawing that helped me work out details like the proportion of the diamonds and the curves of the legs. Since the gaps between the doors and the cabinet were going to be only 1/16 of an inch and the points of the diamonds needed to come exactly to the edges of the doors, I decided to build and veneer the doors before I built the cabinet.
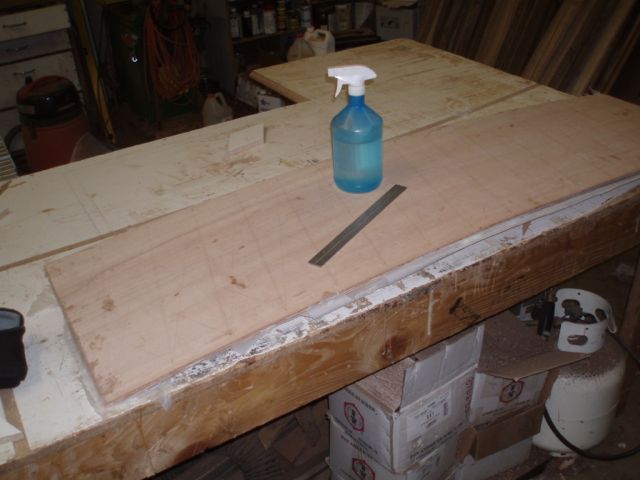
Because the front of the cabinet is bowed, the doors all needed to be bowed to the same curve as the cabinet. To do this I laminated 5 layers of 1/8" plywood together and pressed them to a curved form in a vacuum bag while the glue dried. This gave me a 5/8" thick, curved substrate for the parquetry to be laminated to. It was also my drawing board that I could use to lay out the parquetry pattern. By making one large curved substrate, cutting it to finished size, laying out the pattern, laminating the parquetry to that and cutting the finished panel into the 4 doors, I guaranteed that all of the diagonal lines would line up across the front of the cabinet in the end. Even a small misalignment from one door to the next would be glaring.
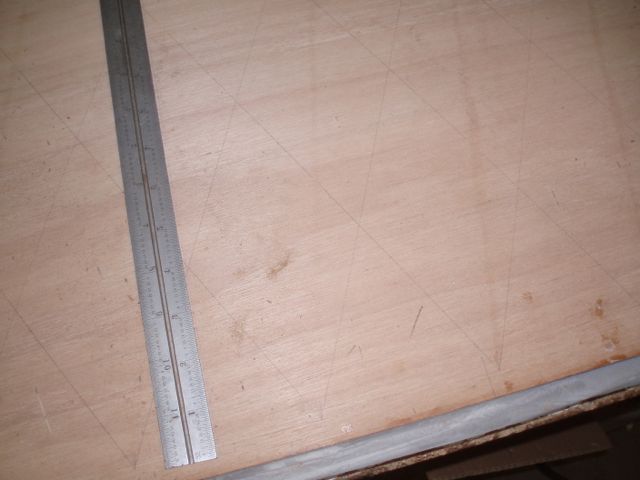
Due to the fact that all of the zebrawood diamonds were going to be cut to the exact same size, and that they needed to fit very close together, my layout had to be extremely precise and fine. A small variation in the layout would leave gaps between the diamonds and make the points of them not land exactly on the edge of the doors. Once I finished the layout I made a series of plywood diamonds that I could put onto the layout to see if I had any accumulating errors in their size and shape. When those fit perfectly I could begin to cut out the parquetry to that exact size.
I wanted the grain in the diamonds to be continuous across the piece, so I resawed my veneers from thick zebrawood and kept all of the veneers in the order that they came out of the original plank. For the horizontal grain, I cut veneers from a plank that was the width of two doors and bookmatched them to cover the other two doors. This way the grain pattern on the left was a mirror image of the pattern on the right.
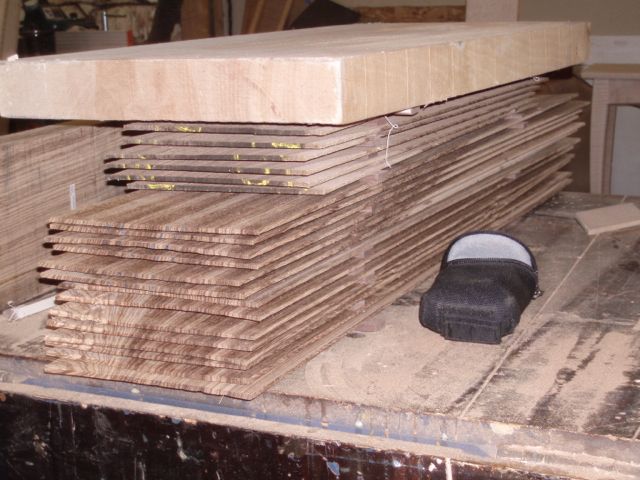
Keeping track of all of the various pieces and where they came out of the original plank was a real logistical challenge. I had to be sure that as I cut the veneers and then the diamonds from the veneers that I kept each piece in it's place both in the horizontal and vertical axis as well as right side up.
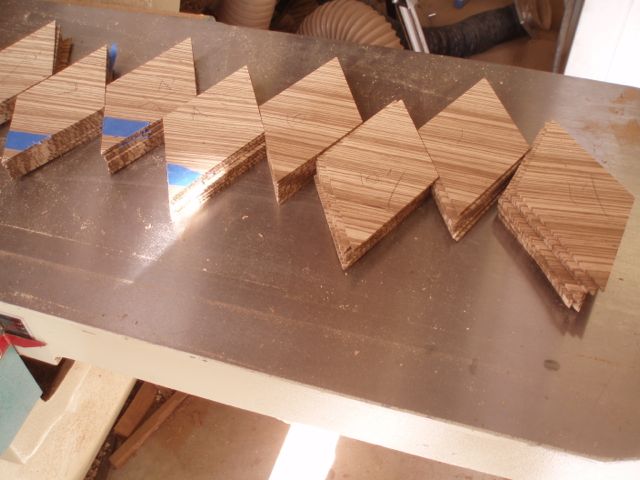
For instance, all of the veneers in the stack above are in the order and orientation that they were in the original piece of wood that they were cut from. The top slice was used to cut the 9 diamonds for the top row on the left side of the cabinet. The second slice was flipped end for end and used to make the 9 diamonds for the top row on the right side of the cabinet. The third and fourth slices did the second row the same way. The fifth and sixth slices were cut to the same pattern and kept as replacements in case one of the originals was damaged along the way. As it turned out I ended up needing to use one of those. Since it was cut from the same place in the same plank it fit into the pattern pretty seamlessly. I can see it, but I bet you can't.
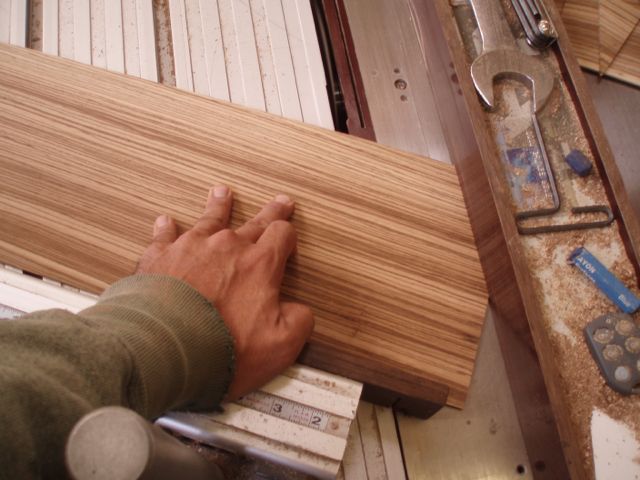
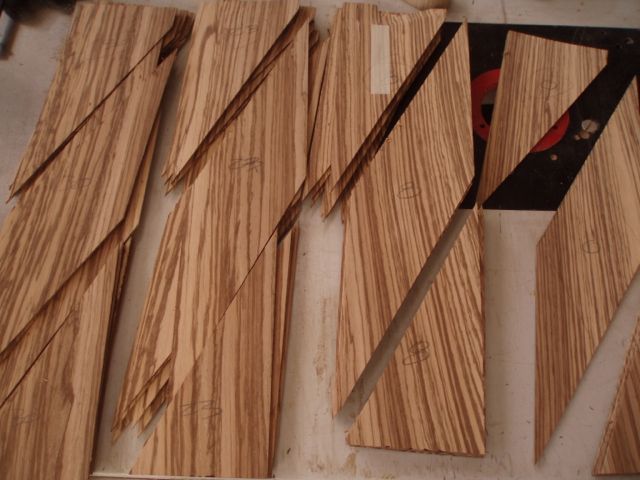
To cut out the diamonds I set the sliding table fence on my saw to the angle I needed and cut my veneers into pieces using that angle, keeping each piece in it's order as I set them aside.
Then I cut the opposite angle and ripped the slices into diamonds. Each one went into a stack back in it's original order in the plank it was from. I did this for the vertical grained pieces as well as for the horizontal ones. It was pesky, but the effect in the end was worth the effort. I was pretty careful to not drop any of the stacks...
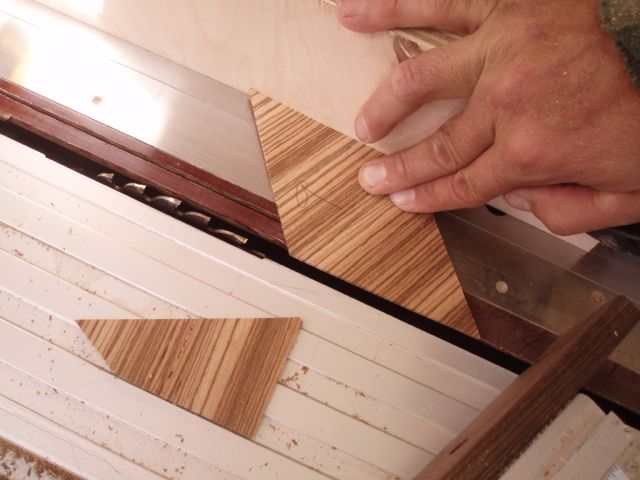
After all the diamonds were cut out and labeled I could lay them out on the curved door substrate, making sure that they lined up exactly with the layout. If they didn't, in the end the points of the diamonds wouldn't hit the edges of the doors perfectly.
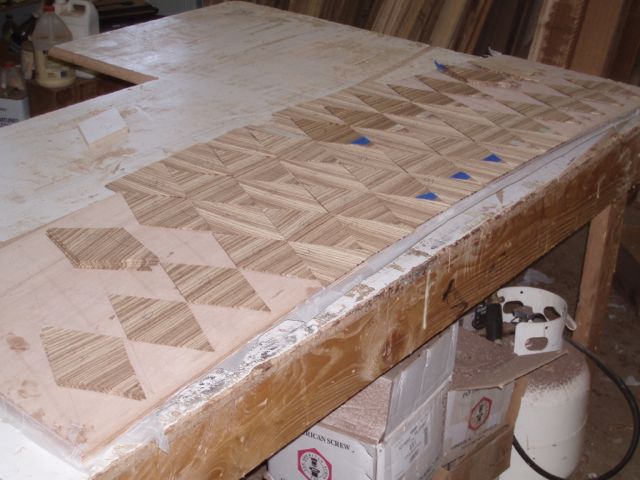 Once I had all the diamonds arranged on the substrate in the correct orientation I taped them into a sheet with veneer tape.
After applying glue to both surfaces and carefully aligning the veneers on the door substrate I put the whole assembly back into the vacuum bag to clamp the veneer to the doors while the glue dried. Later I made veneer for the back of the doors and pressed it in the bag again.
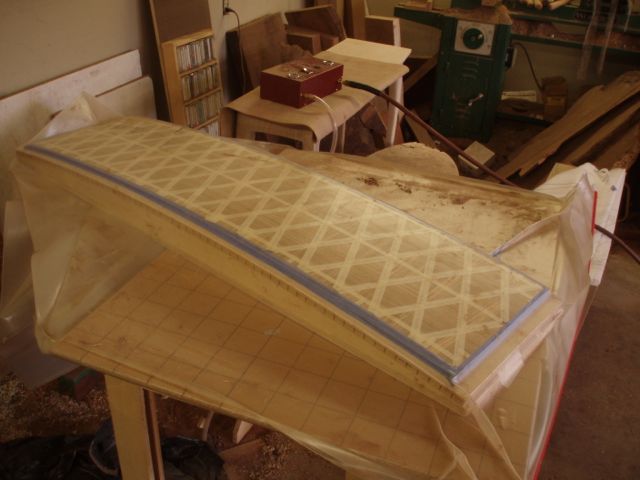
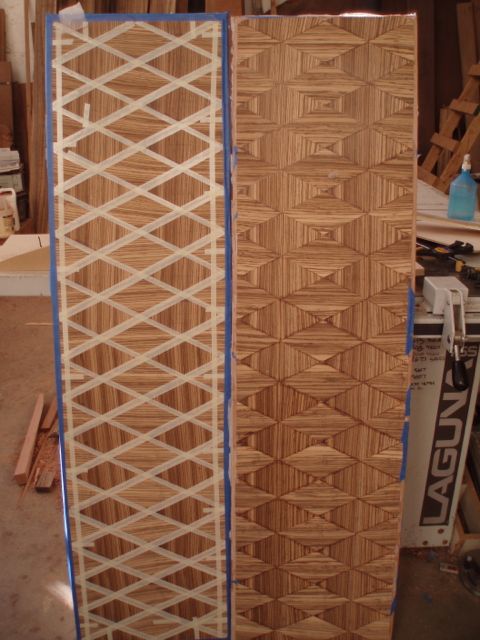
I was making two of these cabinets. Here you can see the door lay-ups just out of the vacuum bag.
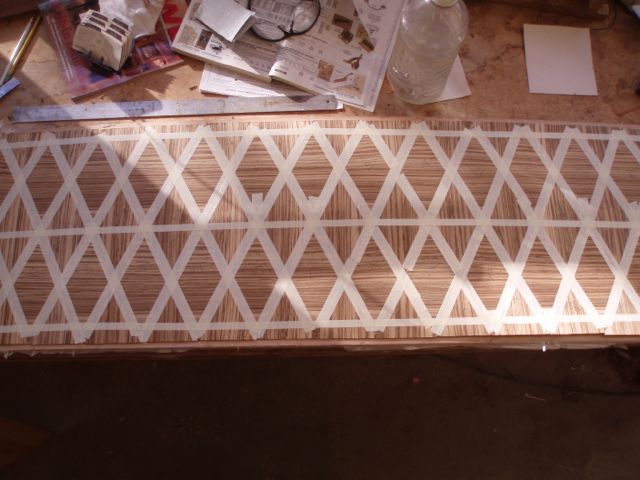
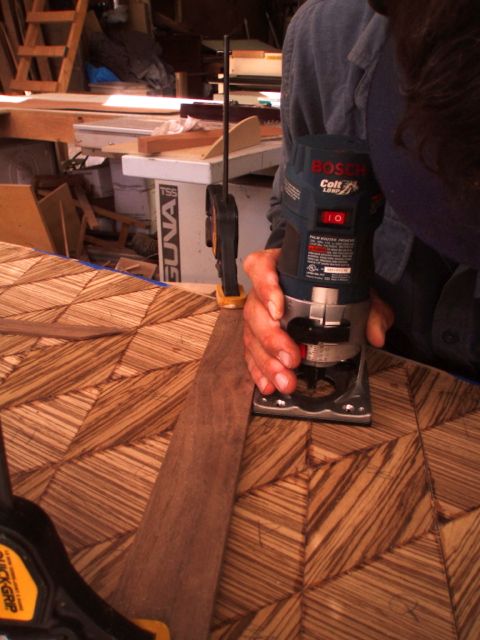
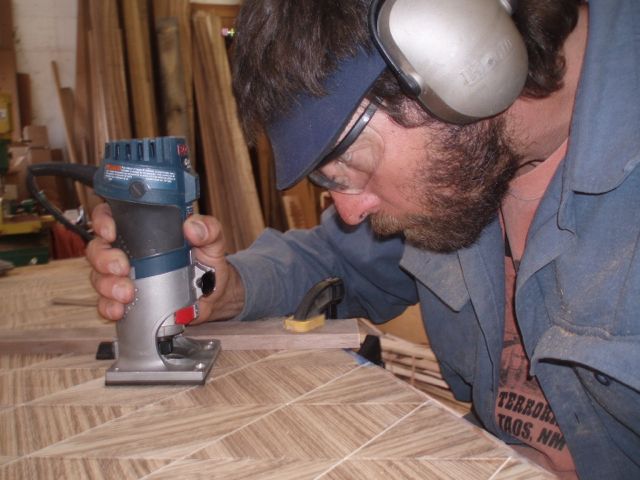
The next step was to put in the aspen string inlay. This involved using a trim router run against a fence to route 1/16" grooves between the diamonds.
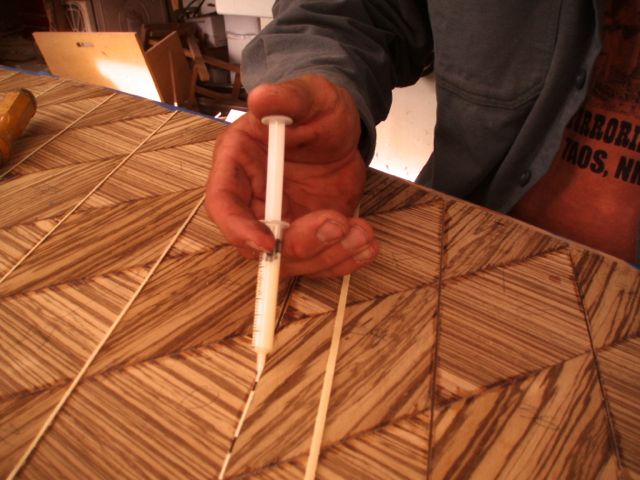
Getting just the right amount of glue into the groove was tricky. Too much and the stringing wouldn't press into the groove. Not enough and I risked the inlay coming out later. A syringe turned out to be a good tool for this. I also thinned the glue a little to make it flow nicely.
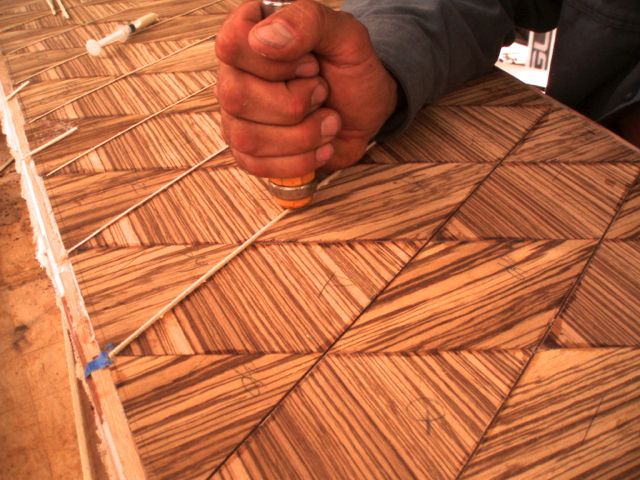
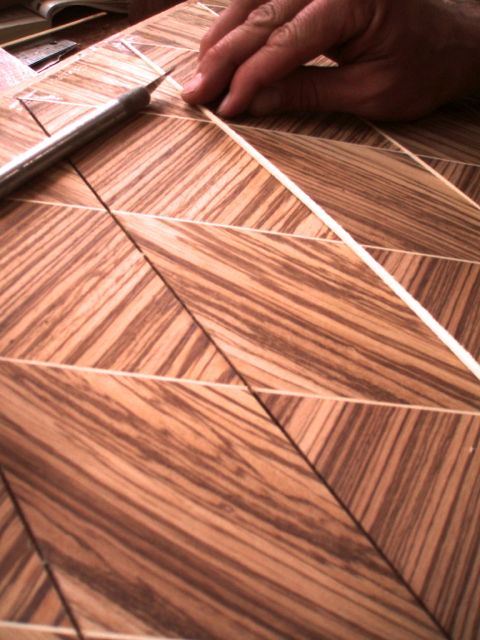
The string inlay was sized to be a nice friction fit into it's groove. I pressed it into the groove with the end of a chisel handle.
With all the stringing in in one direction I sanded it flush to the rest of the field, routed grooves for the stringing in the other direction and pressed in the rest of the inlay.

With all the parquetry done I made a concave jig to hold the door blank so that I could run it over the table saw and cut it into the four separate doors. This exposed the plywood core of the doors. I used a router with a fence to cut a 1/16" rabbet on the sides of the doors that went from the back of the doors to the back of the parquetry and I applied veneer into those rabbets to cover the plywood without showing the edgebanding on the faces of the doors. When the carcass' were built I hung the doors with knife hinges.
You can see more of my custom sideboards here.