


Furniture Blog
Custom Furniture Gallery
A Pair of true divided light doors


The path to enlightenment is long. And as anyone who has been to one of Santa Fe's many "Spiritual Retreats" could surely attest, it can be expensive. If someone tells you that there is only One True Path - be it in religion, politics, canoe paddling, love or woodworking - you should probably run screaming the other way. Personally, it took me years to reach my current state of Bliss. In this case I'm talking about Door Bliss. As much as I would love, like any good Guru, to charge you $899.95 to bring you to Enlightenment, in this case (just this once) I'm gonna give it to you for free.
Back when I was a young, poor woodworker I had your standard basic collection of tools. Table saw, jointer, planer, bandsaw. Some routers. Hand planes. That kind of stuff. It's possible to do an amazing amount of fine woodworking with a short list of equipment. You have what you have and you work around any shortcomings of those tools. Heck, that's part of how you get good. Along the way you find out about faster, more accurate (more efficient) ways of doing things and if you've got the brains and the bread you invest in them and speed things up. Now that I'm an old, poor woodworker I have some of those things. And I am faster, not to mention less poor.
The shaper is one of those big upgrades you can make to your woodworking (there's a whole other article I could write about that), but as my friend David once told me, "Owning a shaper is like owning a horse - they don't cost that much to buy, but the upkeep can get spendy". Back in the day, the shaper tooling I was using was single profile, knives brazed to the head kind of cutters. Big stuff. Dedicated stuff. Expensive stuff. Over the years I began using insert tooling of one type or another. With some insert tooling you have a dedicated profile head and when it gets dull you unscrew the sharp part and replace it with the same profile off the shelf. These are great if you are using that profile to run miles of the same thing. No down time, perfect setups every time. As a guy who is always doing something different, though, I found that they weren't saving me any money. That's when I decided to invest in some corrugated cutter heads. I have one 4" diameter moulding head that can take cutters up to 5" high, and I have three 6" diameter heads that are only 1" thick. These heads all take 5/16" thick, corrugated knives and those knives can stick out from the head by an alarming amount. That large projection gives you lots of options for cutting different profiles. This set up allows me to easily, quickly and relatively inexpensively switch from one kind of project to another. I send drawings (just pencil drawings, no CAD necessary) to Connecticut Saw & Tool and they make up the knives for me.
Lately I've been building a lot of custom doors and historic reproductions of doors as well as window sash and the corrugated cutters have been super handy for making a variety of cope and stick, mortise and tenon projects.
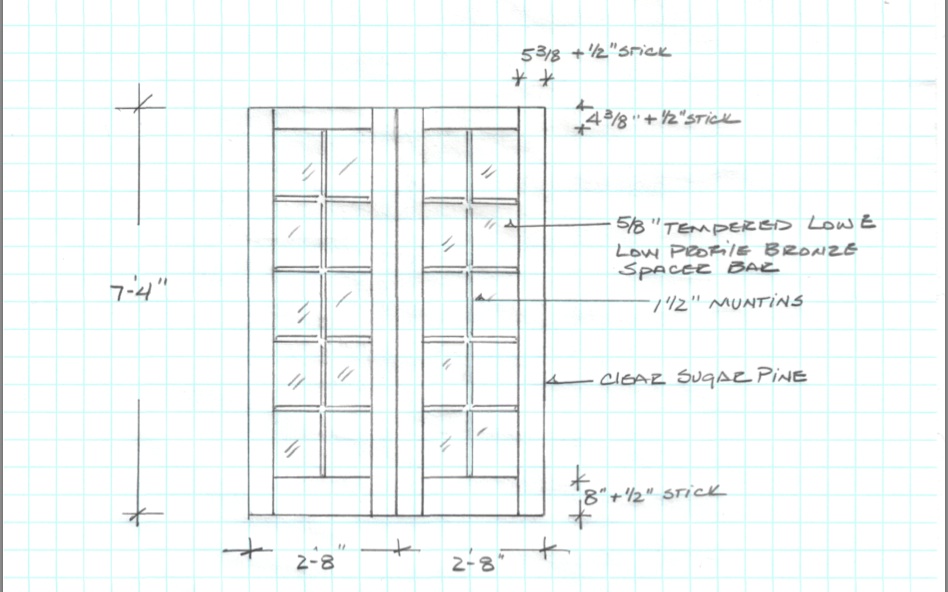
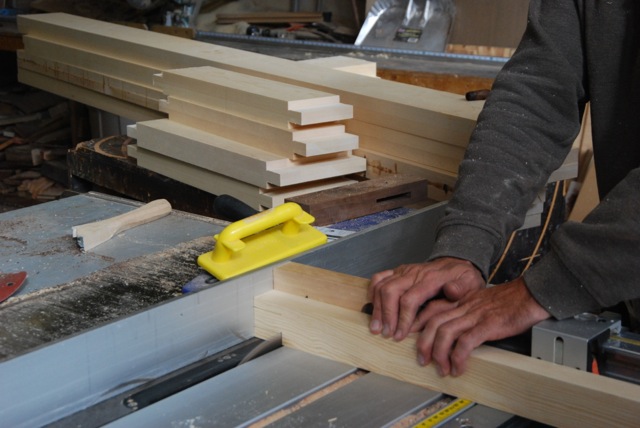
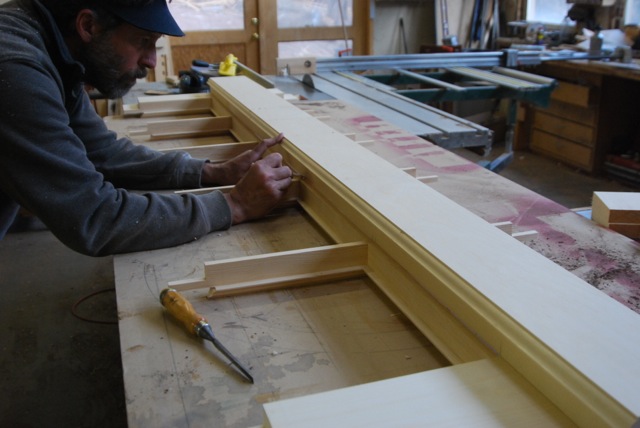
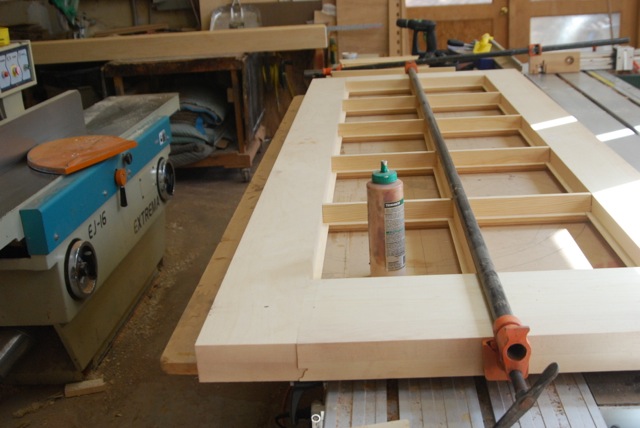
This set of custom doors was ordered to replace some historic doors on the main library in Santa Fe, NM that were falling apart. They are true divided, 10 light doors with mortise and tenon construction throughout. The doors needed to be 2 1/4" thick, so I laminated 2 layers of 6/4 material to get my thickness. I could've used 12/4 but the laminations give you a more stable door in the long run. Once I had all my material glued up, milled four square and cut to length, I roughed out my tenons so that the shaper wasn't having to take such a big bite. The shaper will do the whole cut, but the parts come out noticeably more precise in the end if you rough them out first.
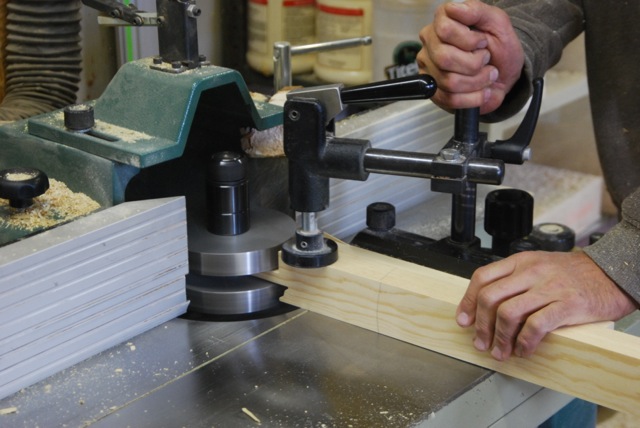
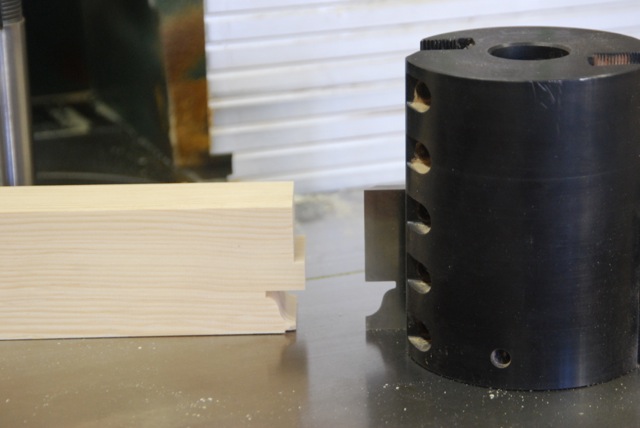
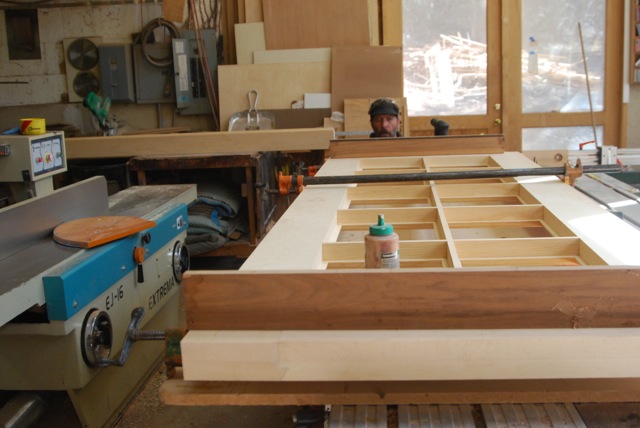
With the tenons roughed out about a quarter inch fat, the coping setup on the corrugated heads makes a perfect coped tenon. As you can see, my shaper has an integral sliding table with a miter gauge and hold down. It would be impossible (and dangerous as hell) to try to feed something like this by hand. You might be able to pull it off with a shop built sled, but you wouldn't catch me doing it. With the sliding table and hold down this operation is really safe, amazingly accurate and very fast. I can cut tenons up to 2 1/2" with this set up and they are a perfect friction fit to the mortise that my hollow chisel mortiser makes. No fitting, no fussing. Just easy perfection.
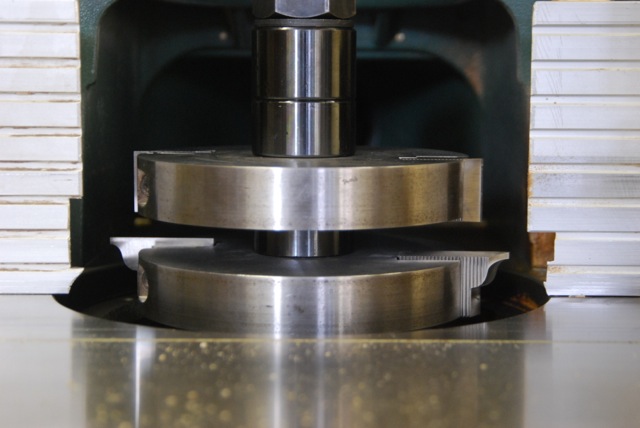
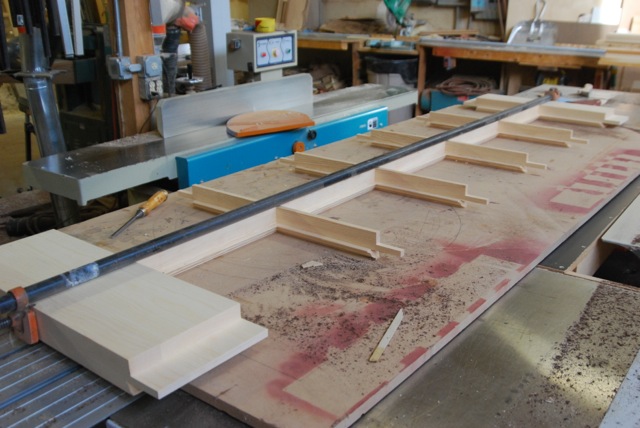
This is a better look at the heads in repose.
With all the coping / tenoning done it's time to get out the moulding head and run the sticking - the profiles on the edges of the parts. When you cope first, any tearout there might be is cut away by the sticking. All of the long grain work on the shaper gets run with the power feeder. This machine feeds the stock past the cutters at the speed you pick and holds it firmly to the table. Most of all it keeps your hands away from an amputation situation. Without a sliding table and a power feed the shaper is, hands down, the most dangerous machine in the shop. With them it is one of the safest.
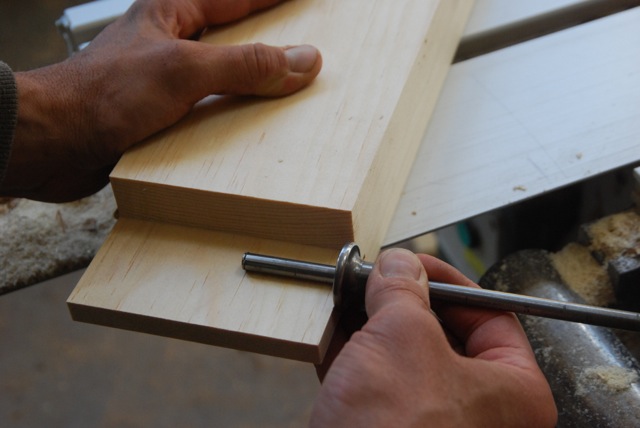
Since the tenons stop short of the top and bottom of the doors, the tenons on the rails need to be haunched. I make the haunch on the top and bottom rails the same so that I don't have to do multiple set ups. First I use my Starret marking gauge to mark the height of the haunch on the tenon.
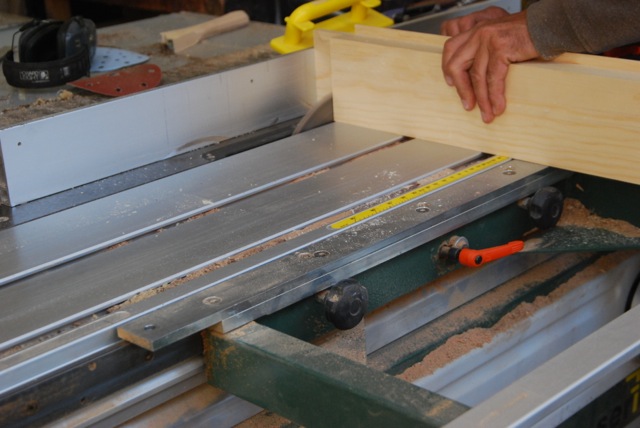
Then I make an accurate cut on the table saw up to the height of the haunch.
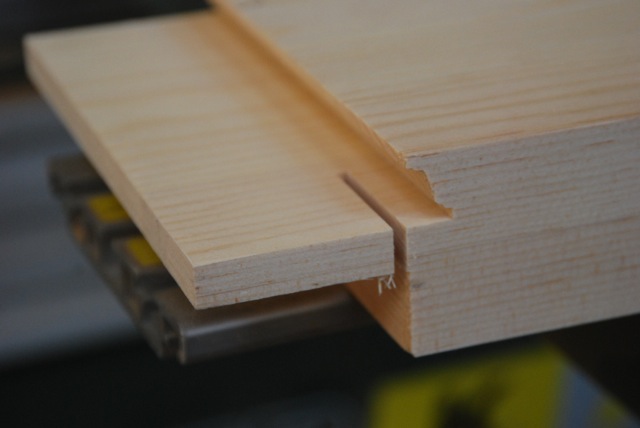
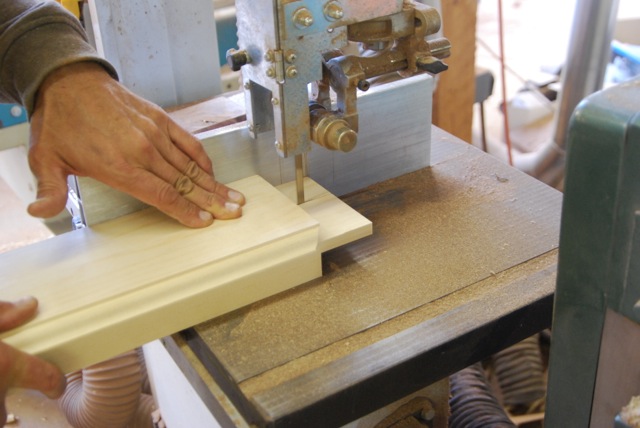
Remove the waste on the bandsaw. You can do that cut on the table saw, too, but when the waste piece comes loose, the table saw has a nasty tendency to pick it up and throw it at you violently. The bandsaw is nice and mellow.
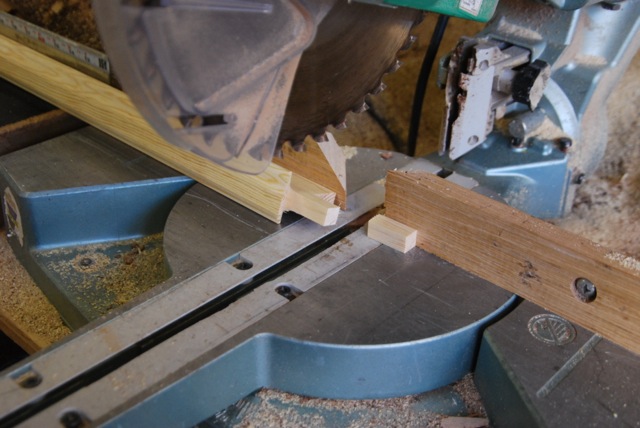
I like the tenons on the muntins to be shorter than the tenons on the rails because it makes the glue up easier. Instead of cutting the muntin blanks shorter and then doing a separate set up to cut shorter tenons on them, I make all the parts the same length, all the tenons the same length and then I go back and nip off the ends of the tenons on the muntins on the chop saw. It's quick, it doesn't need to be very accurate and it ensures that all of the shoulders line up perfectly in the end.
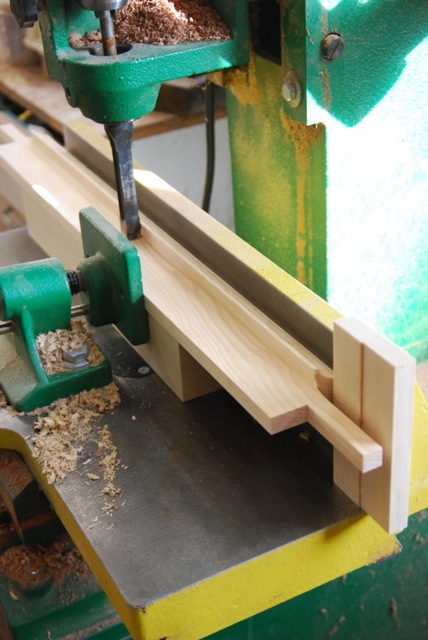
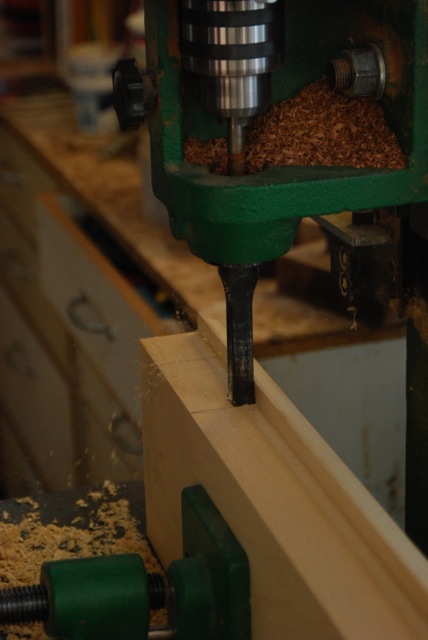
With the tenoning done I move on to mortising. Here I've set up a stop on my hollow chisel mortiser that saves me from having to layout all of those mortises. Just bump the piece to the stop and plunge away in the exact right spot.
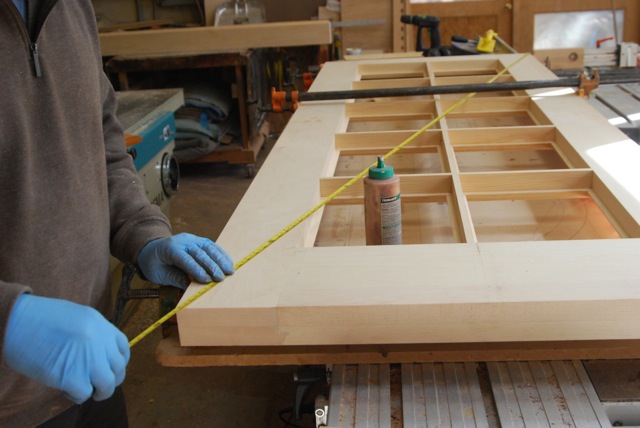
There are 5 vertical muntins on each door, so any small error in their length is magnified by 5 in the layout of the door. If I were to layout the mortises on the stiles with my tape I wouldn't be taking that into account. Plus, just try to accurately layout 14 17/32" + 1/2" five times and see what you come out with. It's way easier and more accurate to simply dry fit the rails and muntins together and take your layout from that.
When I have the layout on one of the stiles I use that as a story pole to transfer it to the other stiles. Then I mortise the stiles.
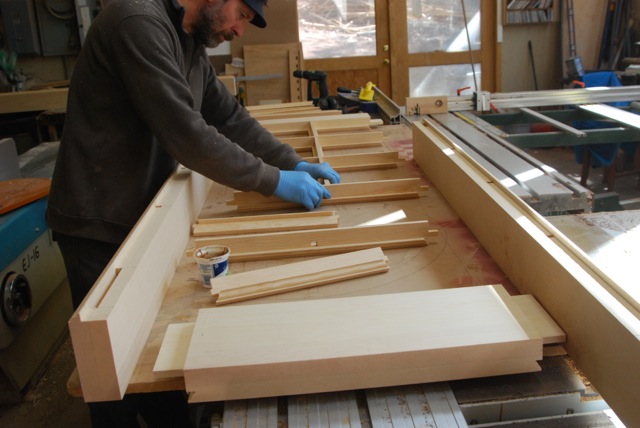
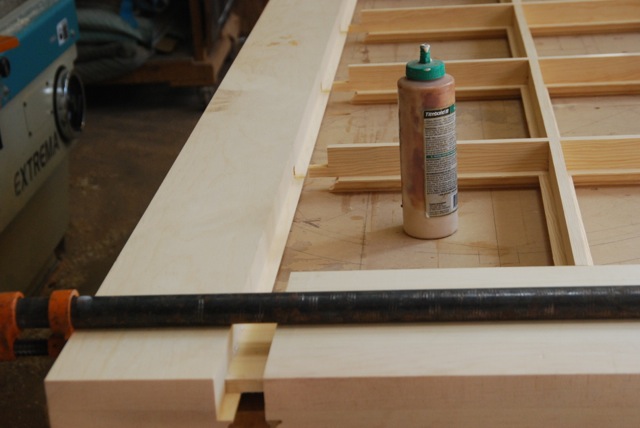
I have two table saws with an outfeed table between them and I have leveled and flattened all of it very carefully so that I can use it as an assembly table for things like doors that need to be perfectly flat. I just throw a piece of lightweight MDF on top as a work surface.
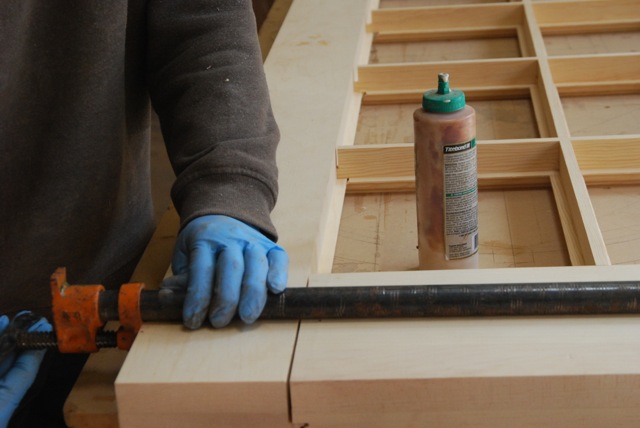
There are a lot of parts in a door like this and they all need to squeeze together perfectly. If I were to try to glue the whole thing up with yellow glue it would be an absolute scramble that would involve cranking on the clamps like a gorilla in the end. To avoid that stress I use epoxy. It has a huge open time (if you use the right formulation) and it is nice and slippery. The disadvantage of that is that the door needs to stay in the clamps for a long time and keeps me from cycling the doors through the clamps. That's why I use epoxy for the muntins but I use yellow glue for the rails. That way I can butter up all the muntins and their mortises in a leisurely fashion and then quickly glue the rails and clamp the door up. Here in the desert of NM, the yellow glue grabs really quickly and I'm able to take the door out of the clamps in less than an hour and glue up the next one.
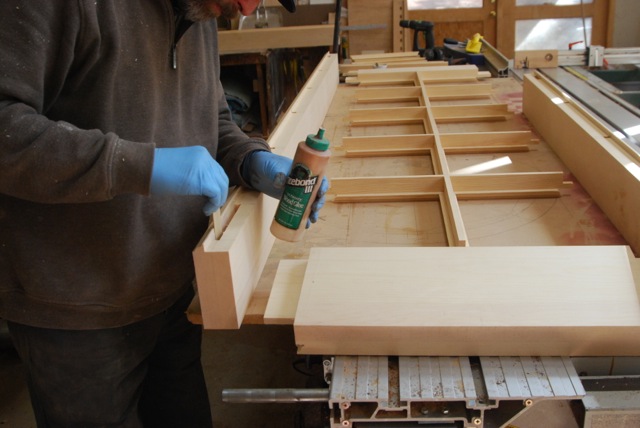
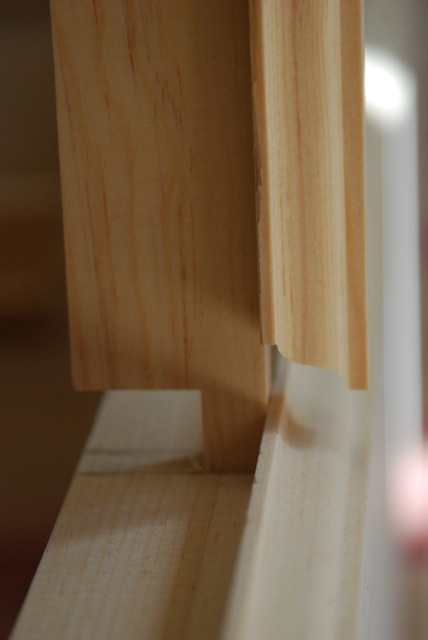
As I pull the rail joints tight you can see the advantage of having the muntin tenons be shorter than the rail tenons. This way I'm able to get the rail joinery coming together and all the parts lined up before I have to start getting all the muntins into their mortises. When everything is lined up I squeeze one end of the door and line up one muntin at a time with it's mortise.
I measure the diagonals to be sure the door is square.
Then I double check with winding sticks to see that it is flat.
There are plenty of other ways to do any one of the steps in this process, but for me, in my shop, with the equipment I have I find that I can produce really crisp doors in a short amount of time with a reasonably small investment in custom tooling.
Ohmmmmmmmm.