


Furniture Blog
Custom Furniture Gallery
Desk with Parquetry


Parquetry is a term you don't hear much in this country. It is the art of doing parquet work. Still not sounding familiar? Parquet is pronounced Par-Kay and we generally hear about it in terms of parquet flooring; usually strips of floor boards arranged in a basketweave pattern with their grain running in alternating directions. Parquetry has an extremely long history, however, in some cases involving kings and their furniture.
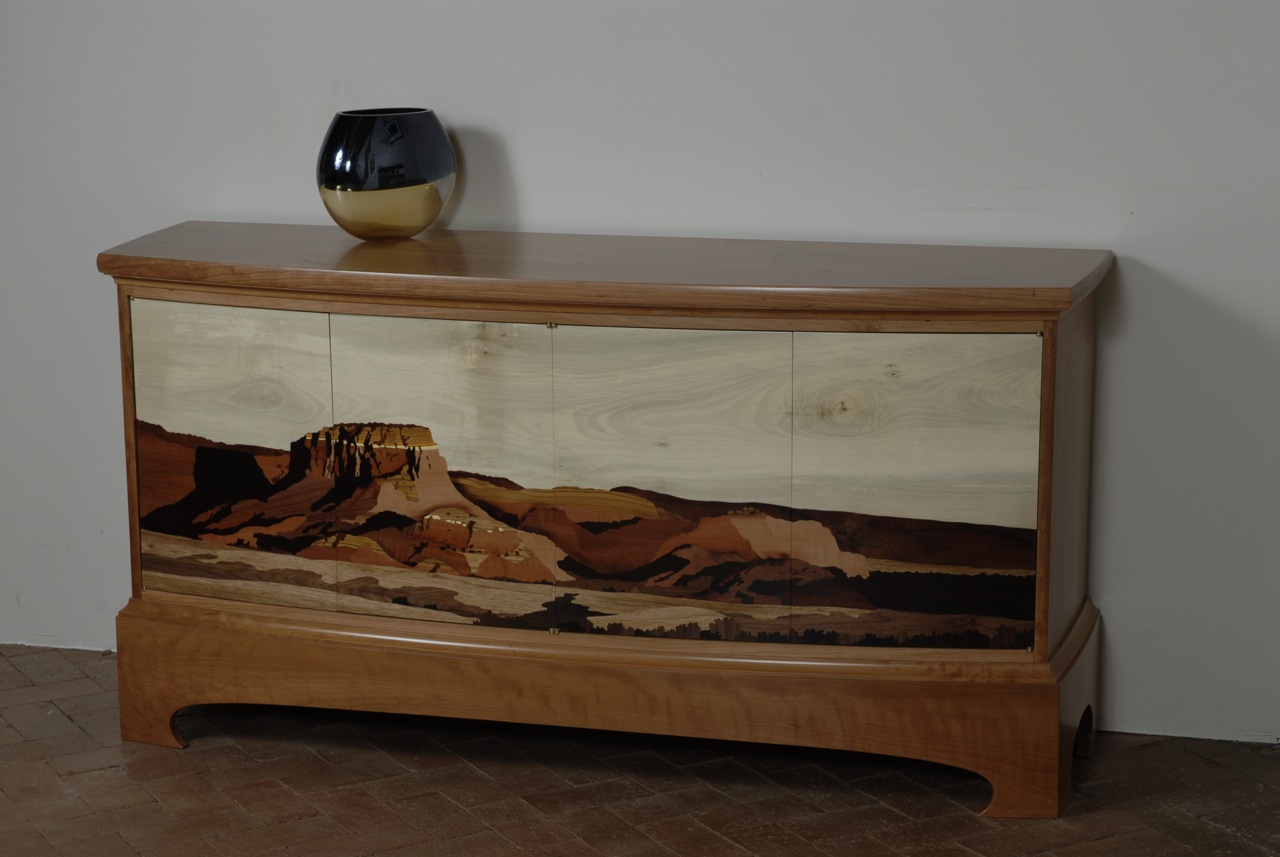
At it's most basic, parquetry is a repeating pattern created by cutting wood veneers into geometric shapes, piecing them together and adhering them to a substrate. Usually the pattern is made up of straight lines since they are easier to cut. On some elaborate furniture from the 16th and 17th centuries parquetry was used as a border or a background to a marquetry design. While marquetry and parquetry are similar in their construction techniques, marquetry is more pictorial than parquetry. To give you an idea of the differences, the custom credenza below is an example of a marquetry piece I built a few years ago.
A few months ago I was contracted to do panels of parquetry decoration on some thresholds. I came up with a repeating Moroccan geometric pattern for that project and it got me excited about the possibilities for using the same pattern on a furniture project. I didn't start out with a design for a piece of furniture that I was going to put parquetry on. Instead I began with the parquetry pattern and just let it draw me along.
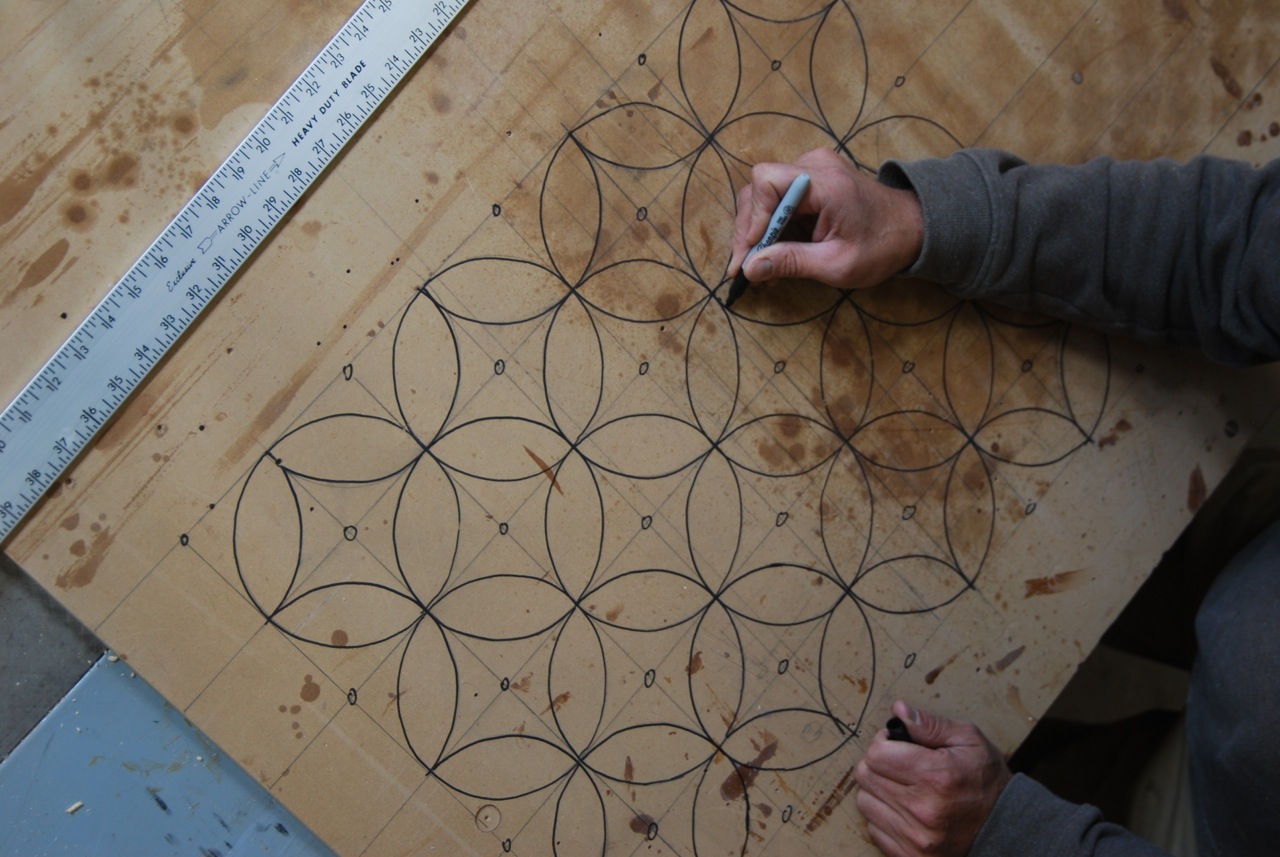
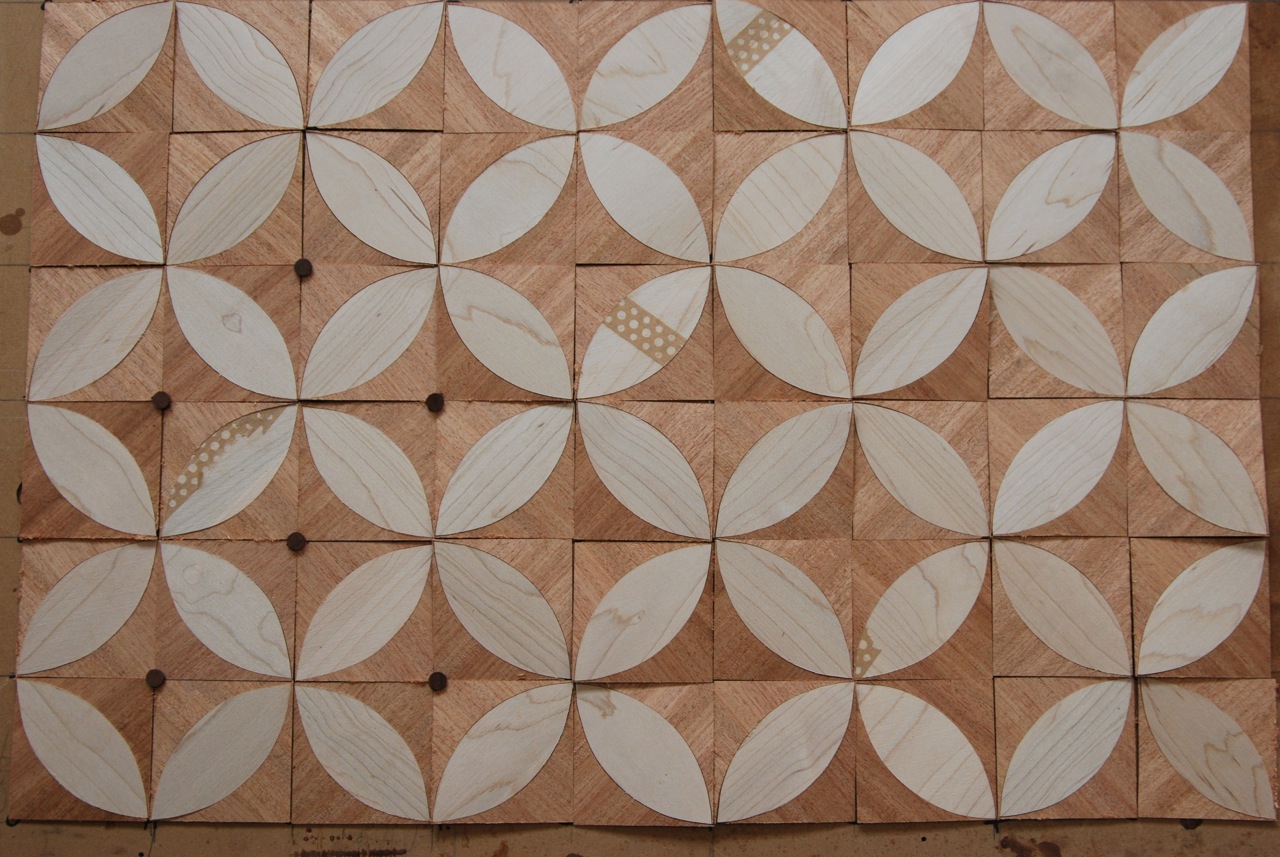
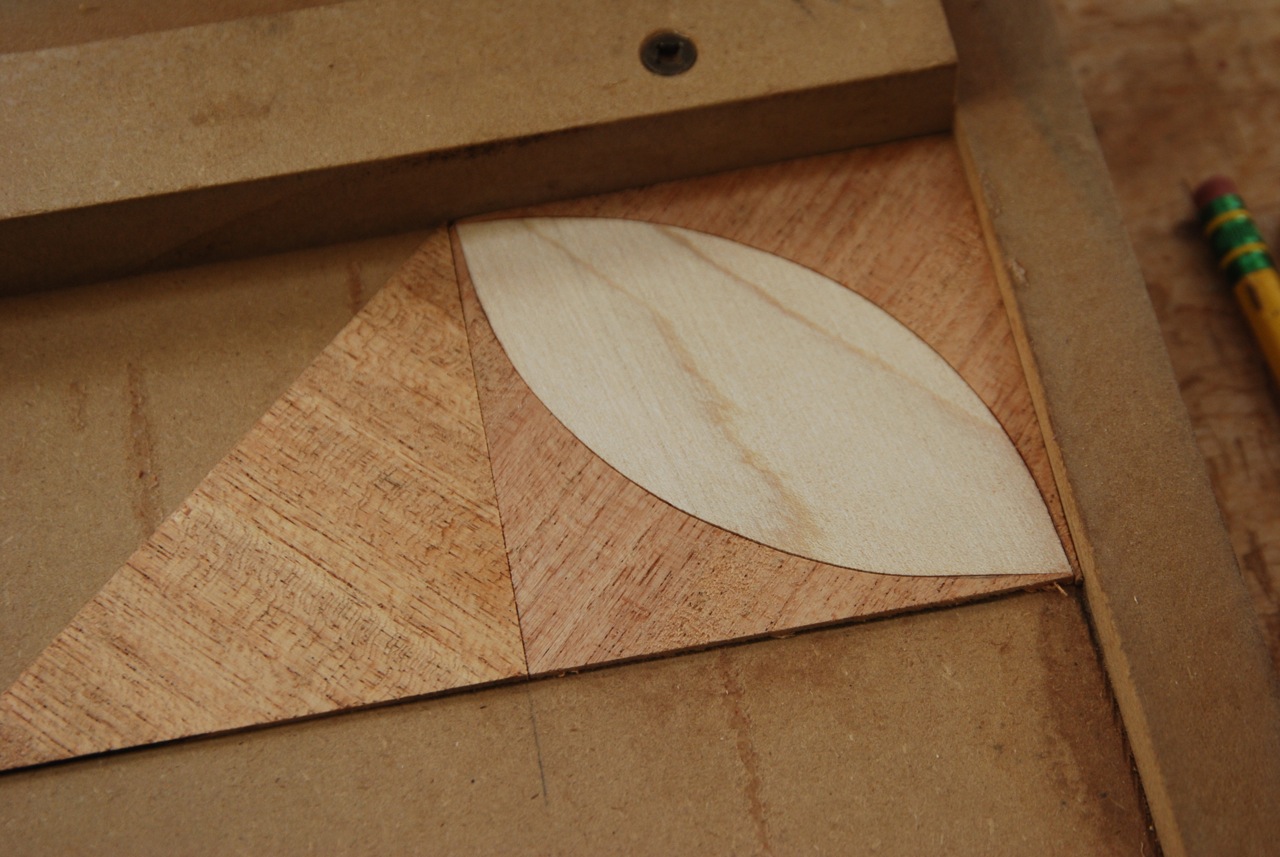
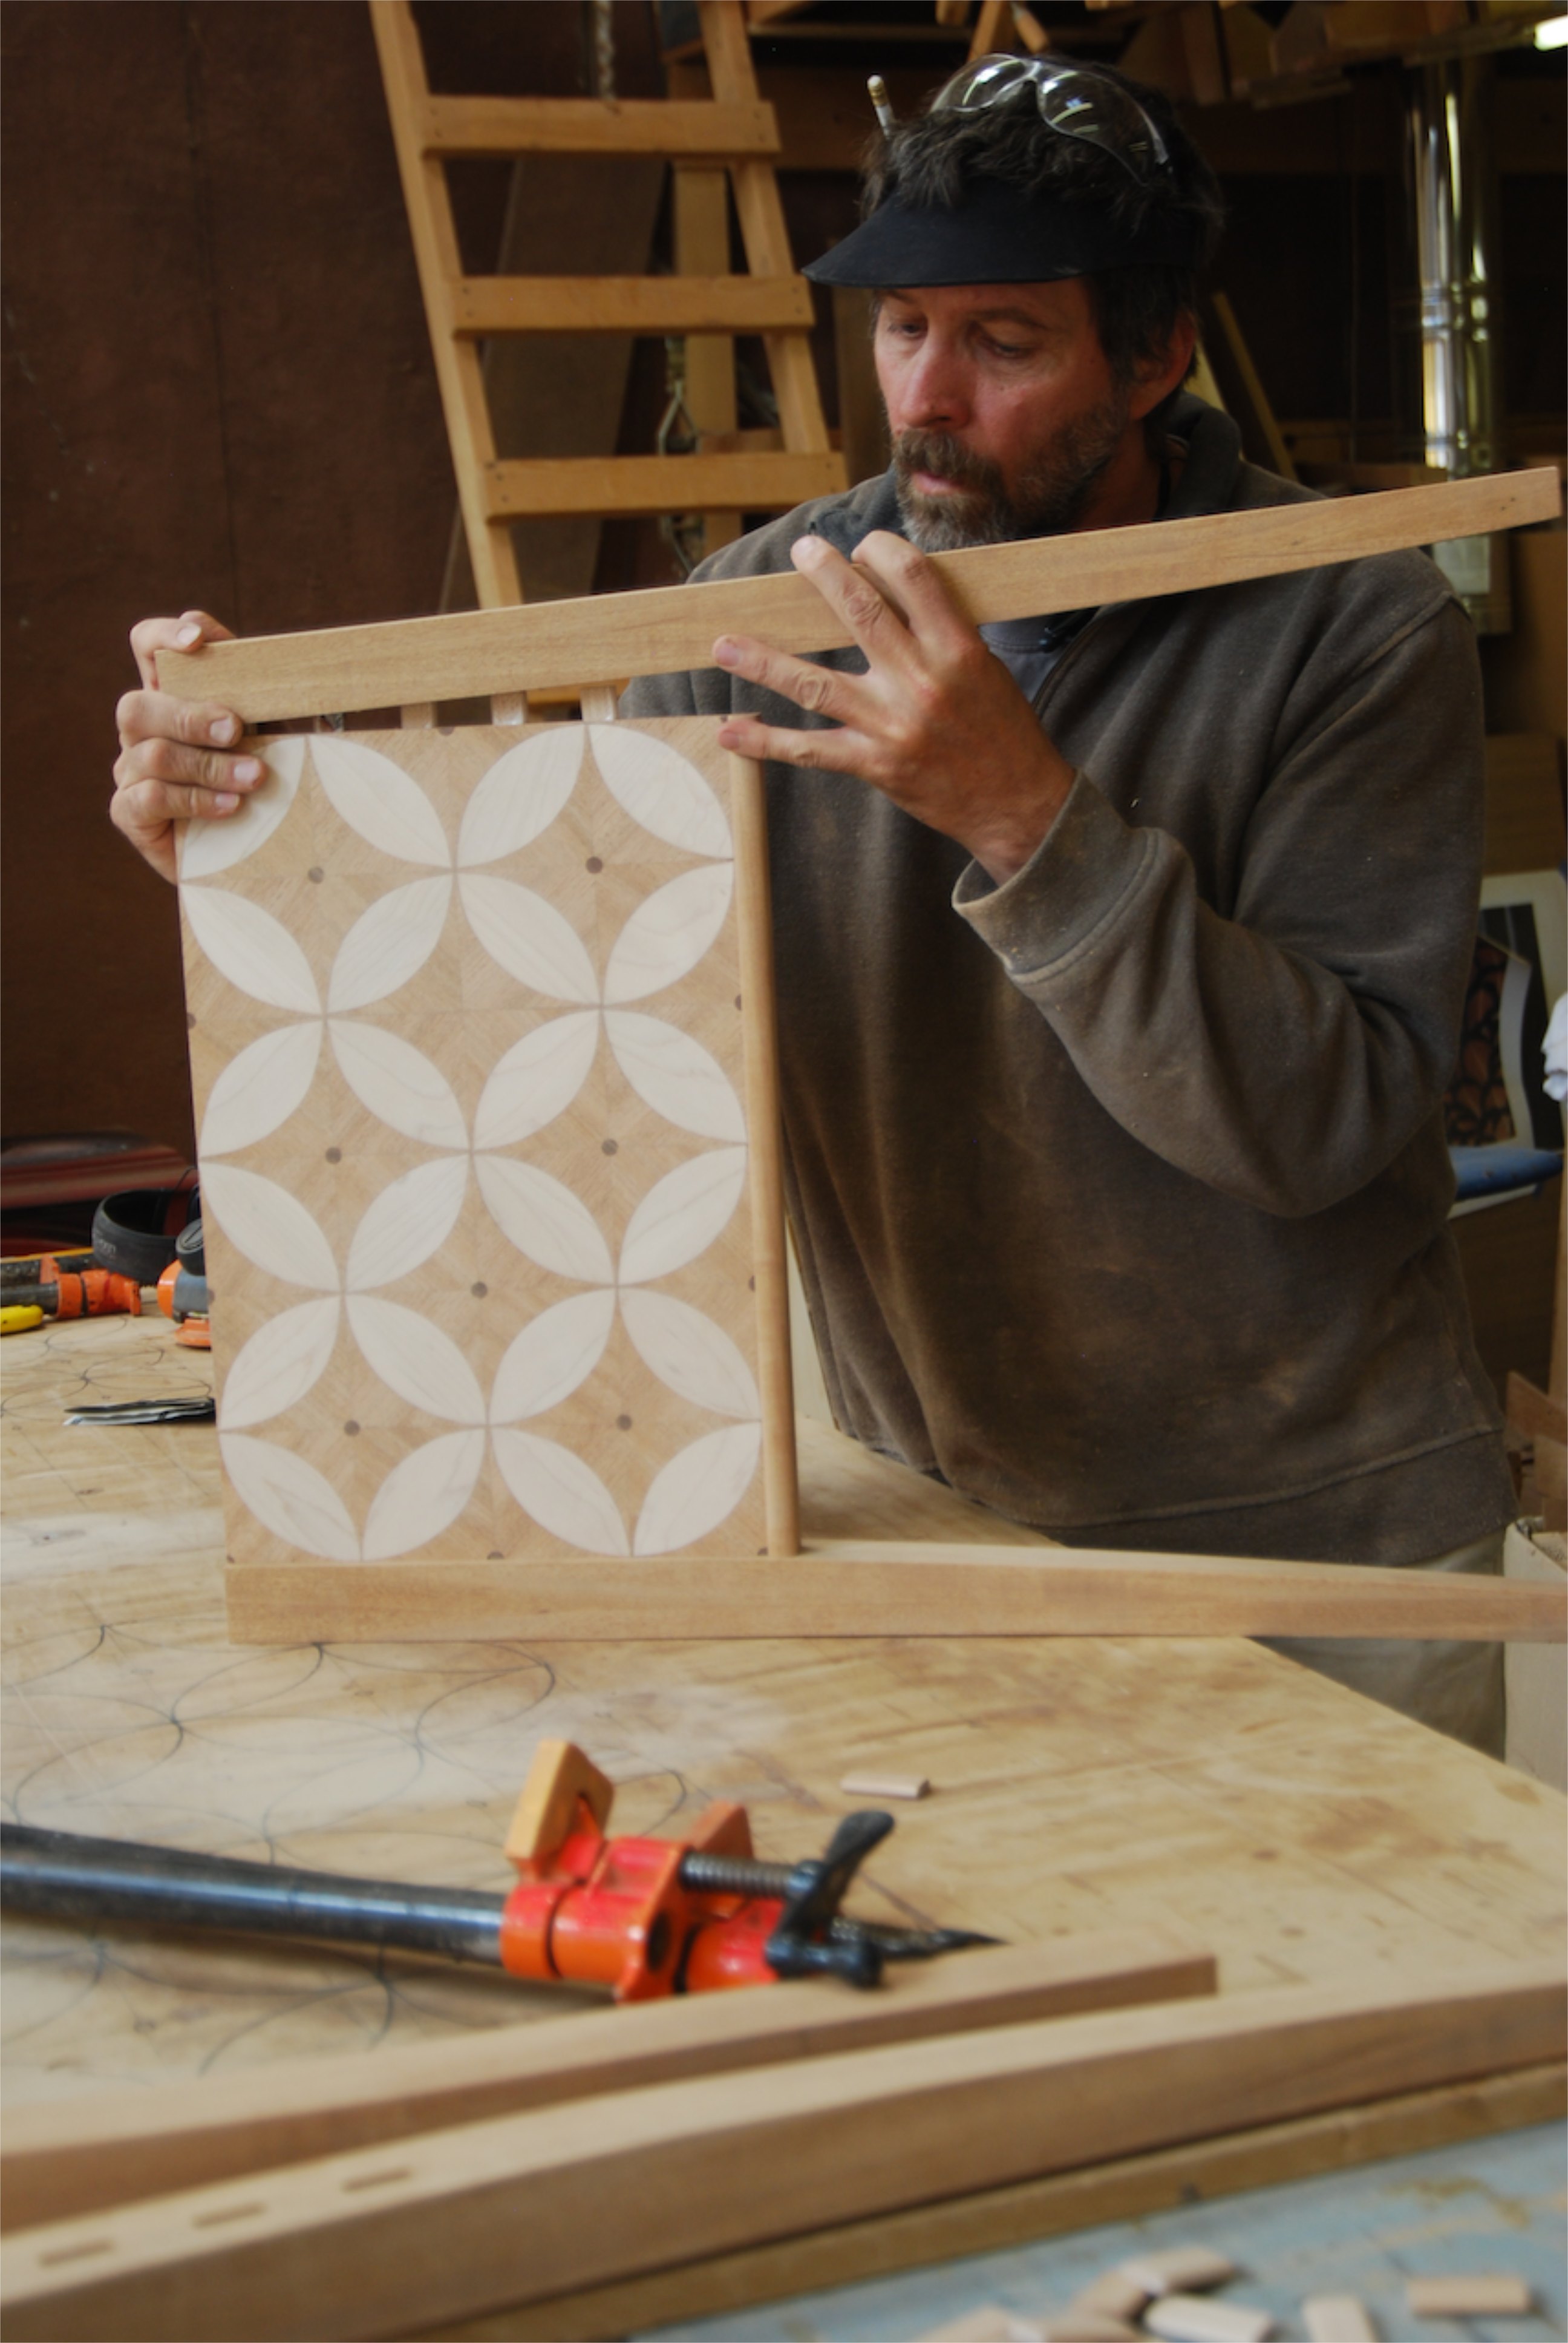
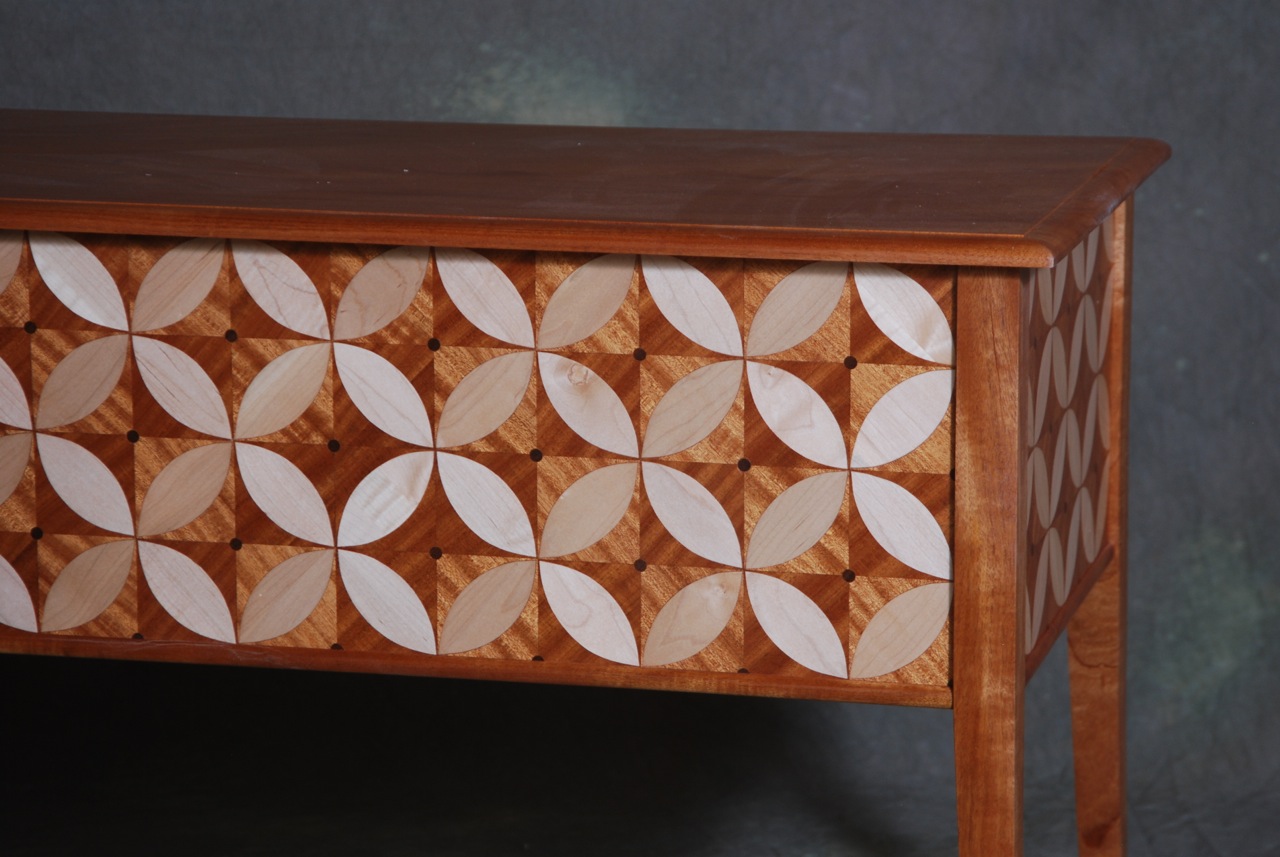
To get the feel for the pattern I started out by drawing it full size in a 3" grid as well as a 4" grid to see which one I thought worked better. I eventually settled on the 3". The pattern is deceptively simple. If you look at it one way it looks like a bunch of interlocking circles. Viewed another way it becomes a floral pattern or a series of diamonds touching at their corners. All of that, however, is created by repeating a square with a football shape cut out of it from corner to corner. What I love about this pattern is how the positive and negative switch and create new patterns.
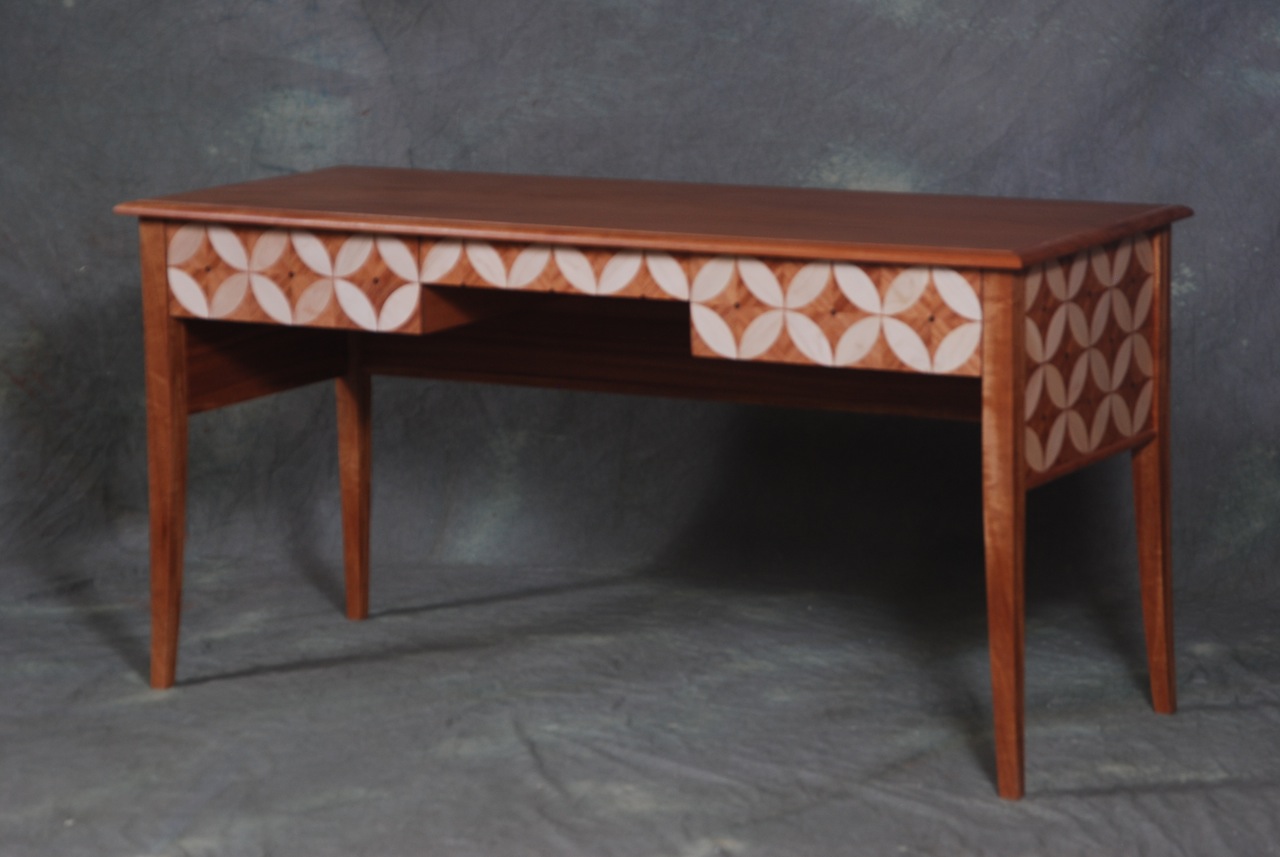
I decided that the first piece I was going to build with this parquetry pattern was going to be a desk. I wanted the piece to be simple but have enough show face on it to let the parquetry shine. Instead of drawing up a design I just started working on the parquetry with the idea that once I got enough of the pattern laid out I could tape up some faces and play with the proportions from there.
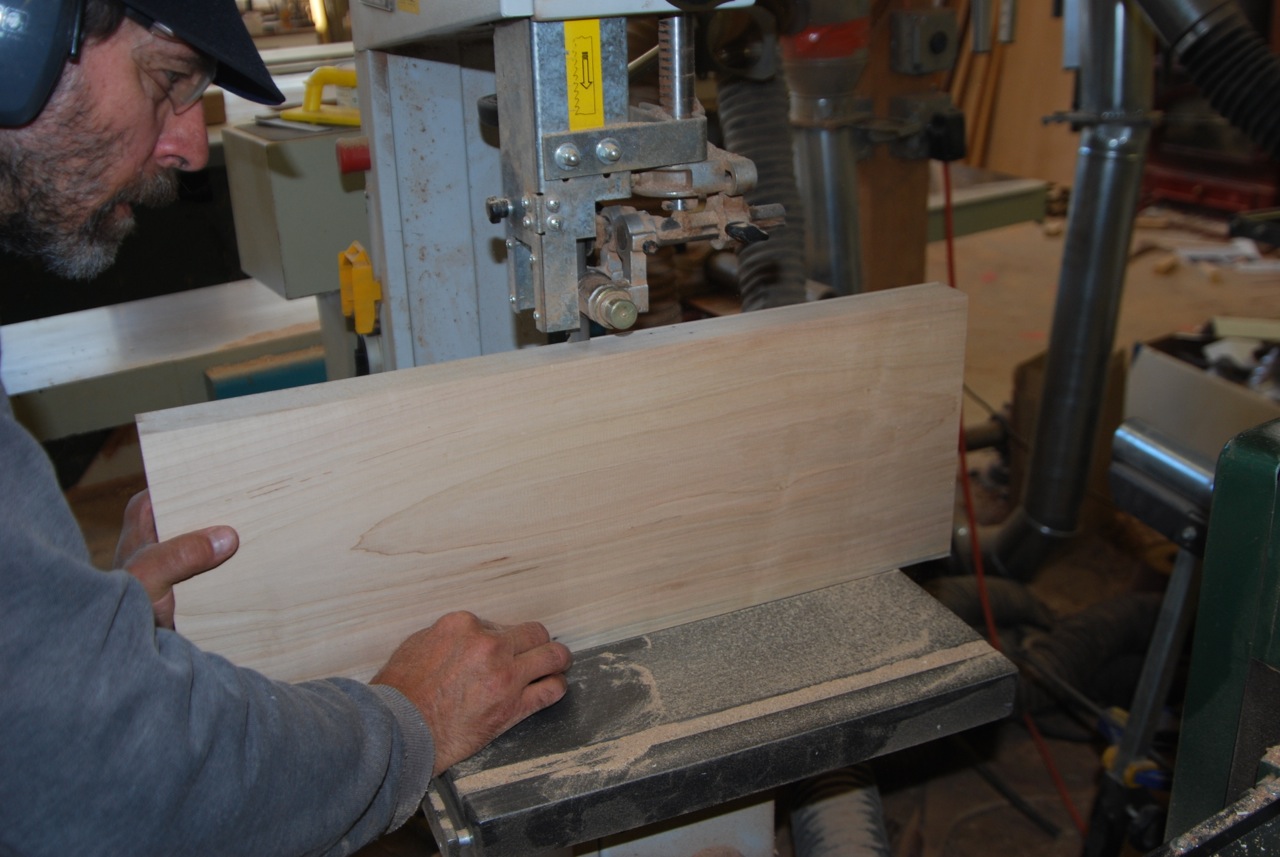
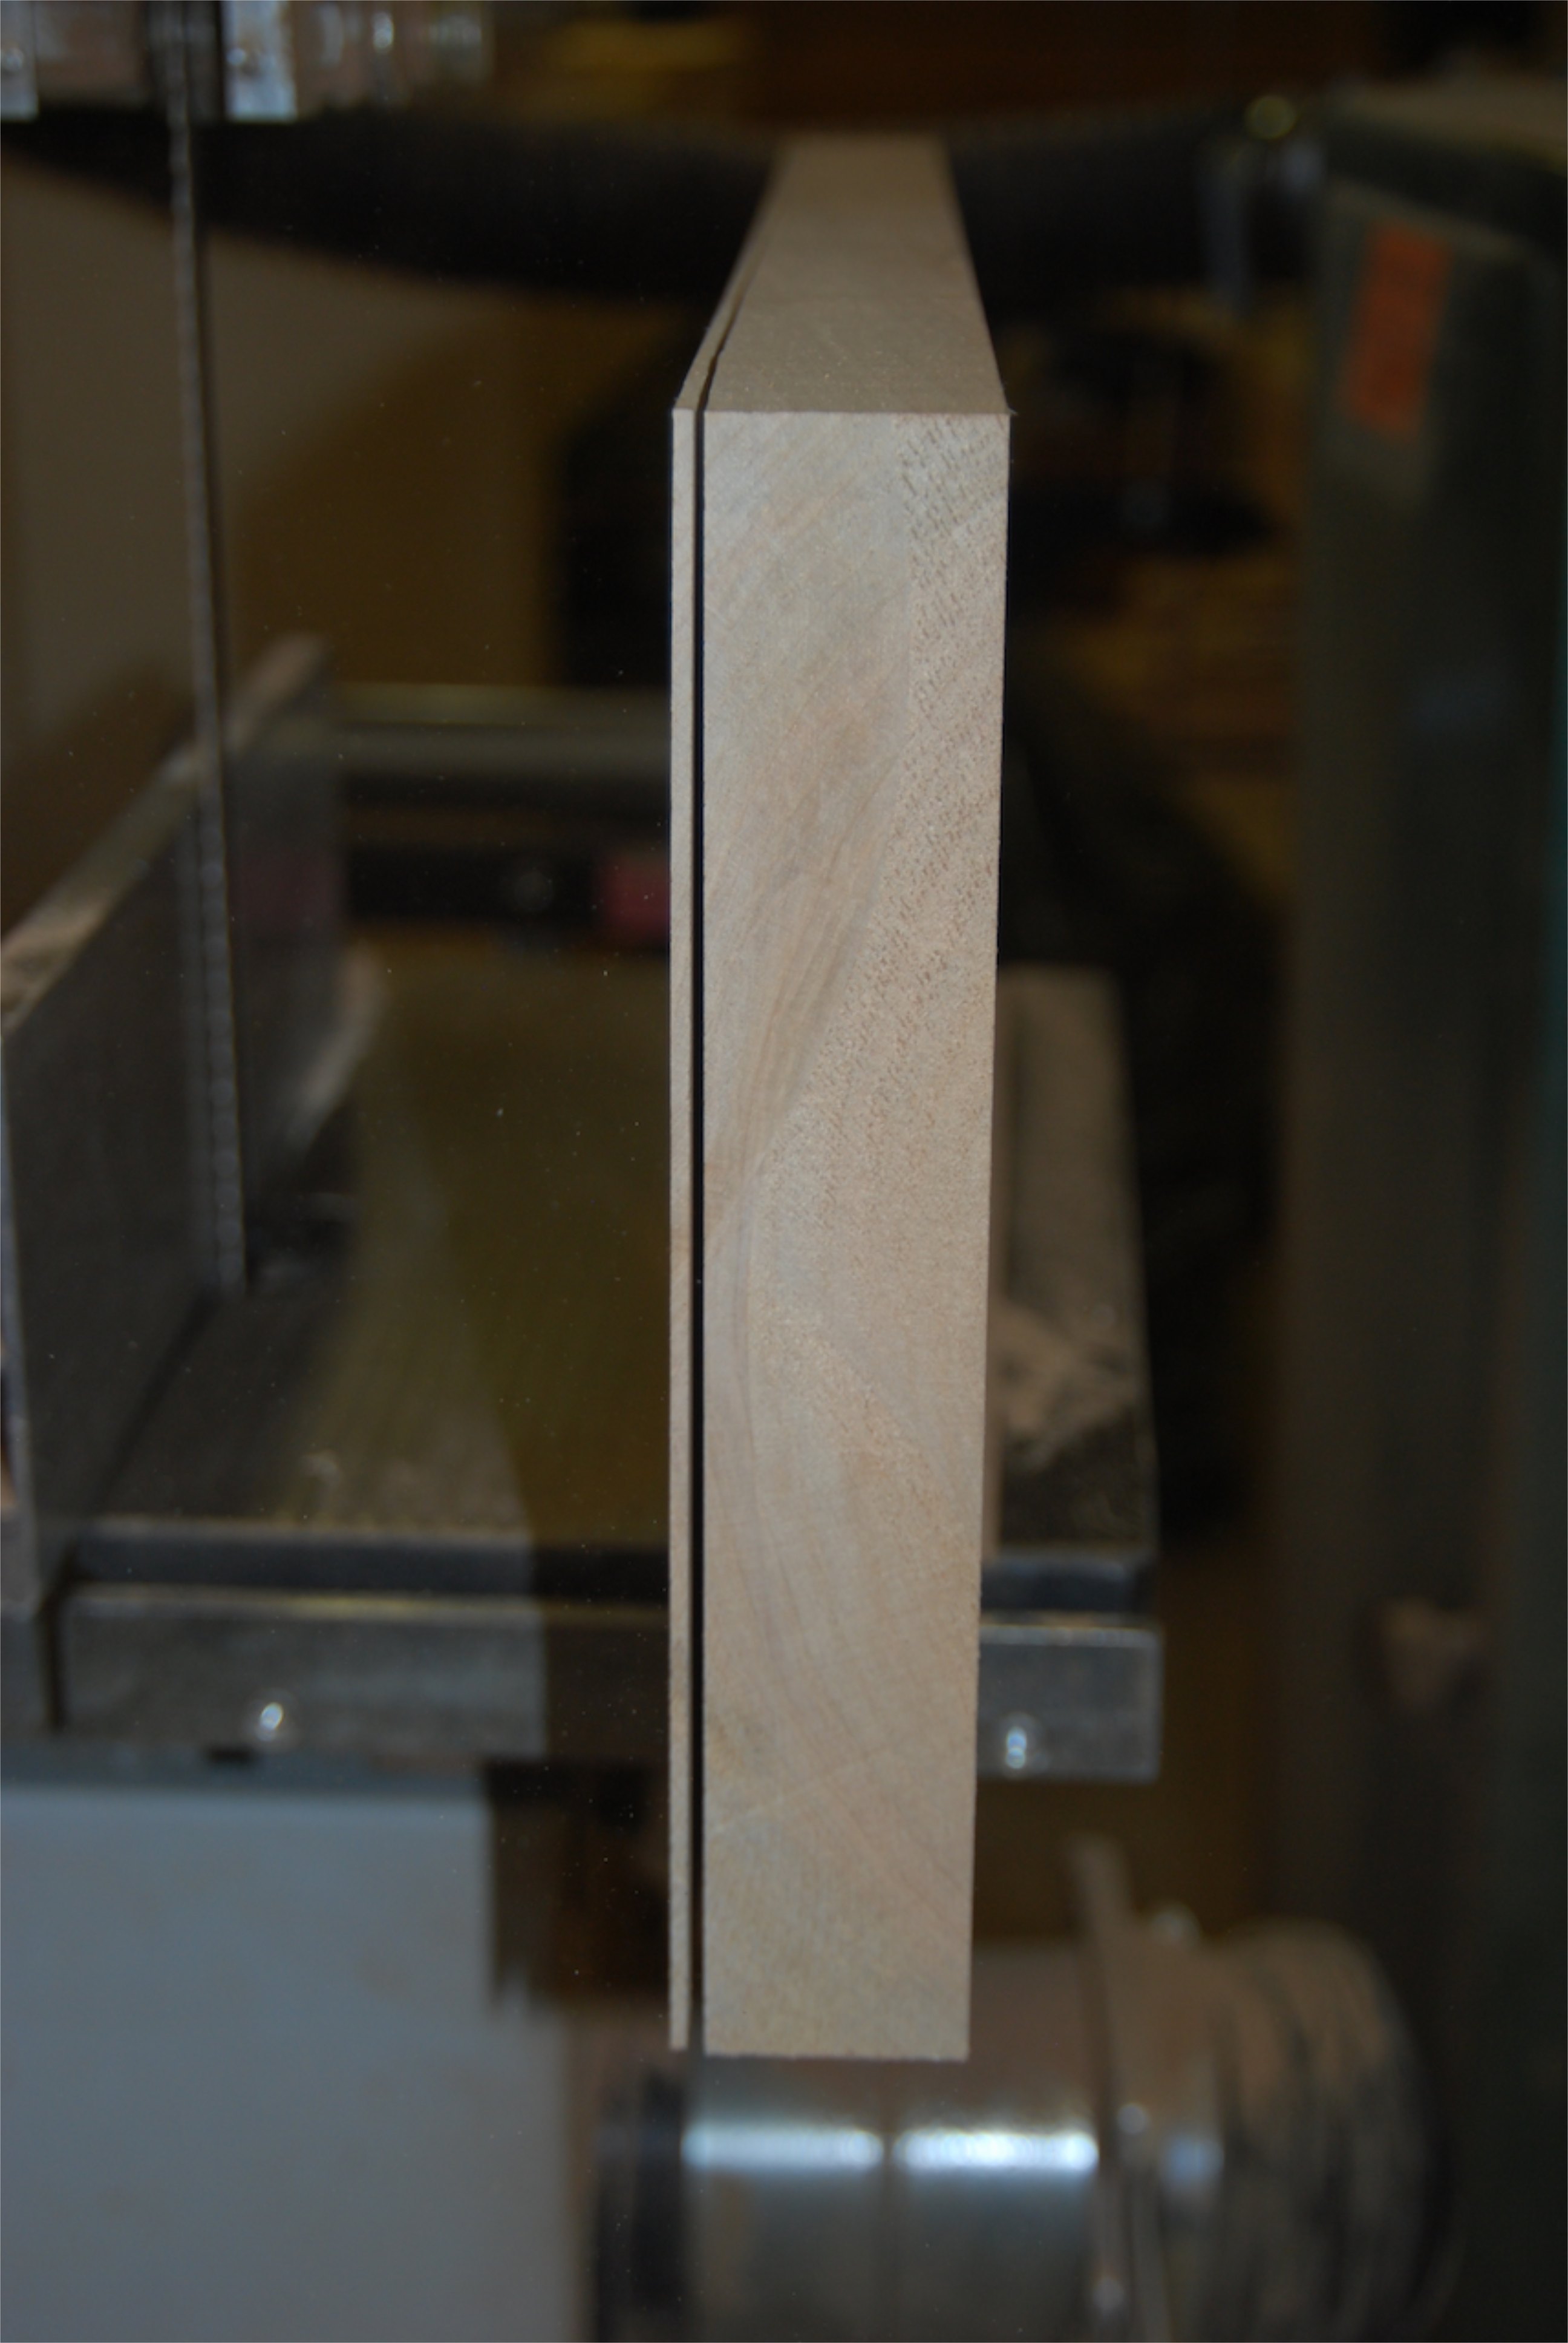
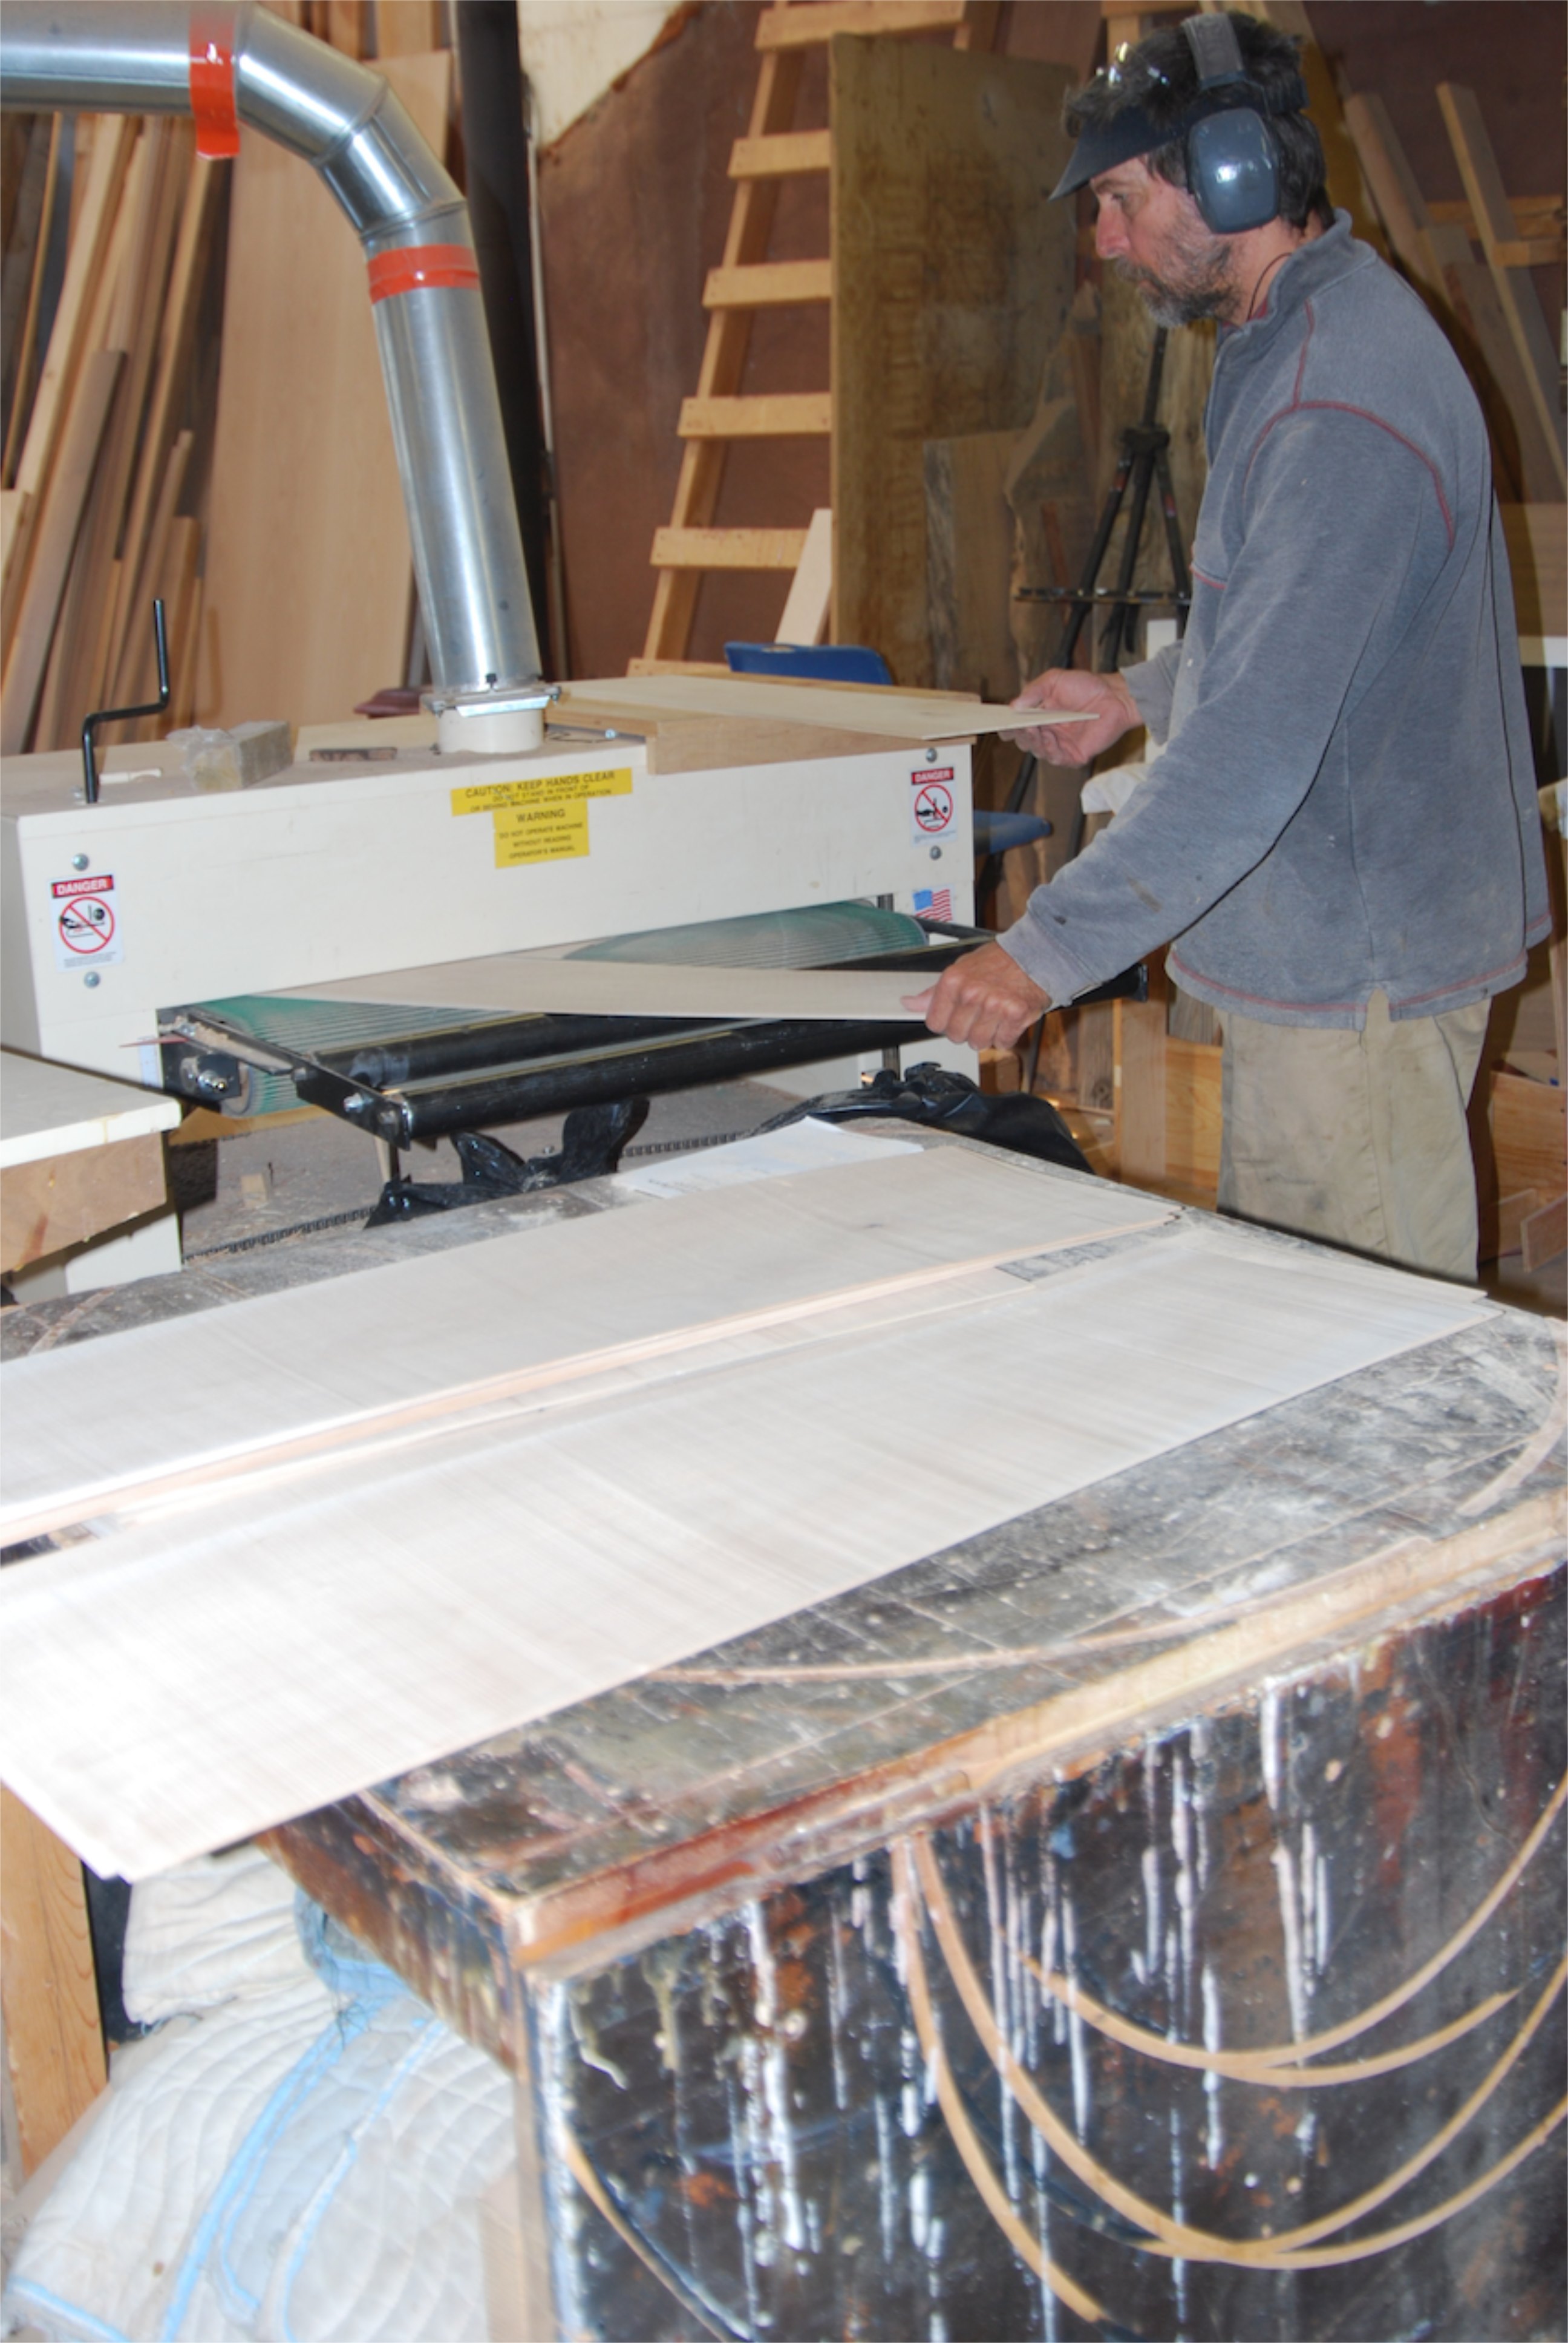
The first step was to make up the veneers that I was going to use. I had decided to use a maple and ribbon mahogany color scheme. I picked a board of each that had enough material in it to do the whole project so that I would have good color matching throughout the piece. My veneers were going to be 1/16" thick and making them started with resawing thick planks down to a fat 1/16" on the bandsaw with a 1" carbide blade. That blade does a really good job at holding an accurate dimension and giving a pretty smooth cut. After cutting off each slice I trued up the board with a light pass on the jointer. That way I always had one perfect face when it came time to thickness the veneer.
I have a Woodmaster drum sander in my shop and with an 80 grit paper on it it does a really nice job of grinding veneers to a consistent thickness.
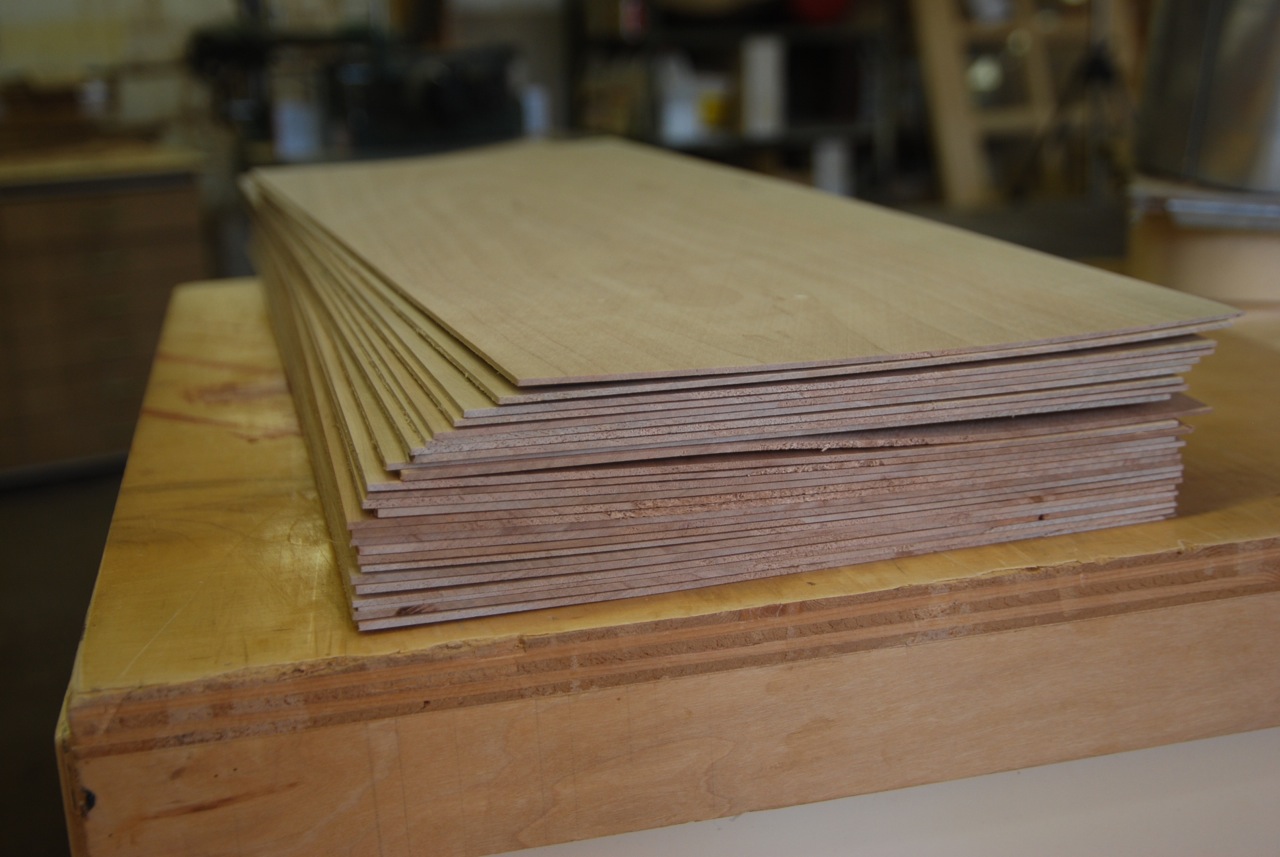
Once all the veneer was right at 1/16" I taped the leafs into larger sheets. This kept my waste to a minimum during the next step of cutting out squares with the grain running diagonally.
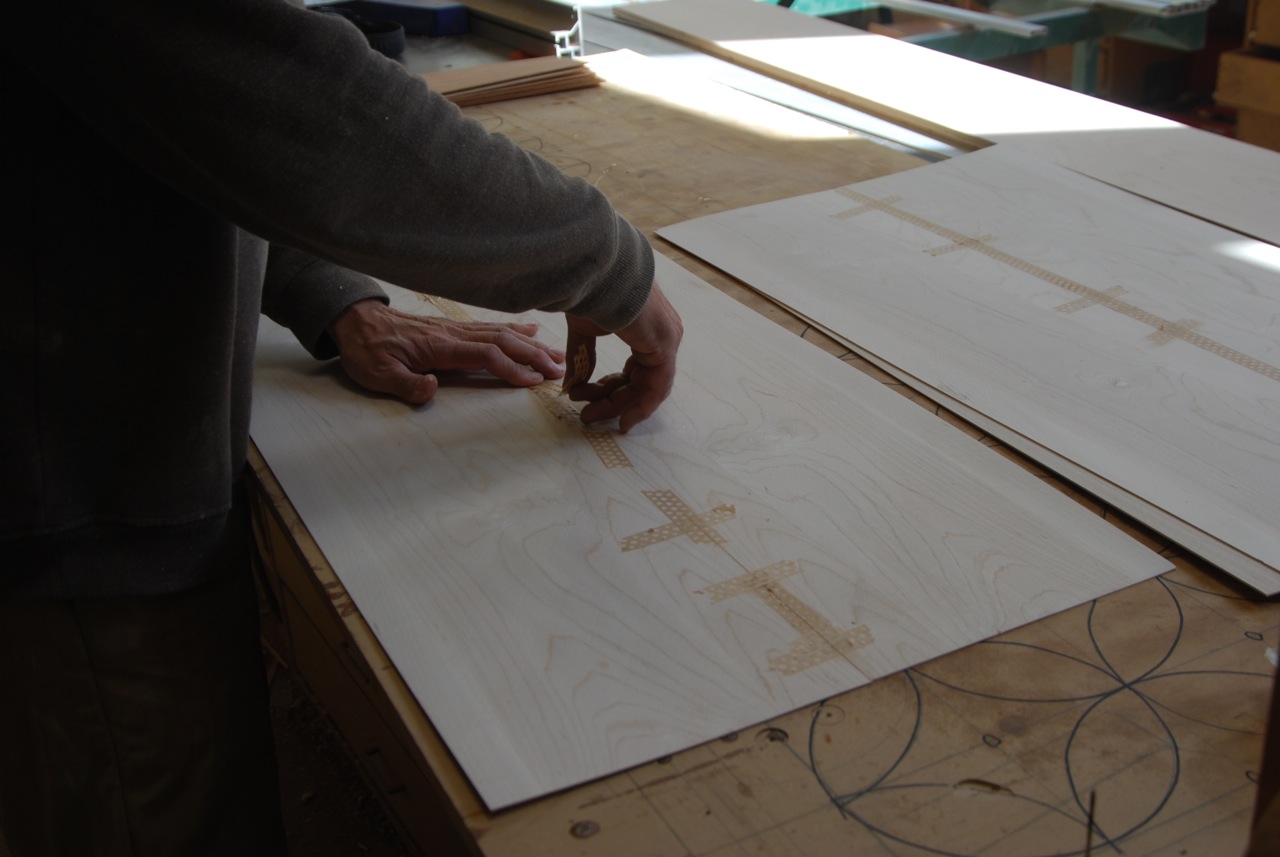
To make the squares with diagonal grain I started by cutting a 45 degree angle on the end of all of the sheets.
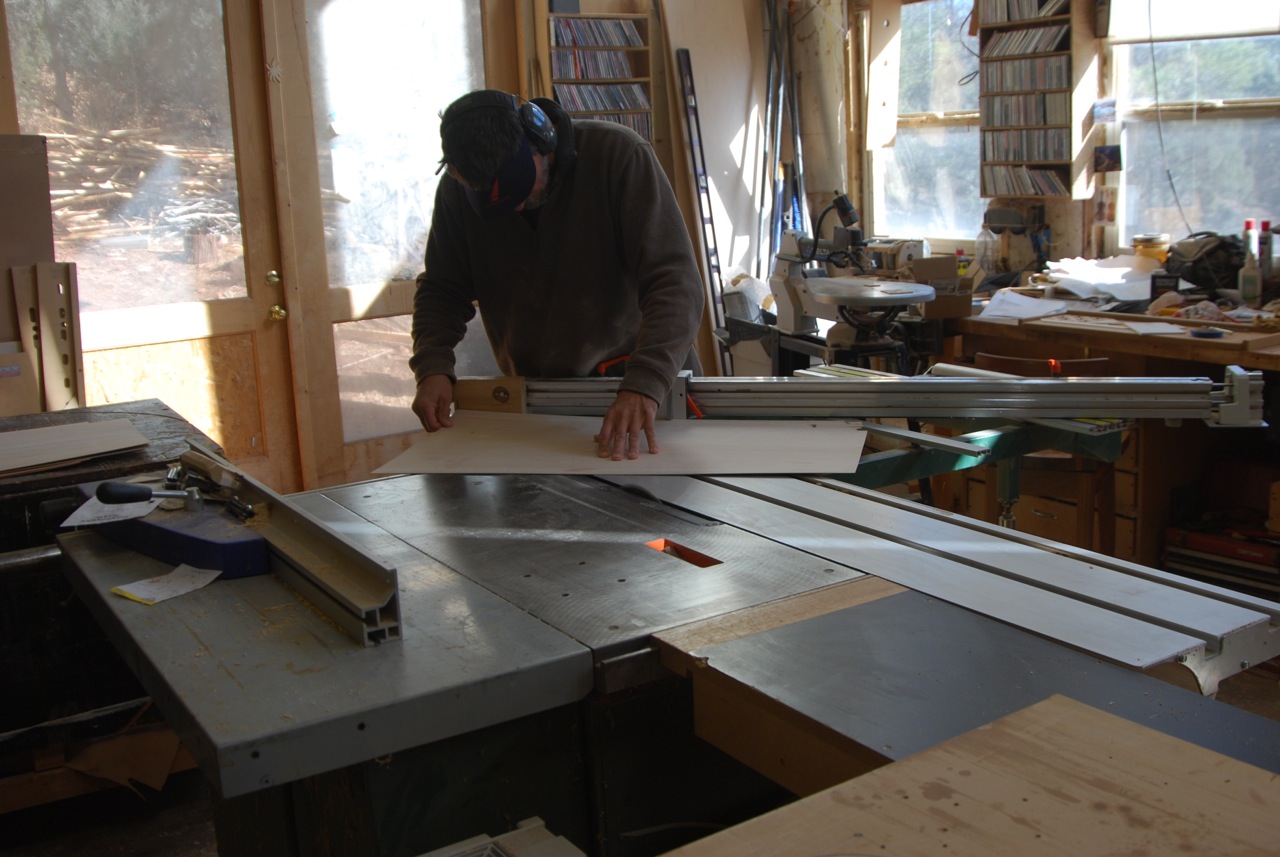
Using that 45 degree cut as my new working edge I could now start ripping 3" strips that had the grain running at a 45.
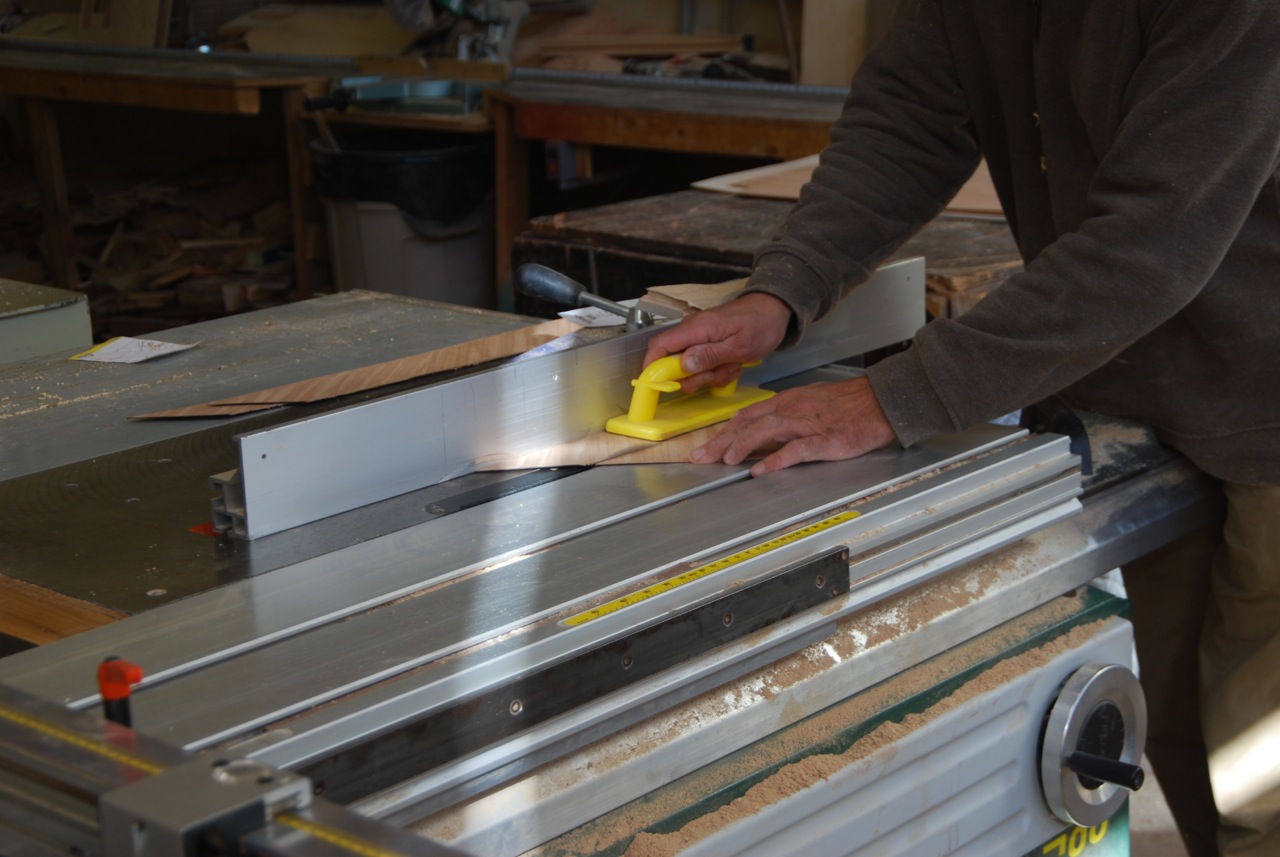
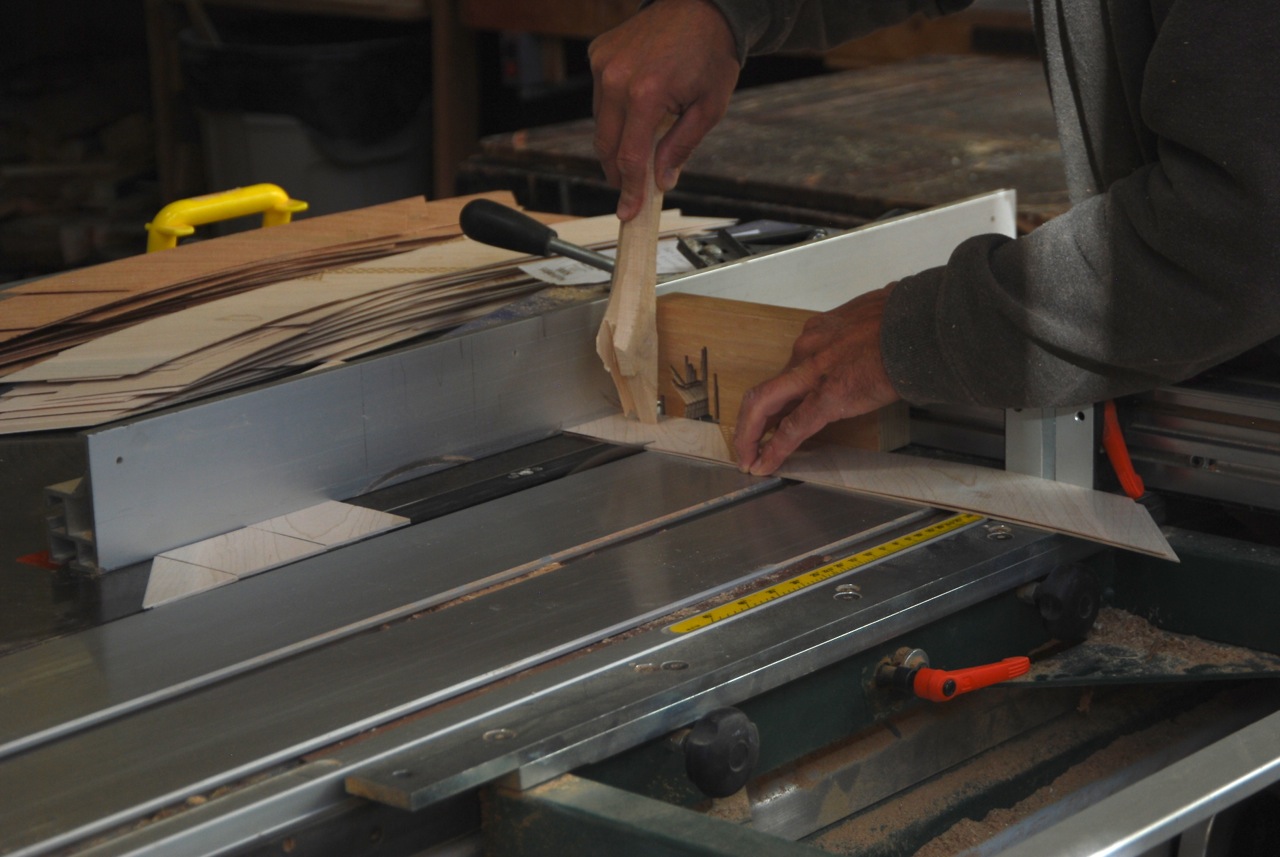
With all the veneers cut into strips I used my sliding table to cut the strips into squares leaving the rip fence in the same position and using it as a stop.
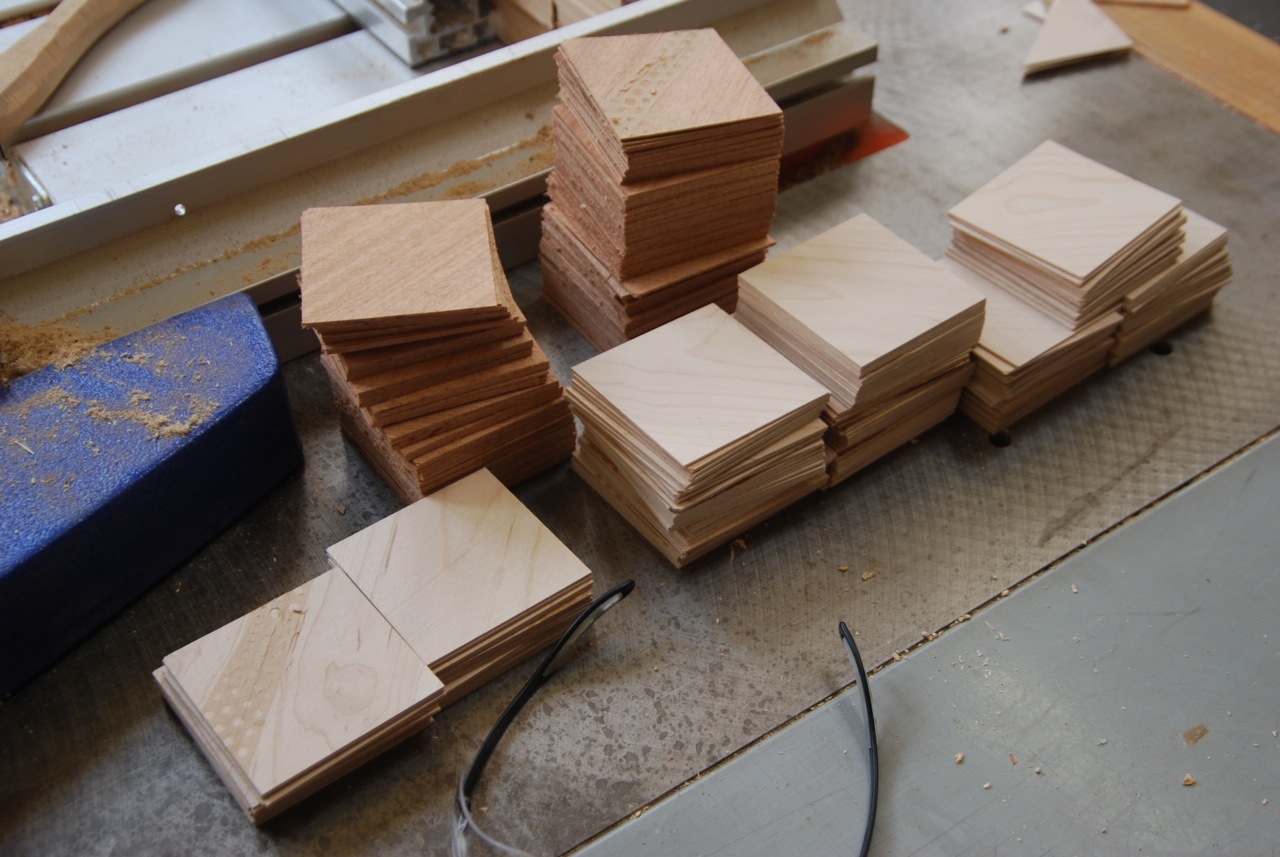
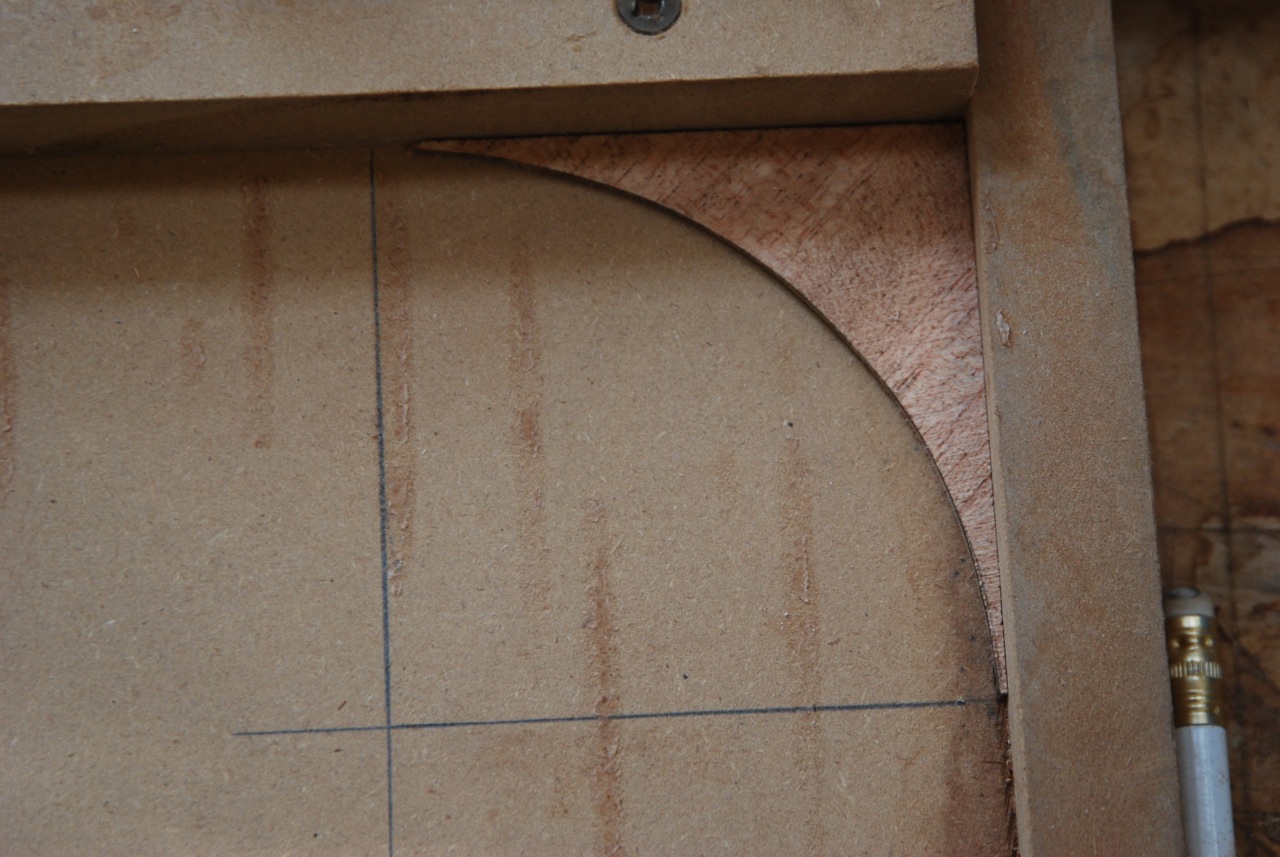
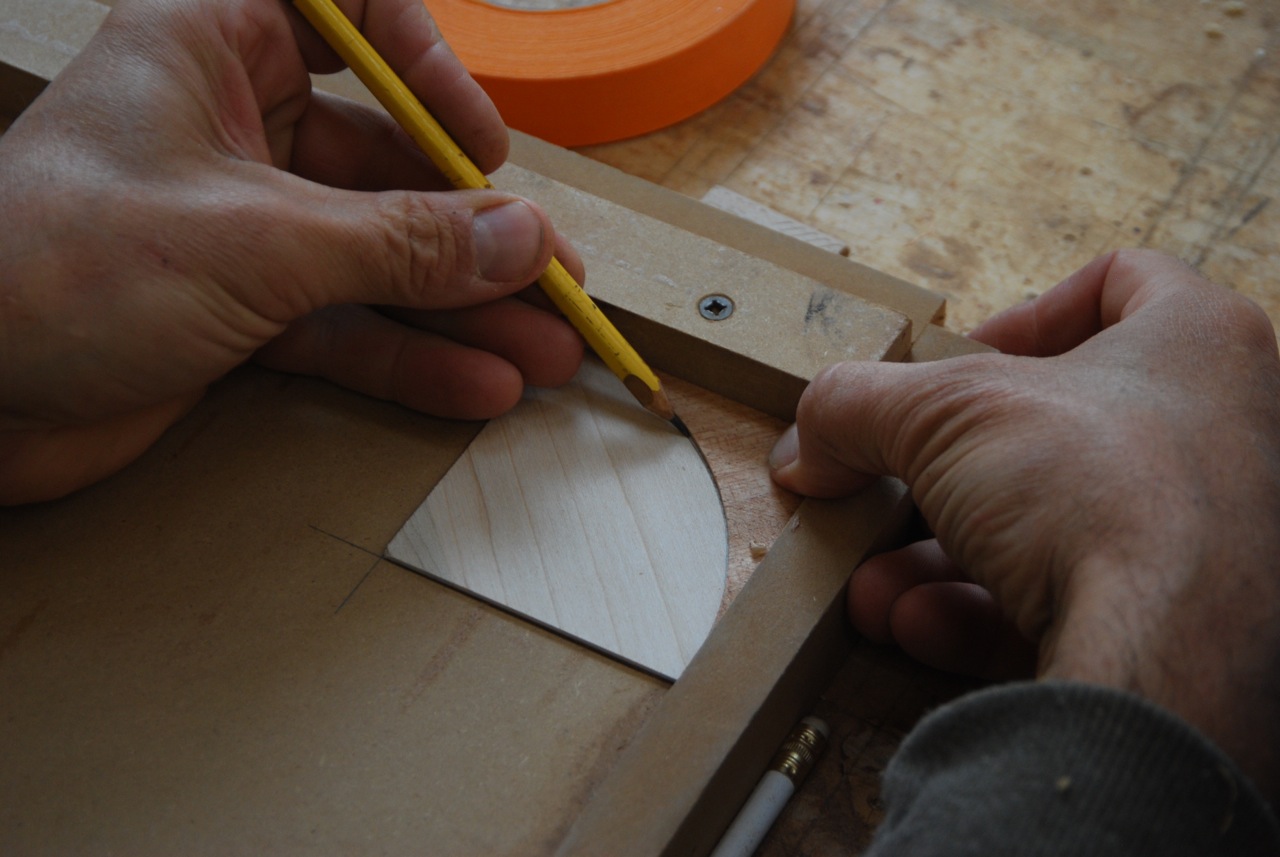
To cover the area I wanted to veneer I needed to make about 150 squares of each species and then mark them out with the cut lines for the football cutout. To make that layout consistent and quick I made myself a simple little marking jig. This was nothing more than a piece of the veneer cut to the right arc and glued into the corner of an MDF jig with enough room to slide the piece that I needed to mark under it.
Then I could mark one side of the football, turn the square 180 degrees and mark the other side.
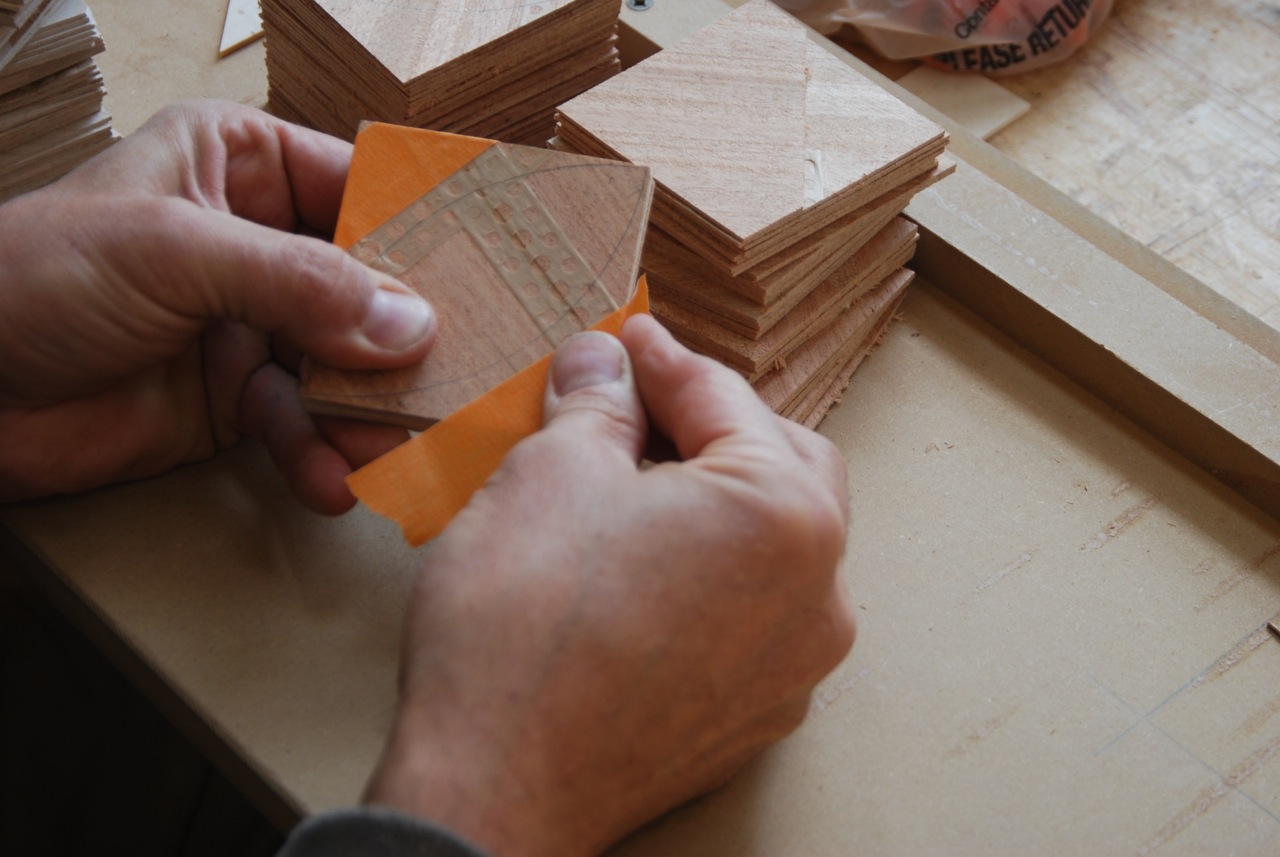
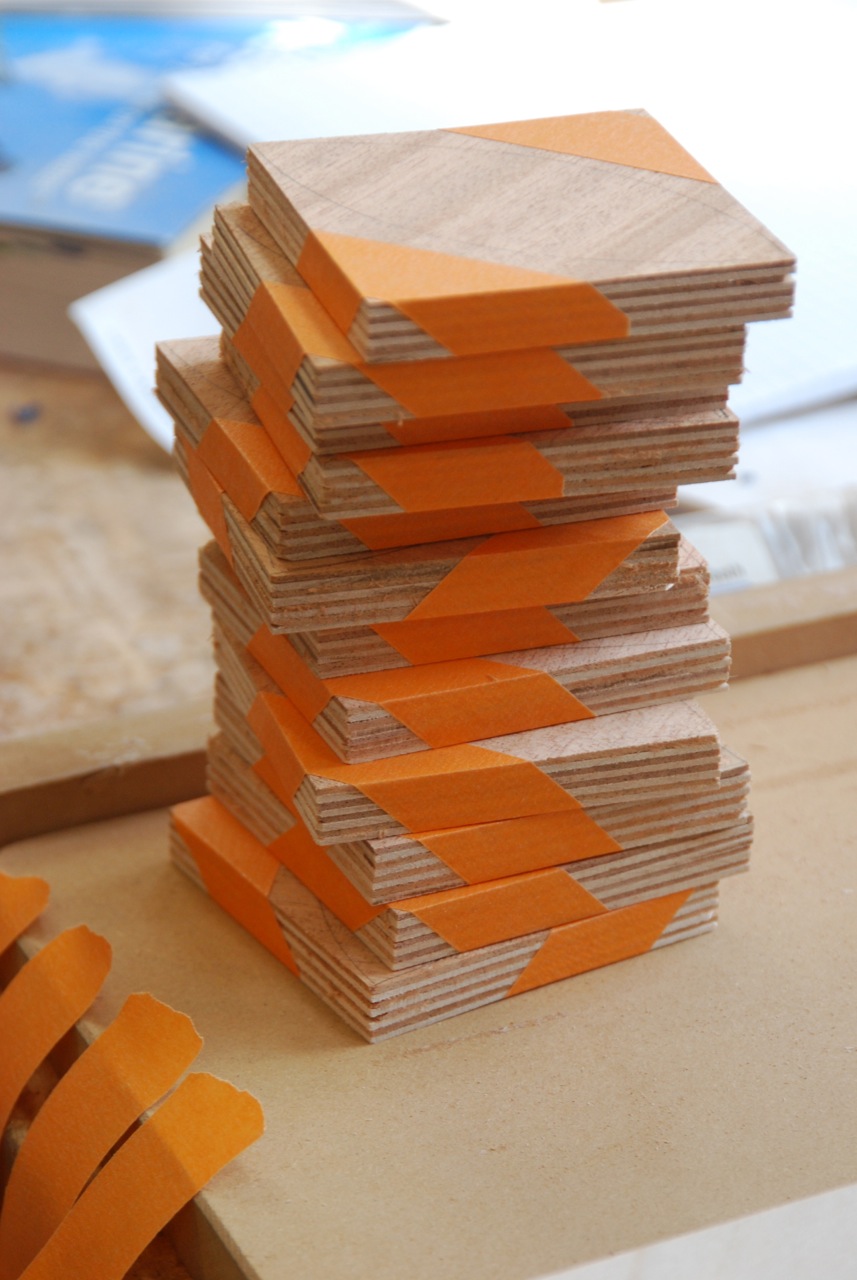
Once I had enough squares marked I taped up packets of veneers alternating 4 pieces each of the maple and mahogany. This gave me packets that were 1/2" thick which was about as thick as I thought I could cut effectively with the scroll saw. In the packets each species had it's grain running 90 degrees to the other. The top piece had the football layout on it.
Then it was time to go to the scroll saw and cut the curves. I used a 1-0 modified geometry blade for this. As you can see below the blade is really small. You can't even see the teeth. The advantage of the small (i.e. thin) blade is that it takes out a small saw kerf. This is important when the faces get put together.
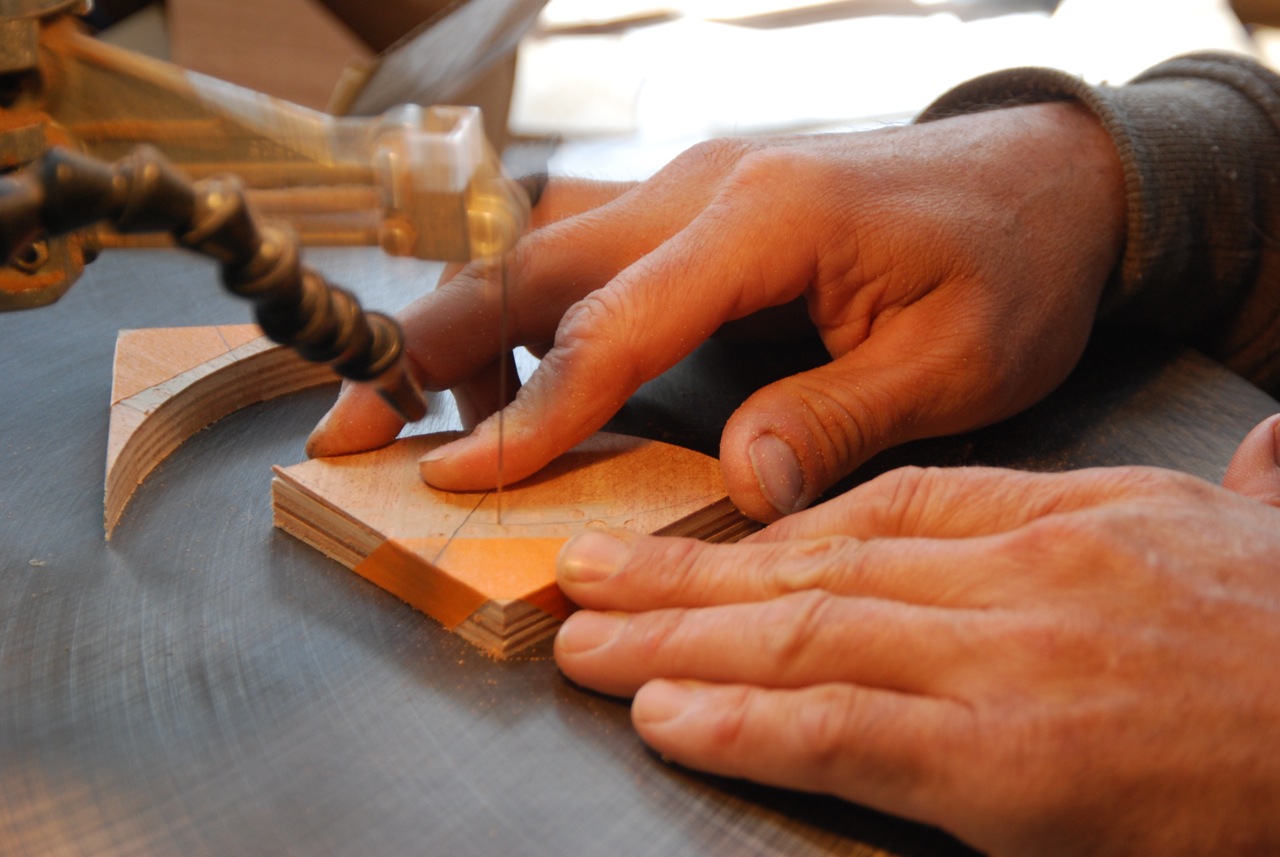
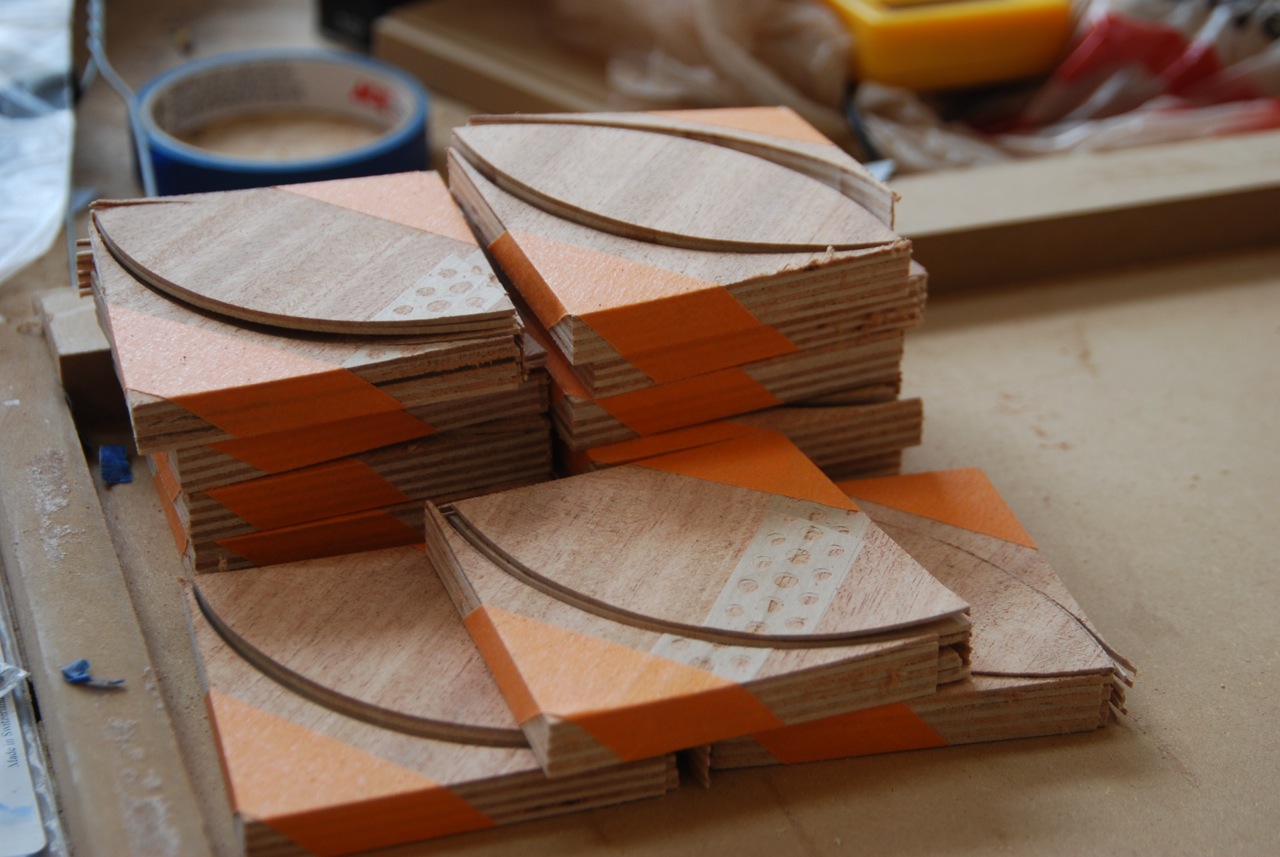
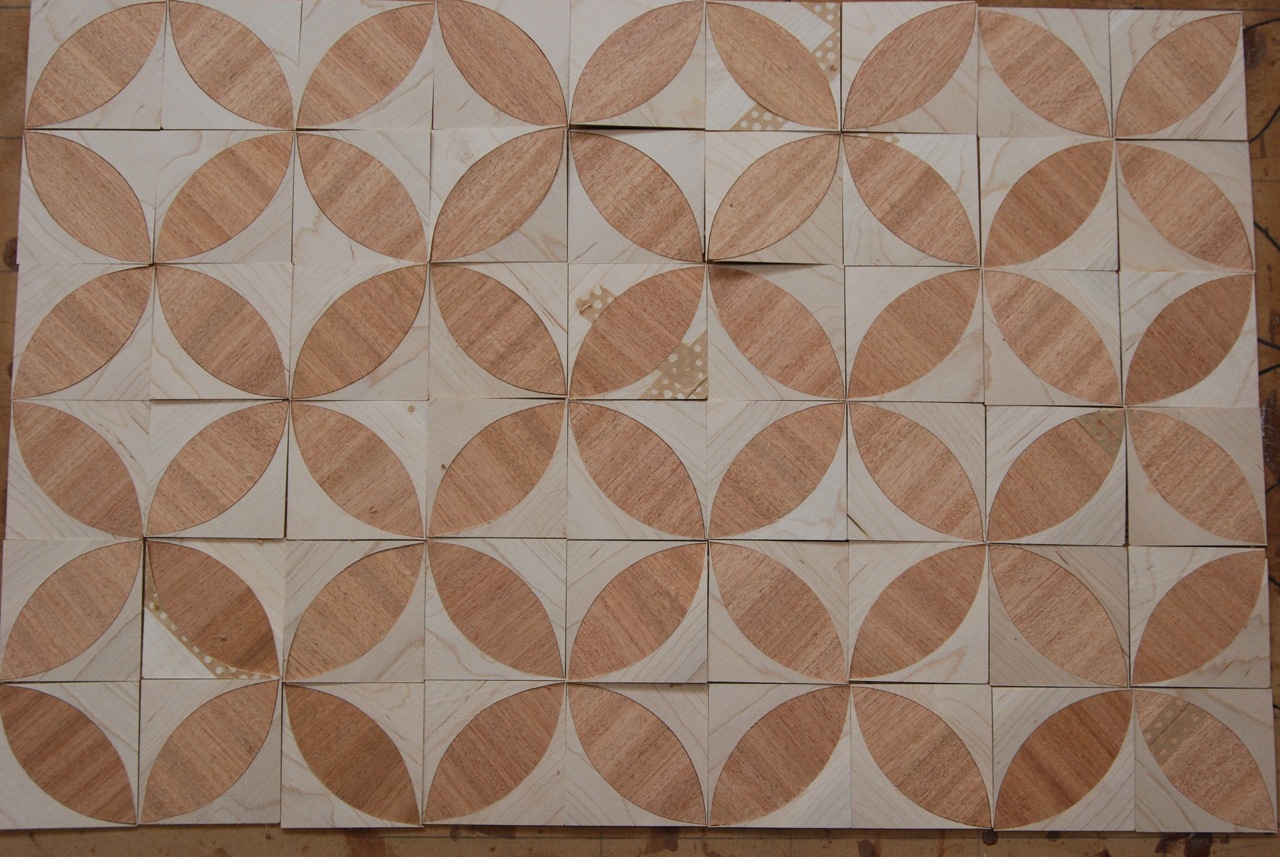
This system gives you equal numbers of mahogany and maple corners and footballs. What that means is that you end up with two faces in opposite color patterns. One has dark corners and light centers. The other has light corners and dark centers.
By stacking the veneers and cutting them together, any slight wandering from the line doesn't matter. The corner from layer 1 was cut at the same time as the football in layer 2 so they will always fit together perfectly. You can't mix and match from side to side but the pieces above and below each other will be a good fit.
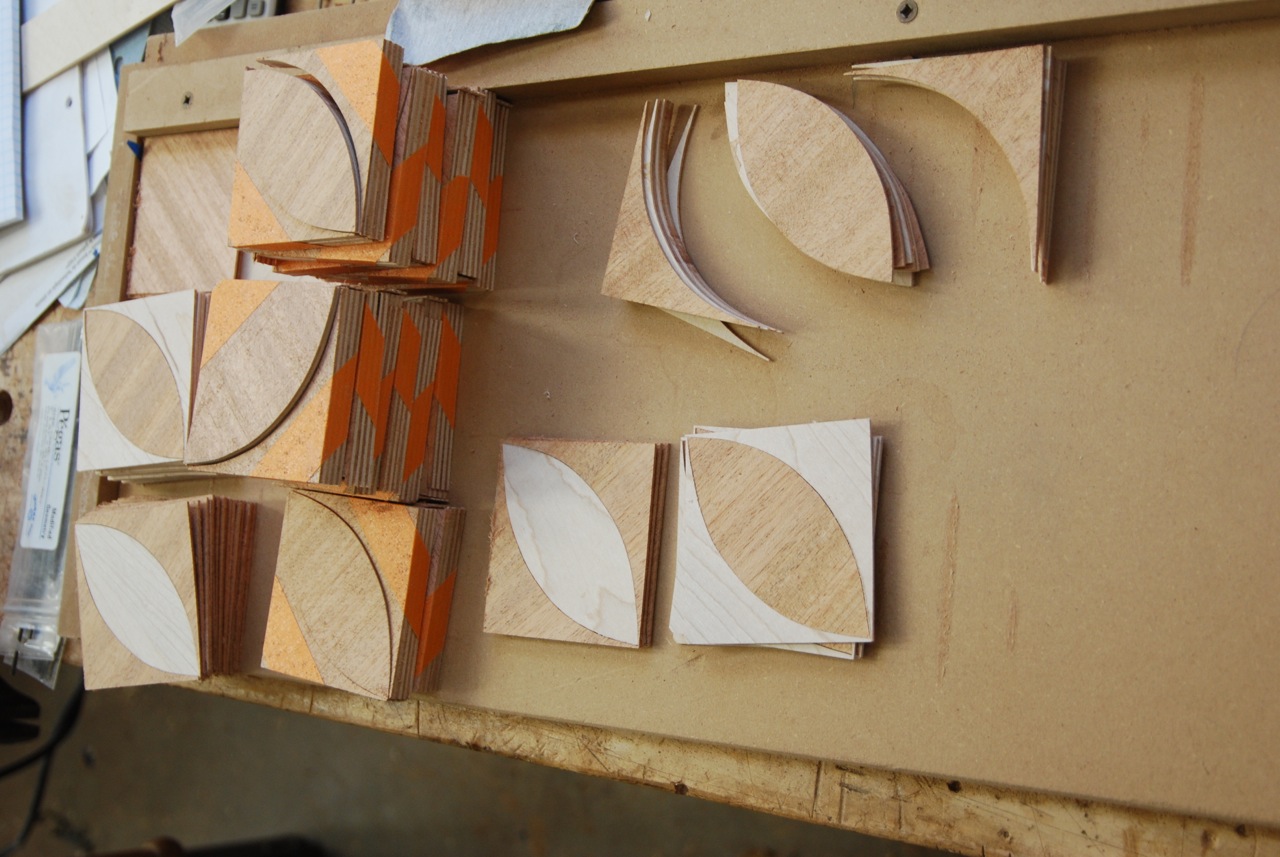
Since all of the squares were going to be taped up together into a grid they all needed to be exactly the same size or the pattern will wander. The material lost to the scroll saw kerf is very small but if you push the 3 pieces in the square tight together you will be left with a square that is something less than 3". To be sure that the squares in my pattern were all precisely 3" I made another quick jig. It was just a square corner with a piece of scrap glued to the bottom of the jig. I set it's location by putting an un-cut 3" square piece of veneer into the corner and then put a little glue on the bottom of some scrap and slid it around until it stuck next to the 3" piece. I also drew a layout line on the open side of the jig against the 3" square. Now I could drop my 3 pieces into the jig, gap them evenly with the outer edges pushed against the jig sides, and tape them together with veneer tape. Before long I had 150 three inch squares in both color patterns.
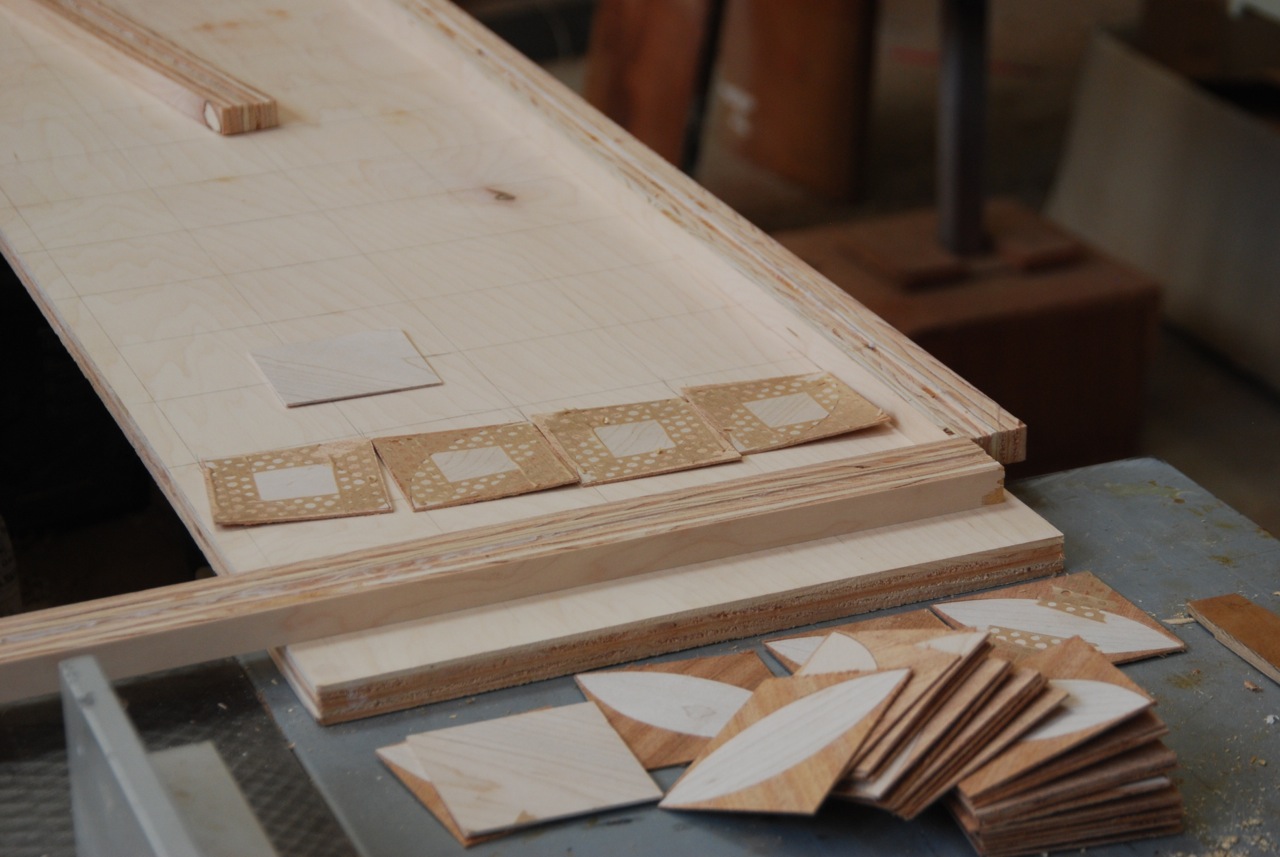
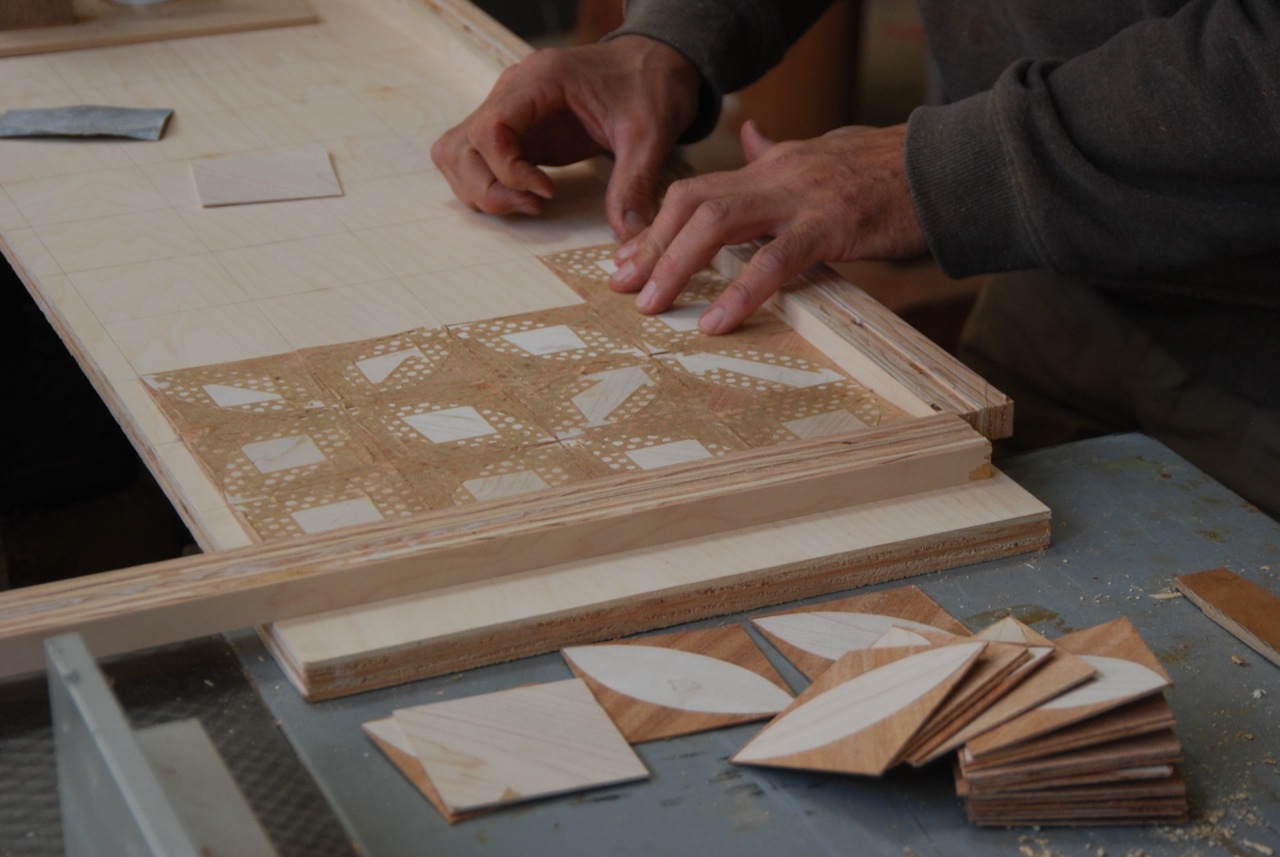
With all of the individual squares made up it was time to tape them together into the faces that would be glued down to the substrates that made up the sides and front panel of the desk. To be sure that these faces would be perfectly square and straight I made another jig. This one was a piece of scrap plywood with the 3" grid drawn on it and a couple of cleats screwed to the sides. By bumping the squares to the cleats, alligning them with the registration lines and taping them together I got nice square, straight faces.
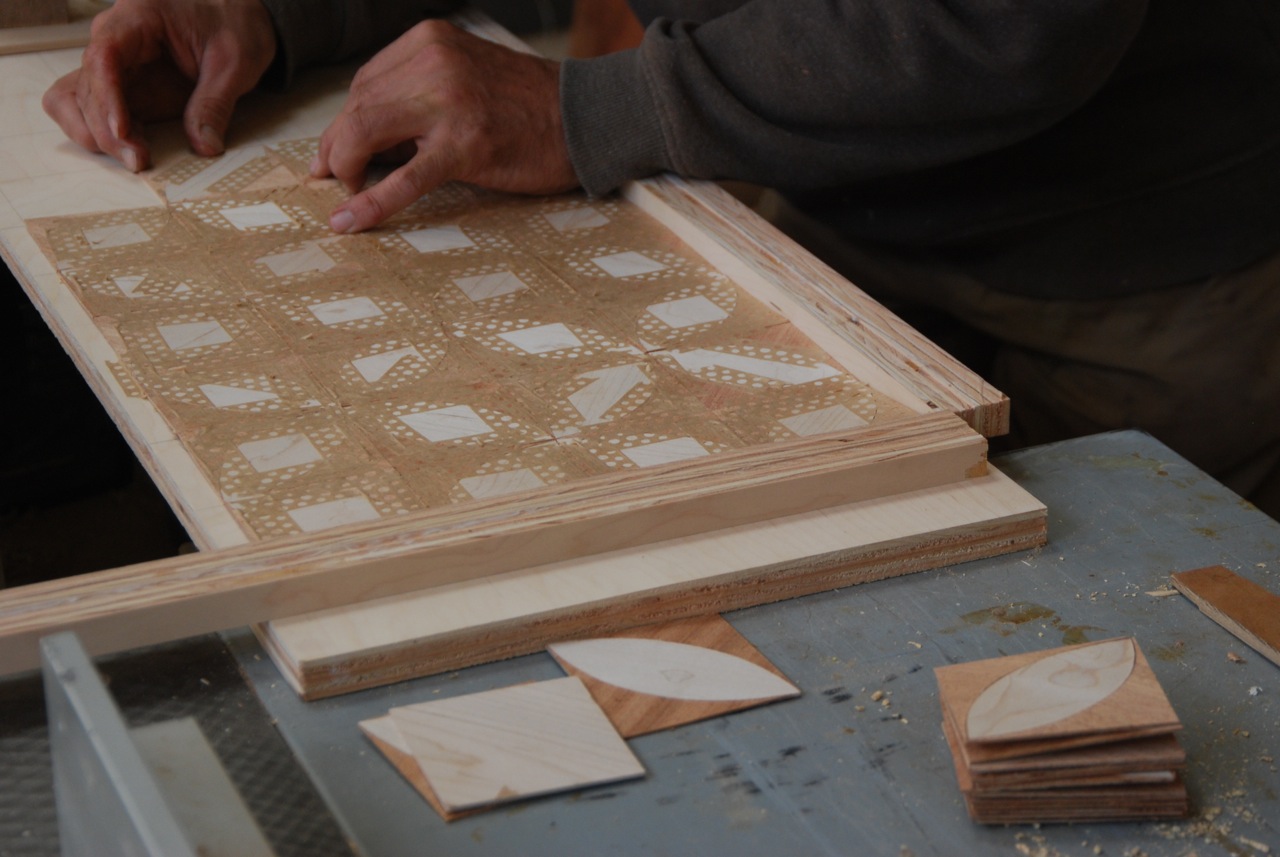
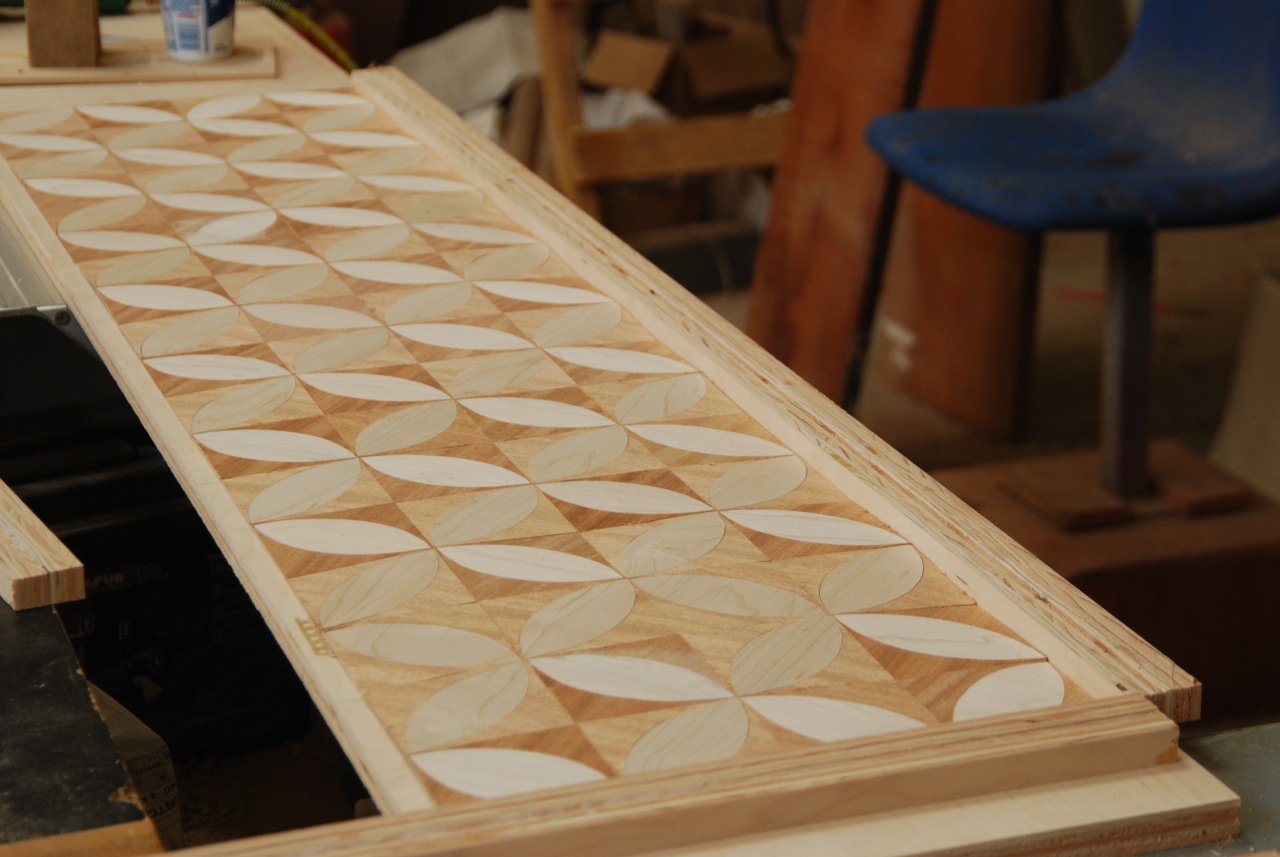
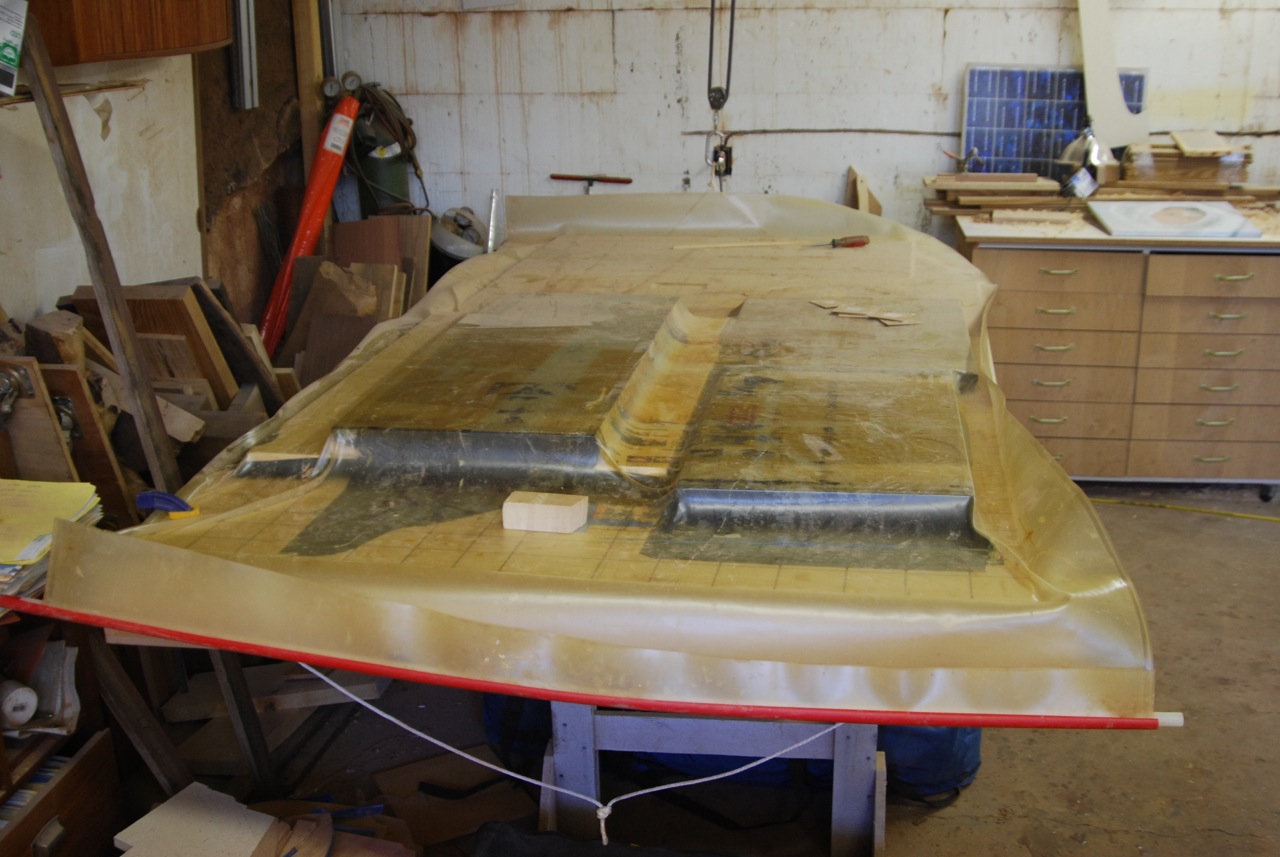
Once I had my squares taped up I really got a better idea about how I wanted the proportions of the piece to be. With that finalized I could move forward with glueing the parquetry to the substrate. I use West System epoxy for these kind of layups because it gives me a sufficient (and known) amount of working time and it isn't water based, so it doesn't make the veneer curl while I'm working on it. The epoxy also sands really nicely. I put glue on both surfaces and tape it down to the substrate to keep it in alignment while the glue cures in the vacuum bag.
Once the epoxy was cured I ran the panels through my drum sander to level the surface and remove any excess glue from the surface.
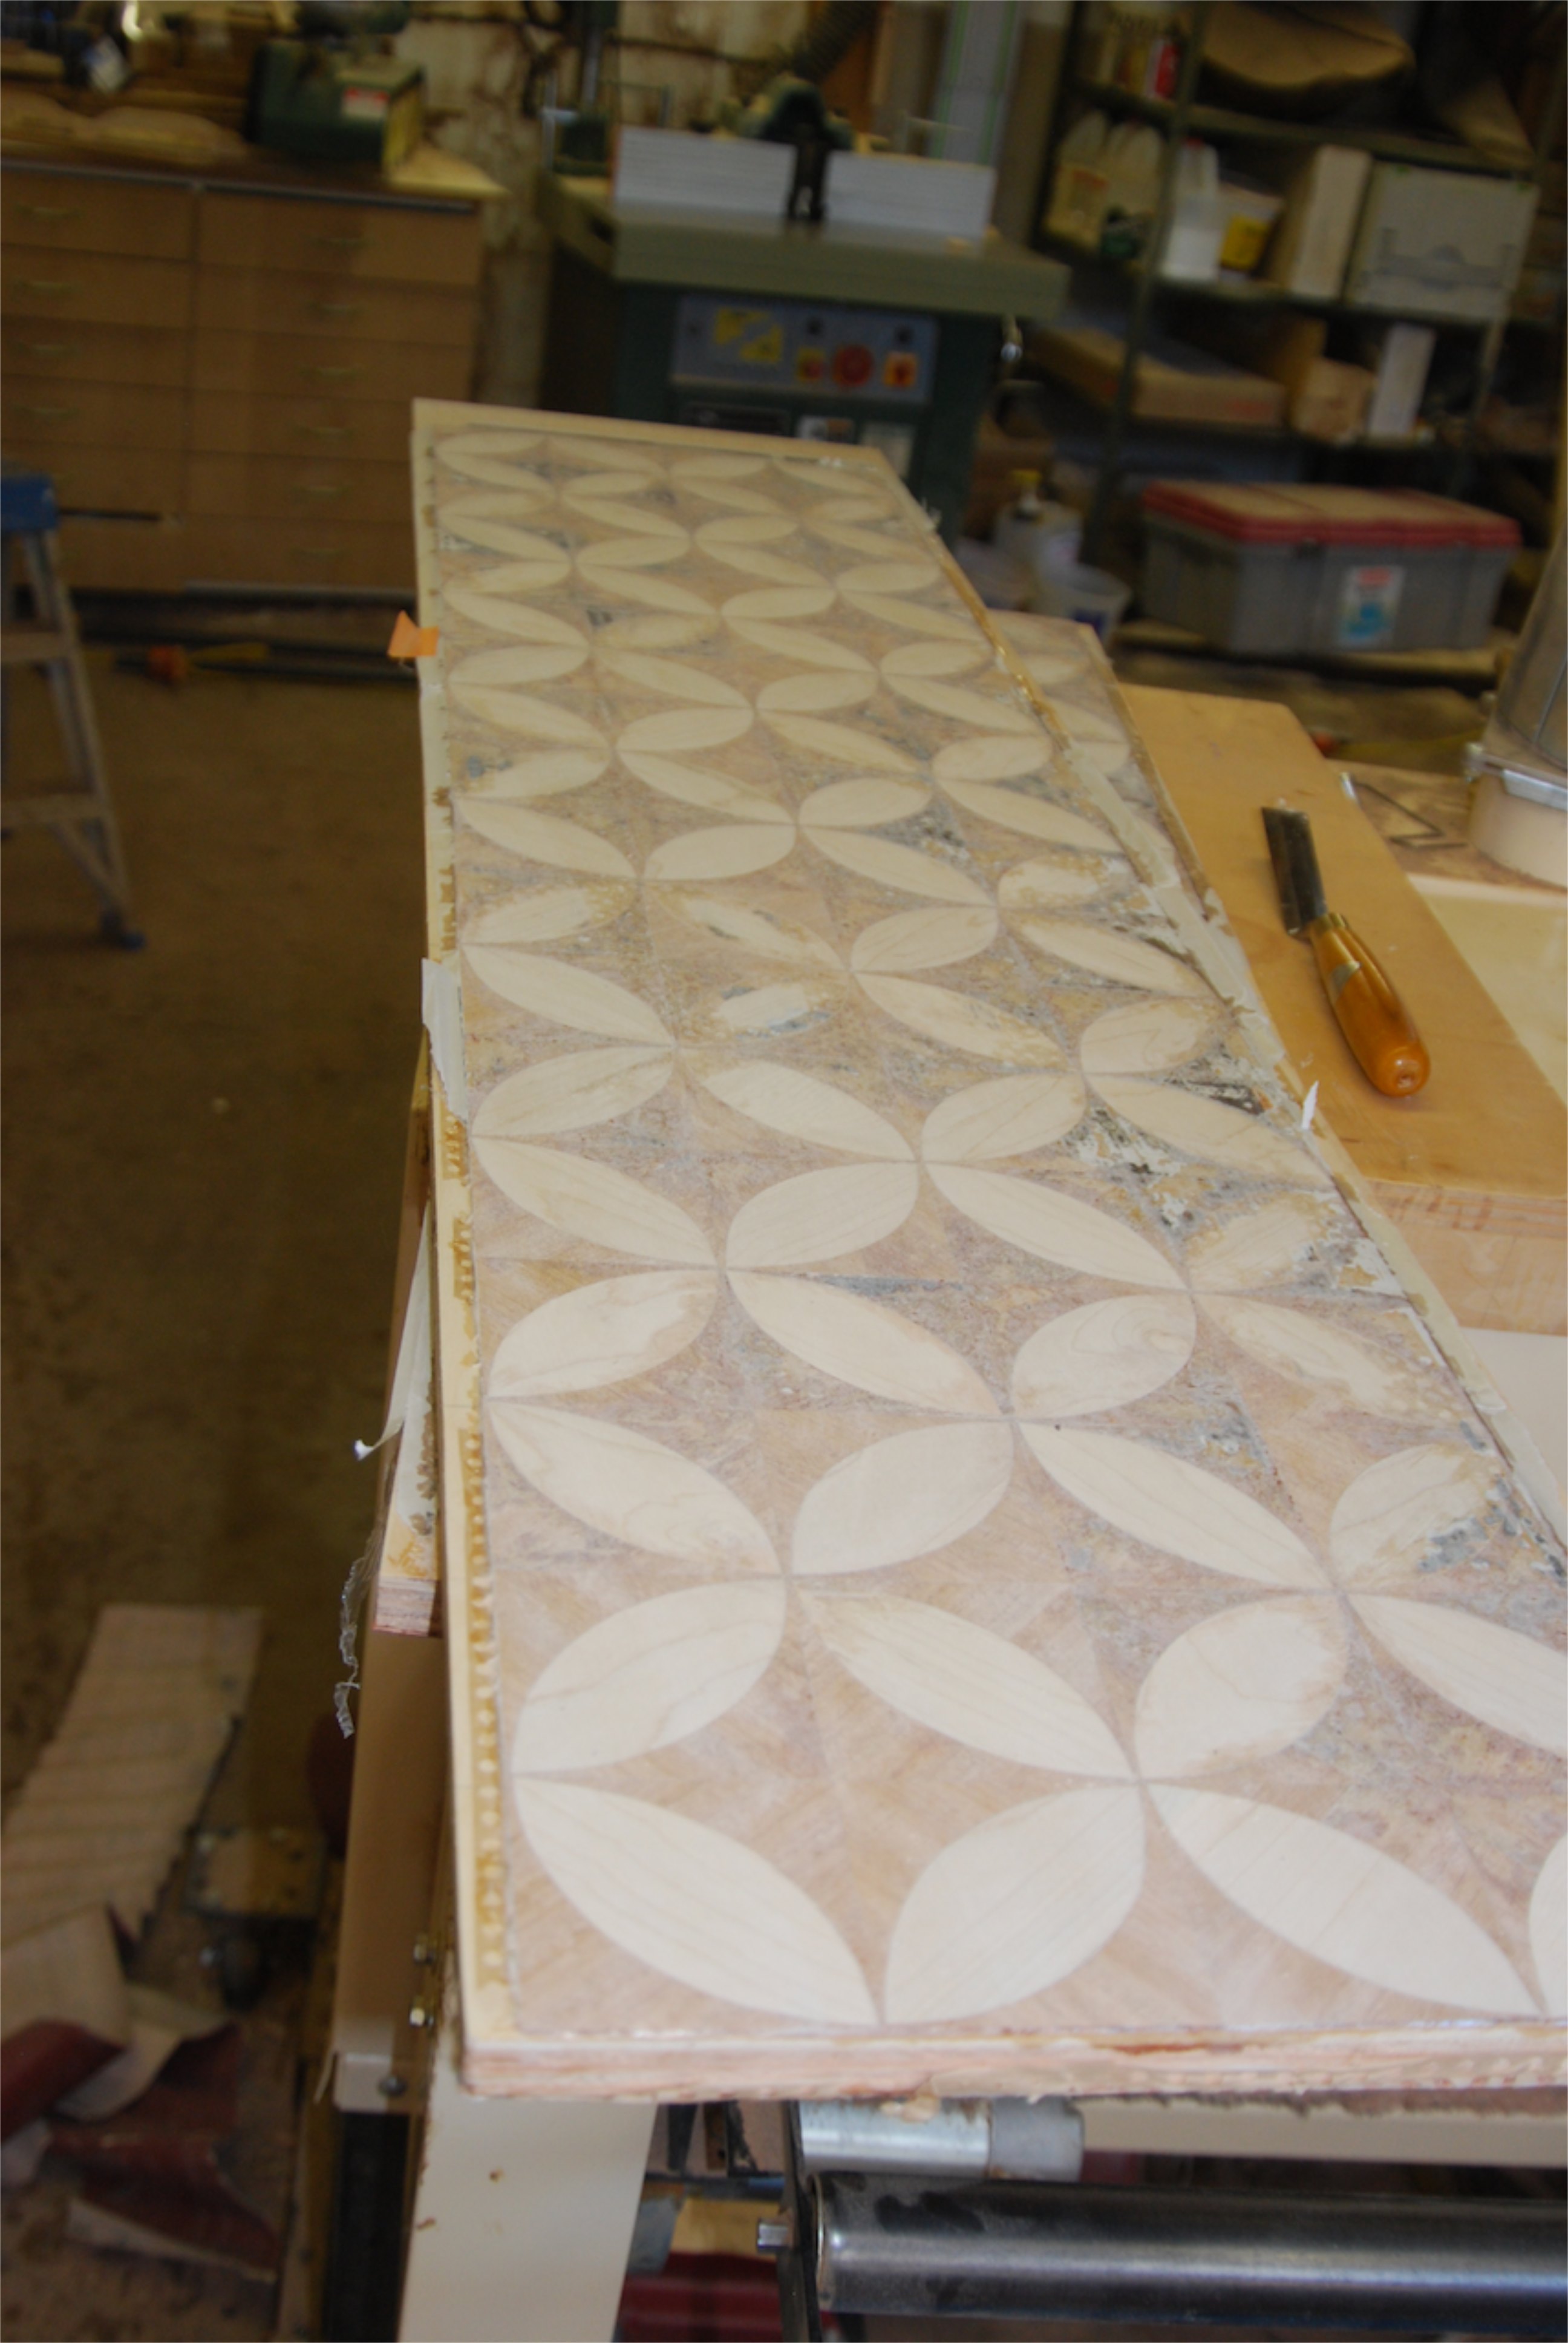
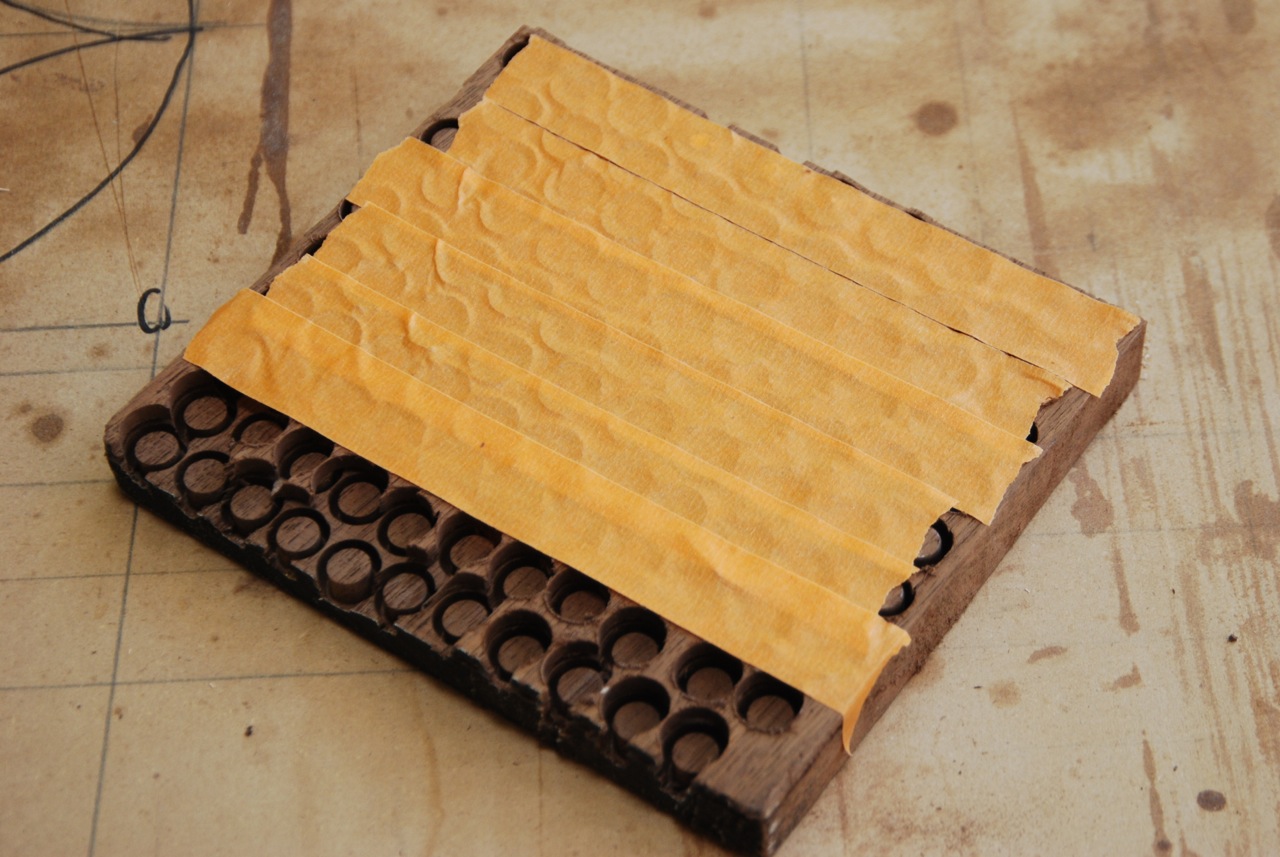
I had decided to put accent dots into the parquetry pattern to add another layer of visual geometry. I used a standard plug cutter to cut the plugs into a chunk of walnut.
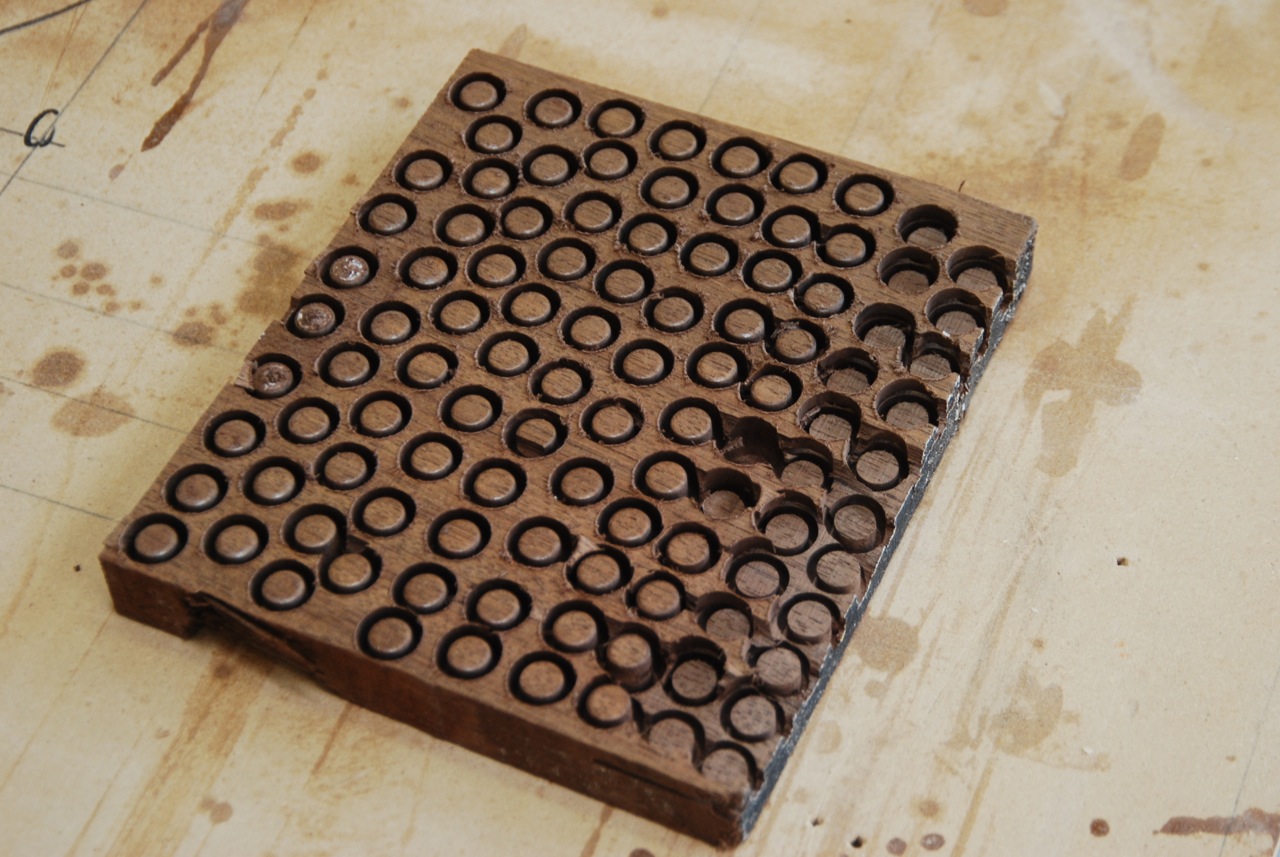
To keep from losing the plugs while cutting them out of the plank I like to cover the surface with tape.
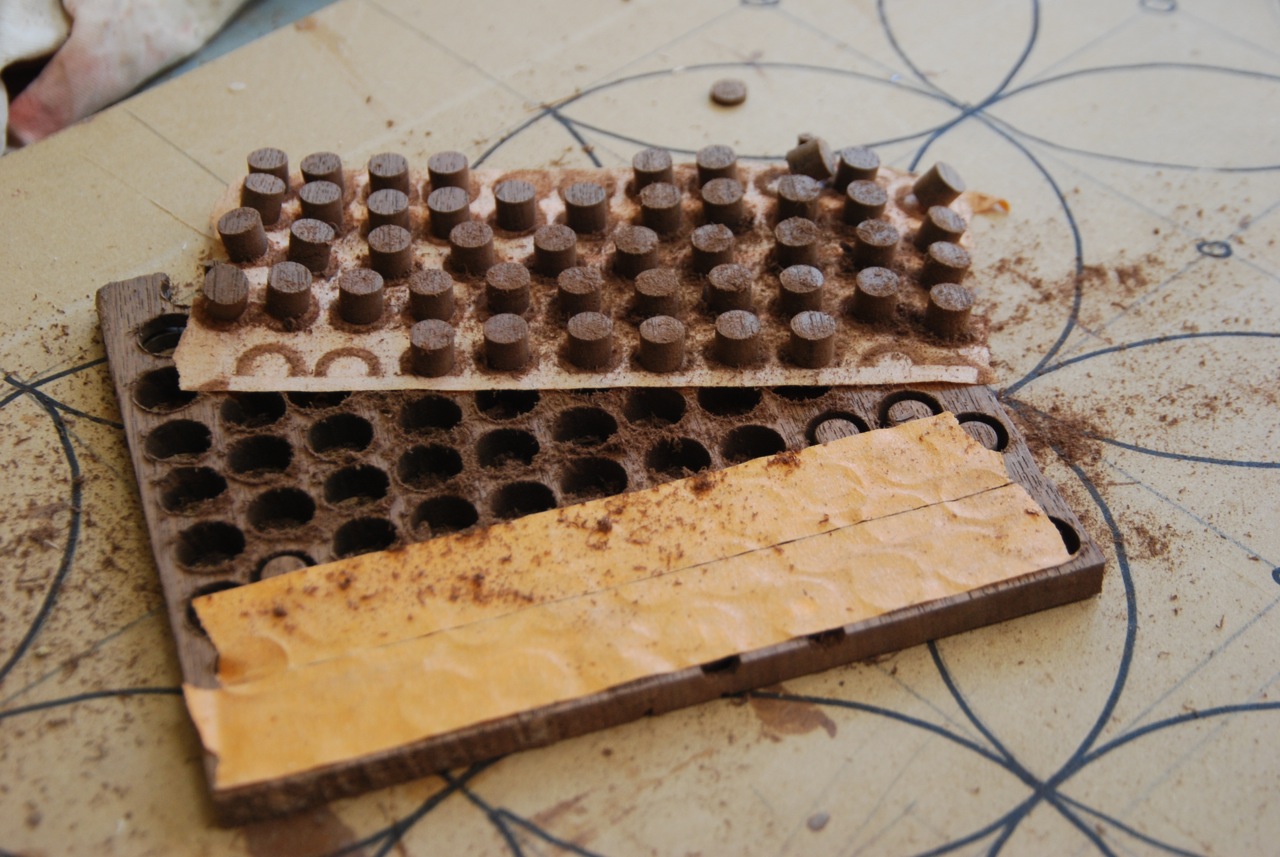
Then I can cut them all off at once on the bandsaw.
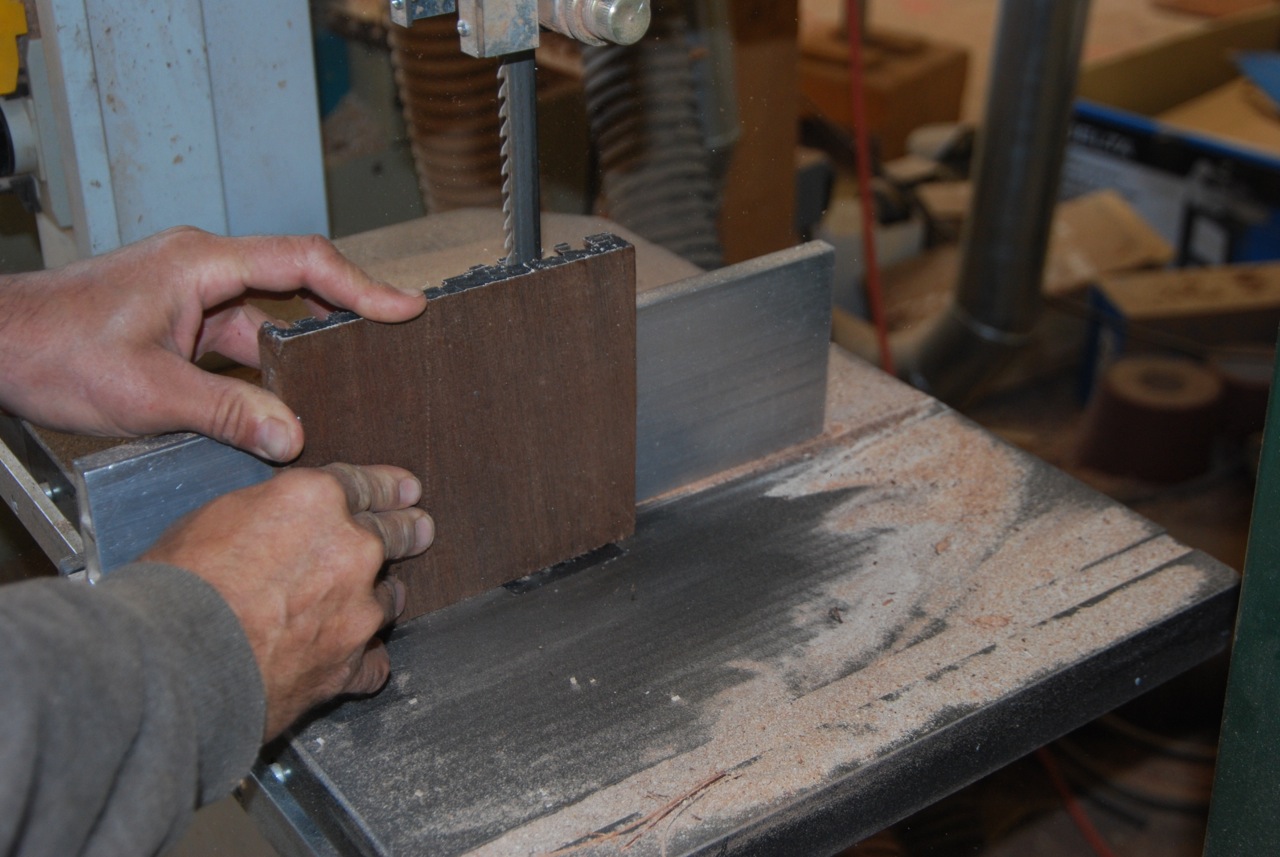
The plugs stick to the tape when you peel it off instead of falling all over the floor of the shop.
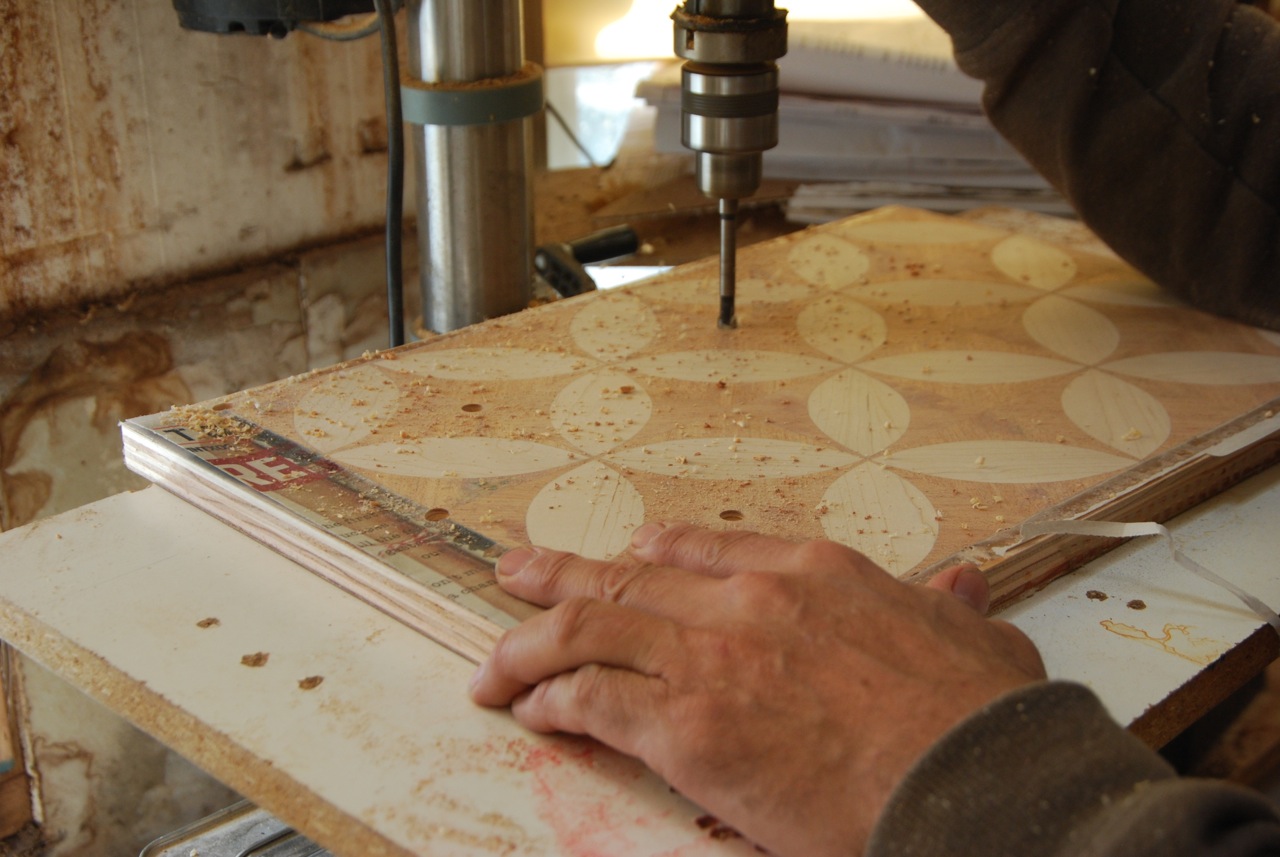
I drilled the holes for the plugs at the intersections of the squares with a forsner bitt on the drill press.
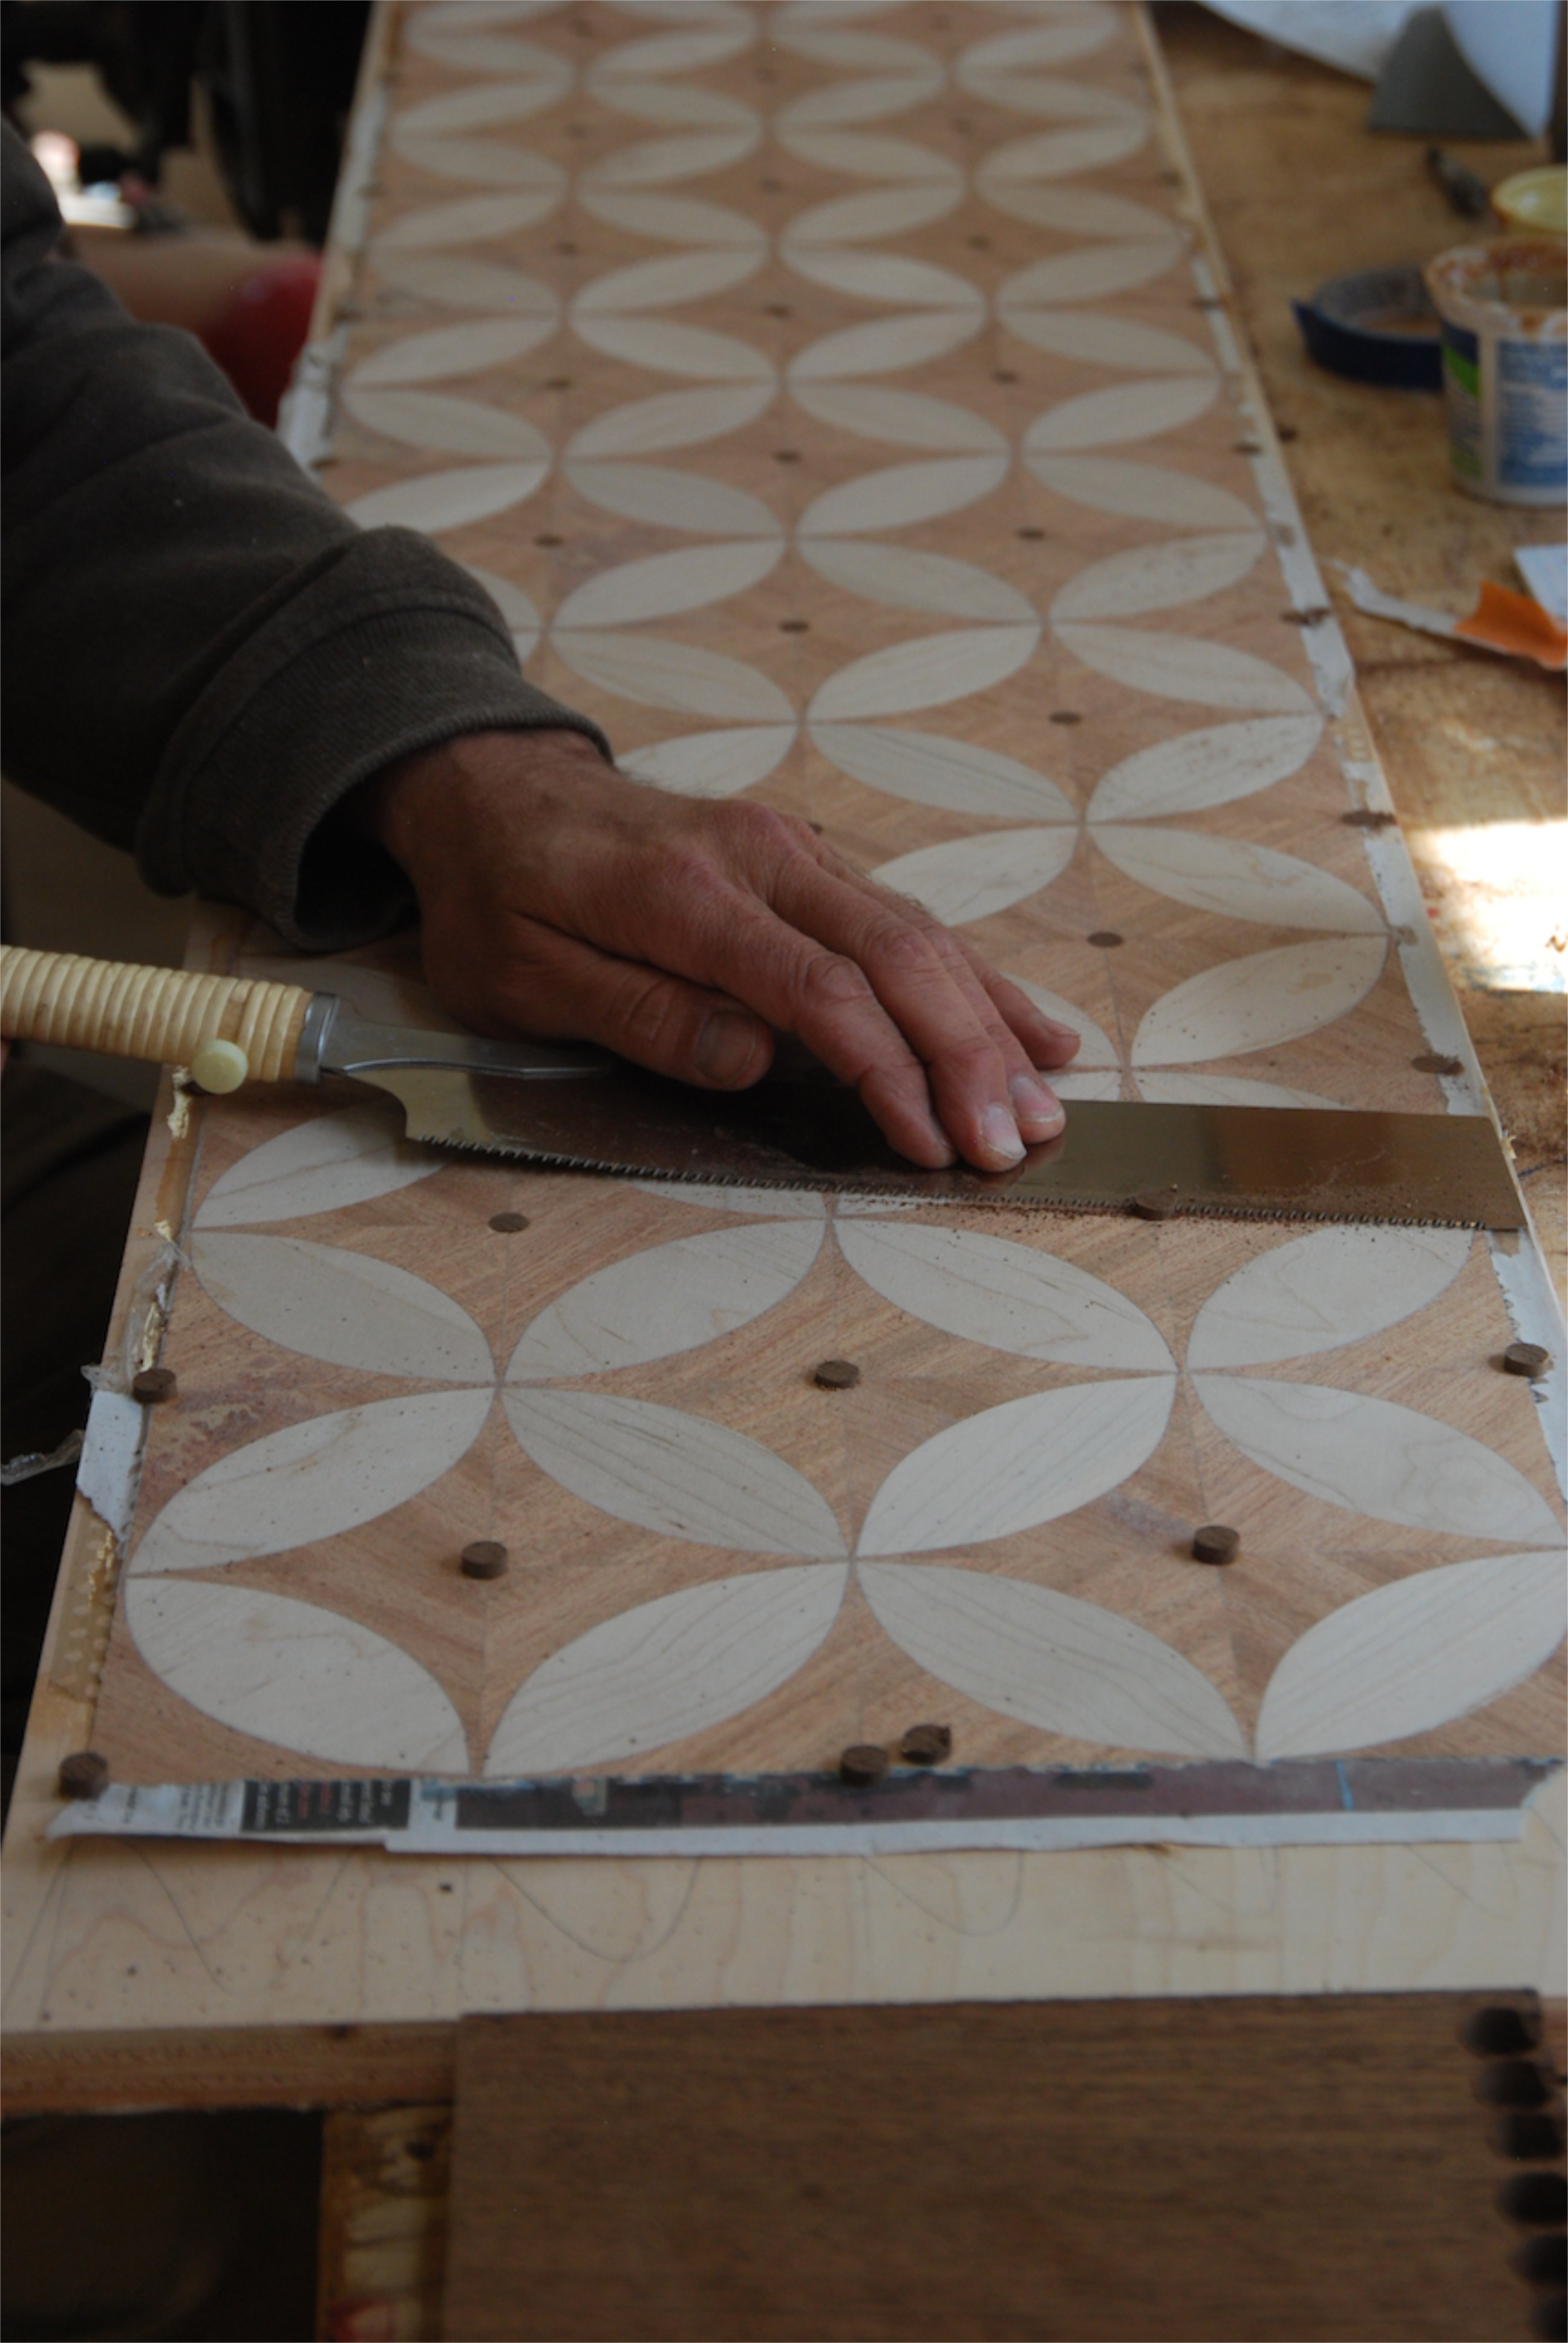
Then I glued the plugs in and cut them flush with a pull saw.
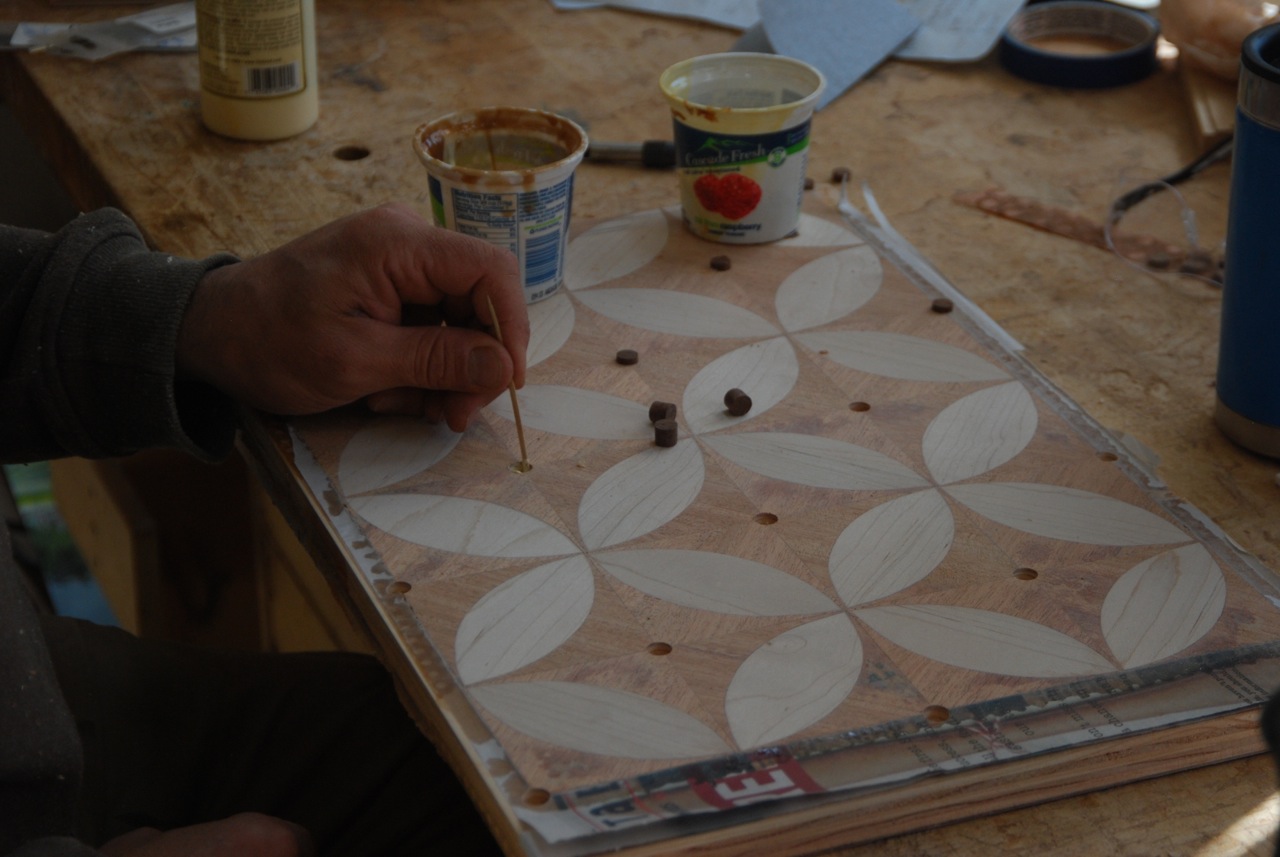
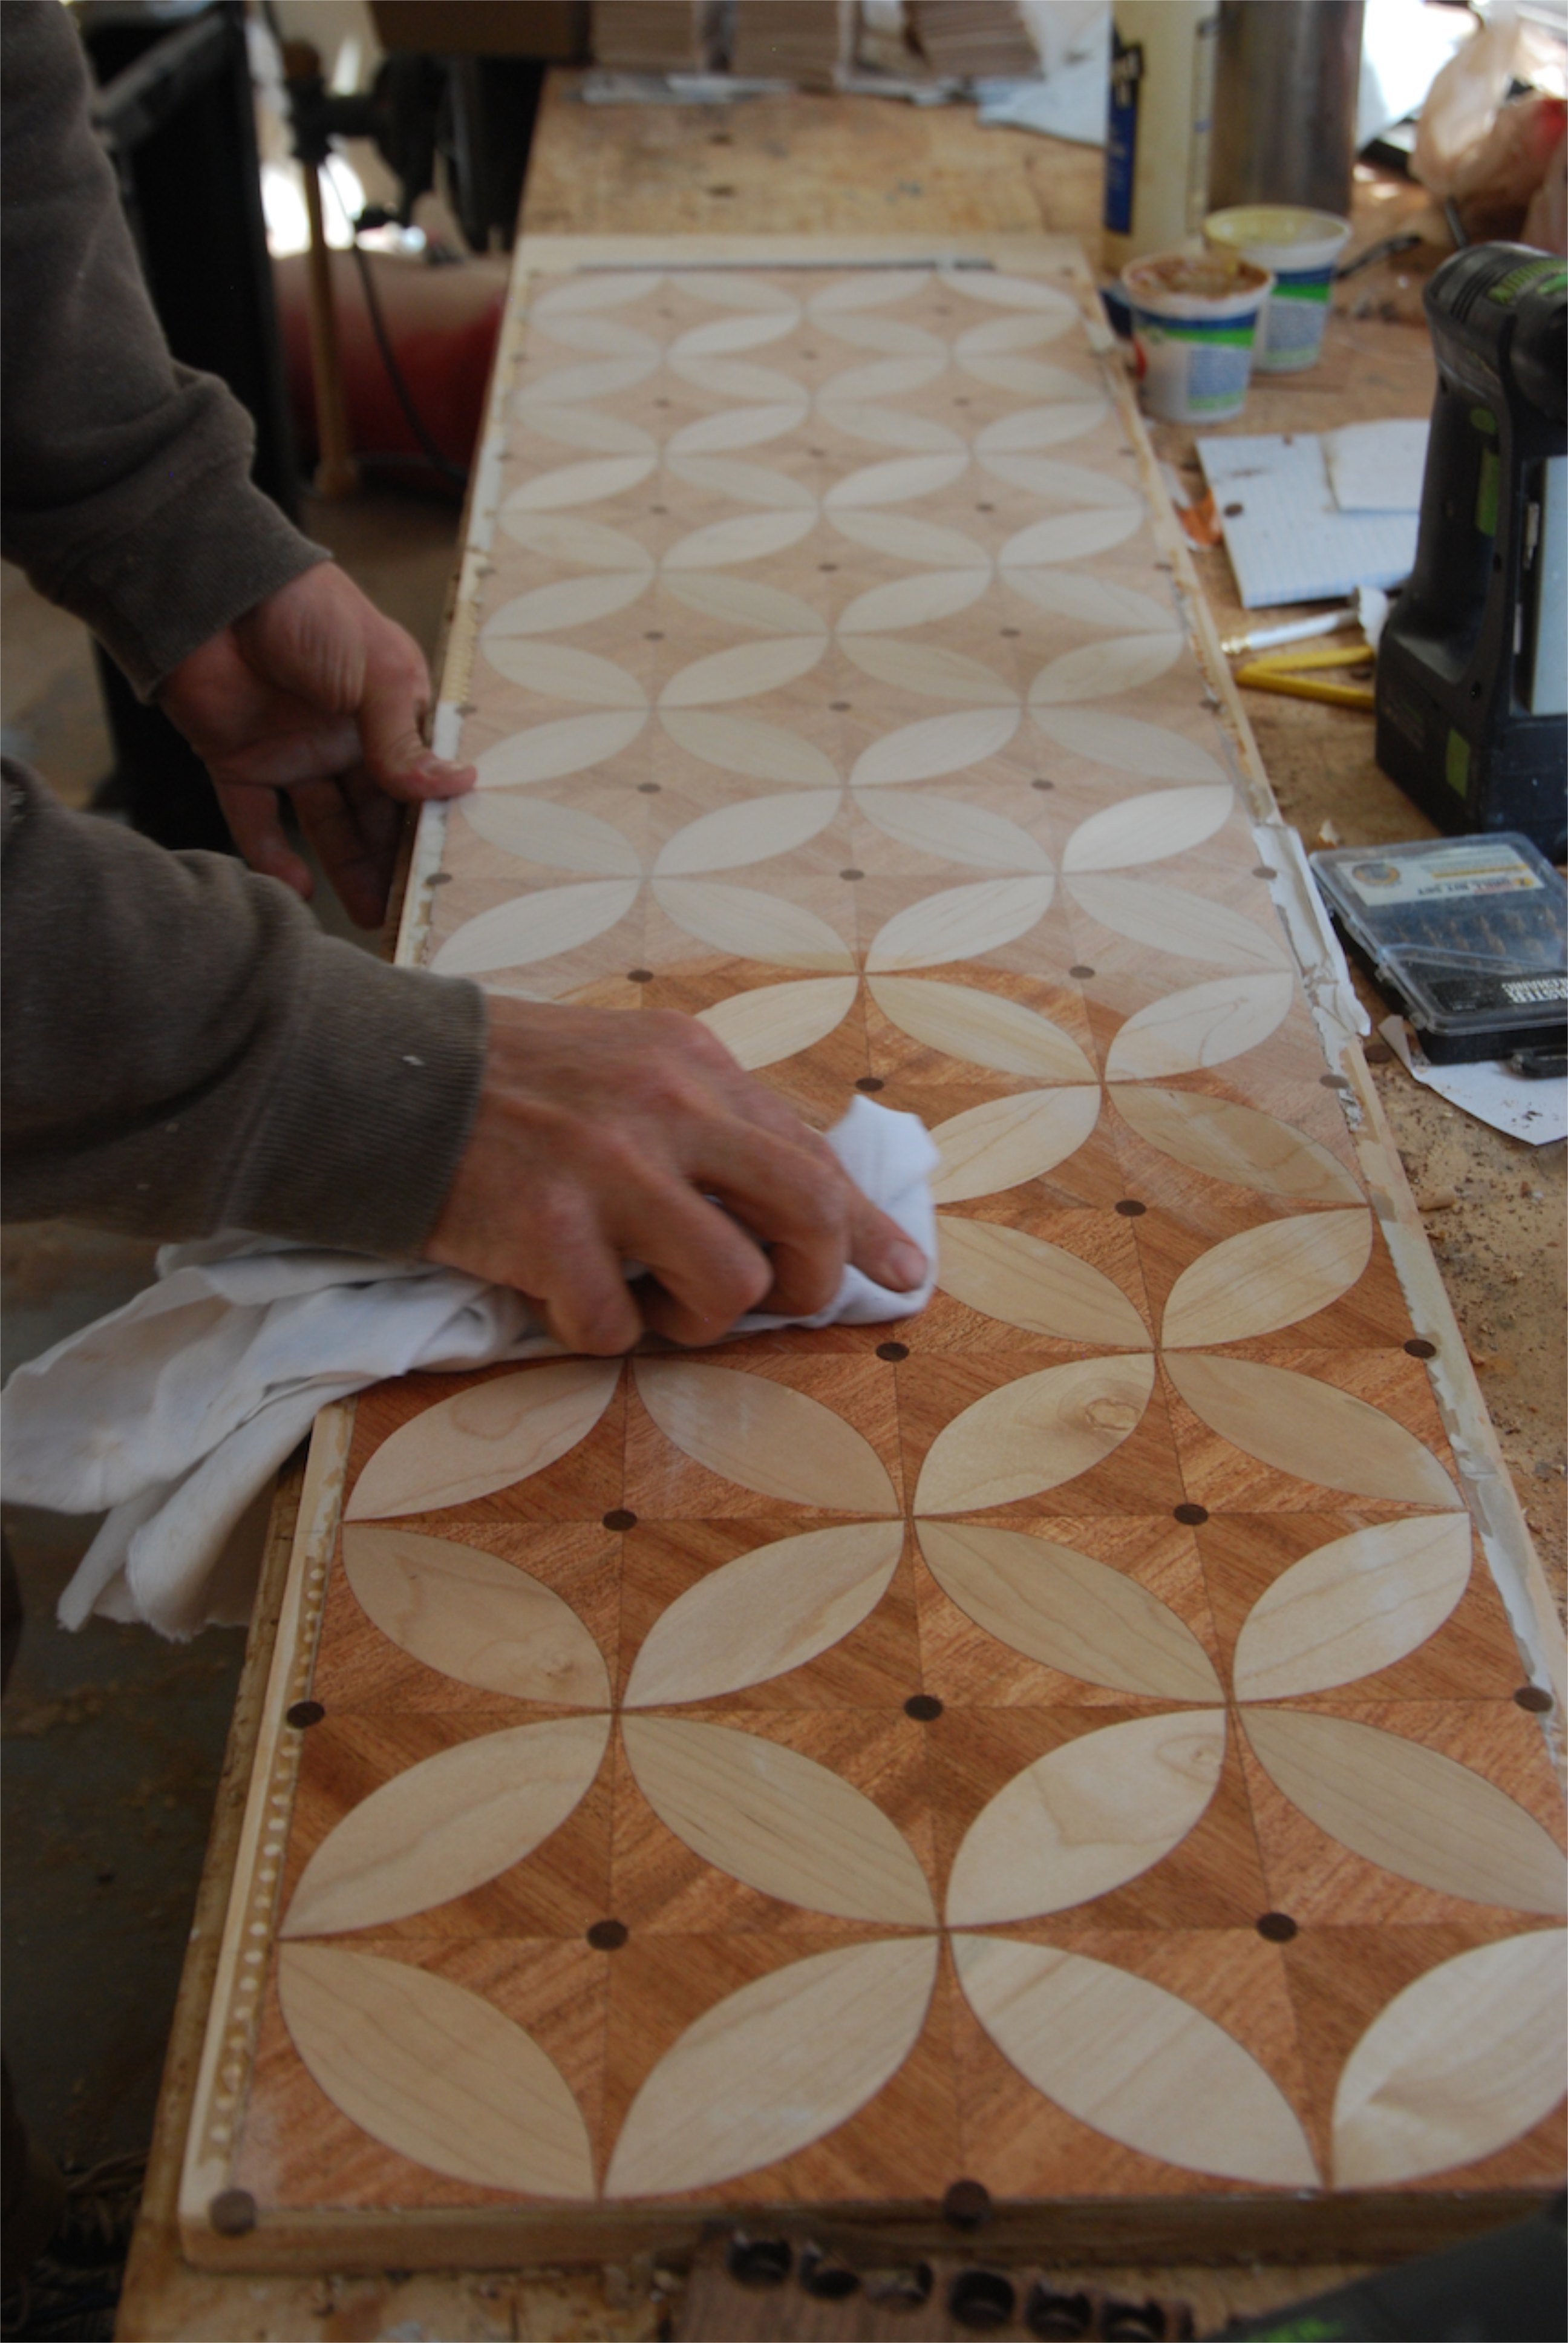
Once you've gone to all of this work it's hard to resist wiping a little mineral spirits on to see how it's eventually going to look with finish.
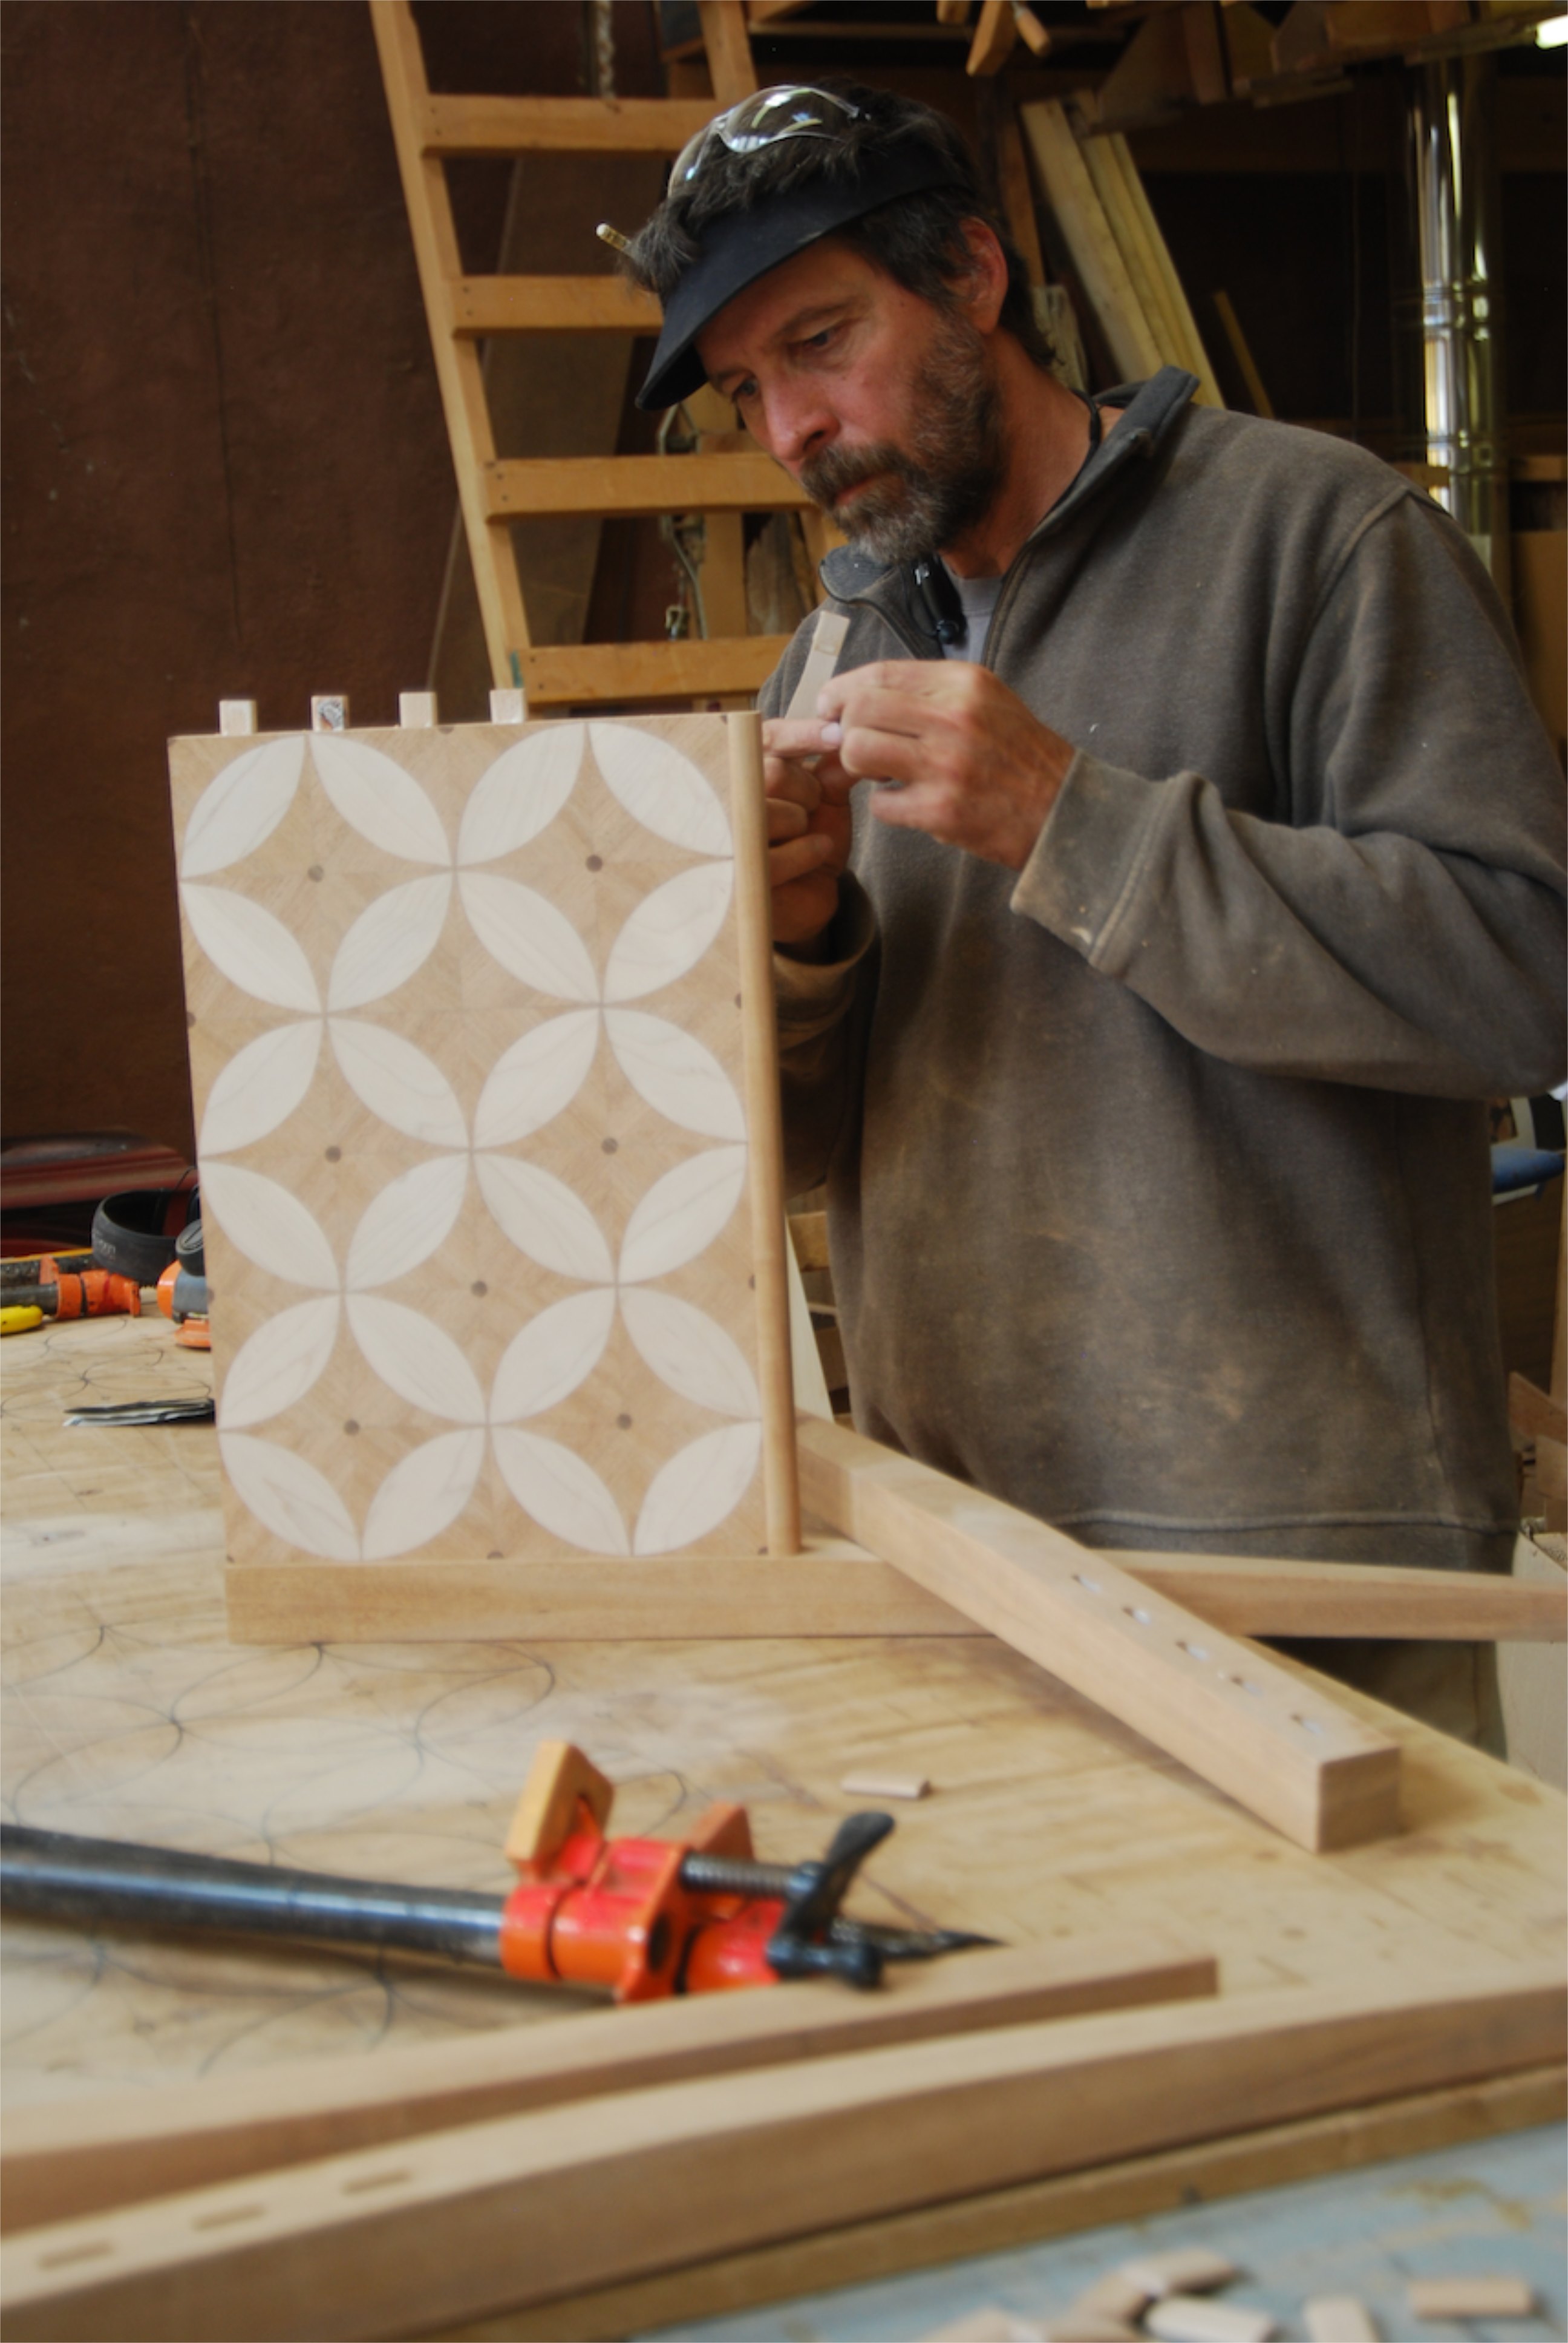
When the panels were sized I glued on some simple bullnosed mouldings along the bottom edges, made some tapered legs that flared out a little and used my Domino machine to join everything together.
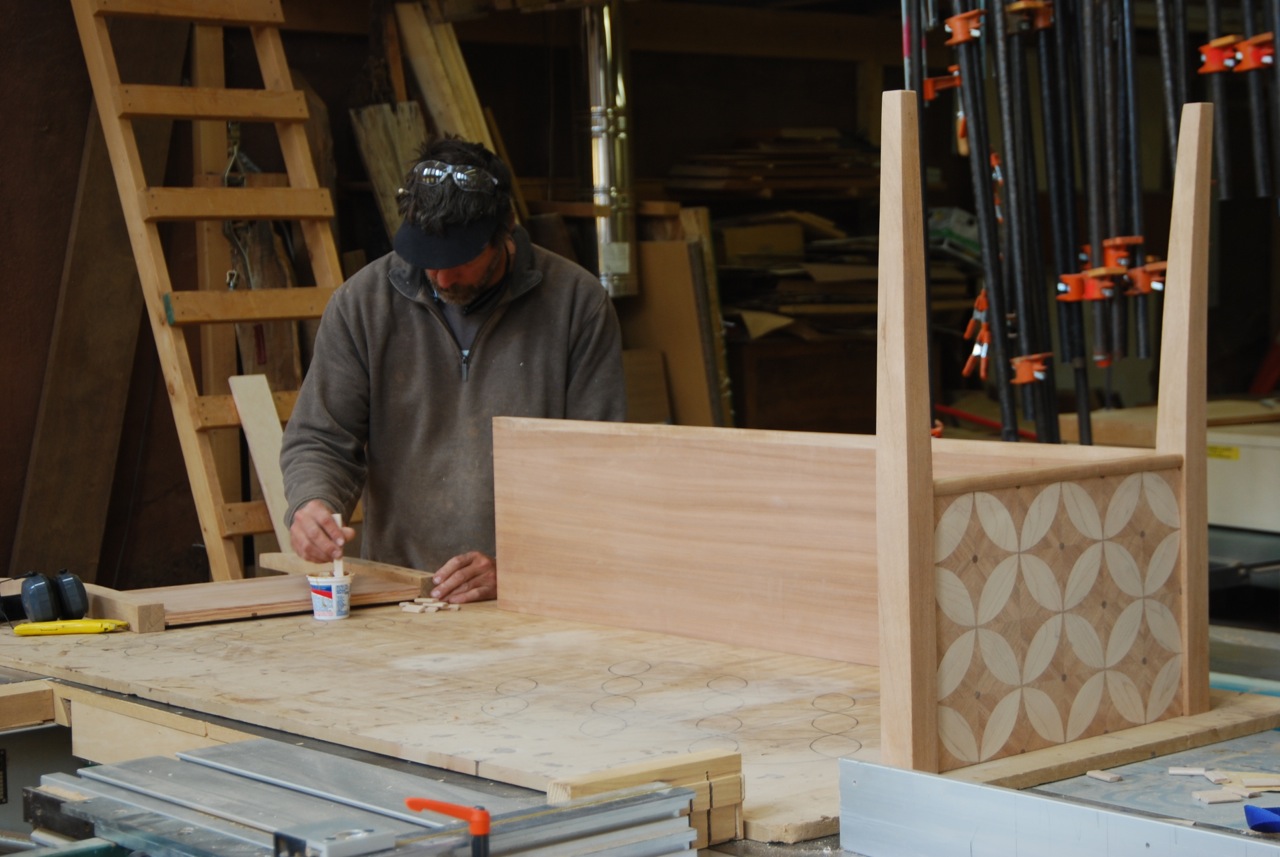
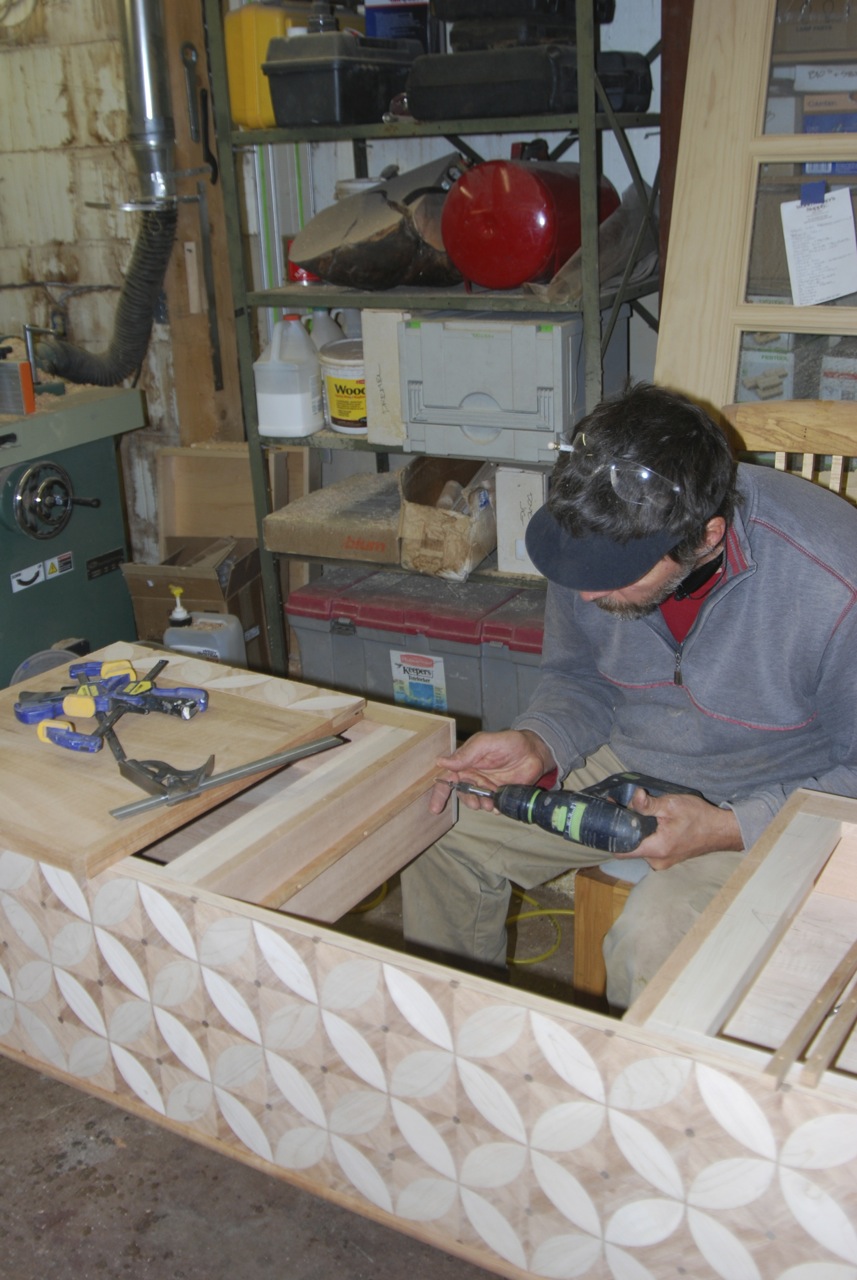
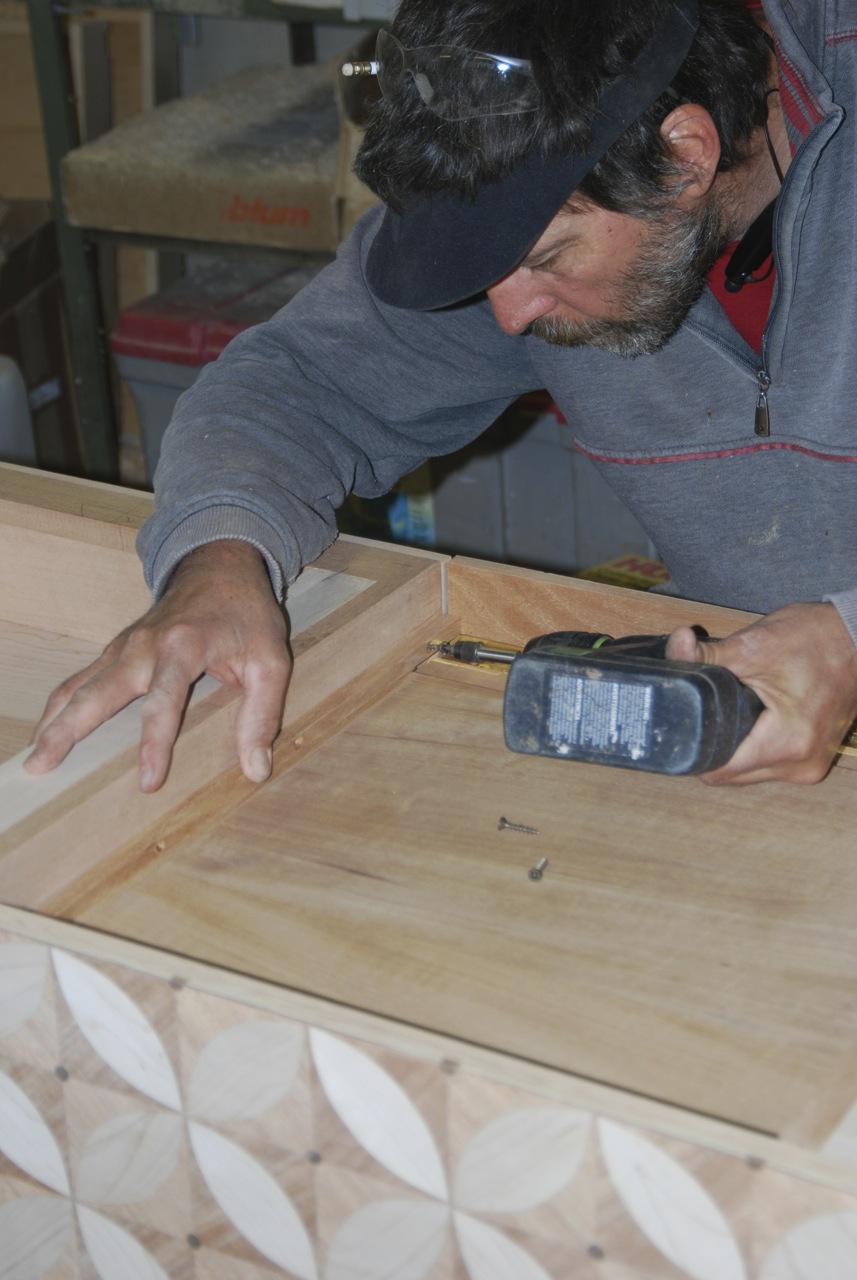
I made boxes for the dovetailed drawers to ride in and screwed them into the corners of the 3 sided carcass.
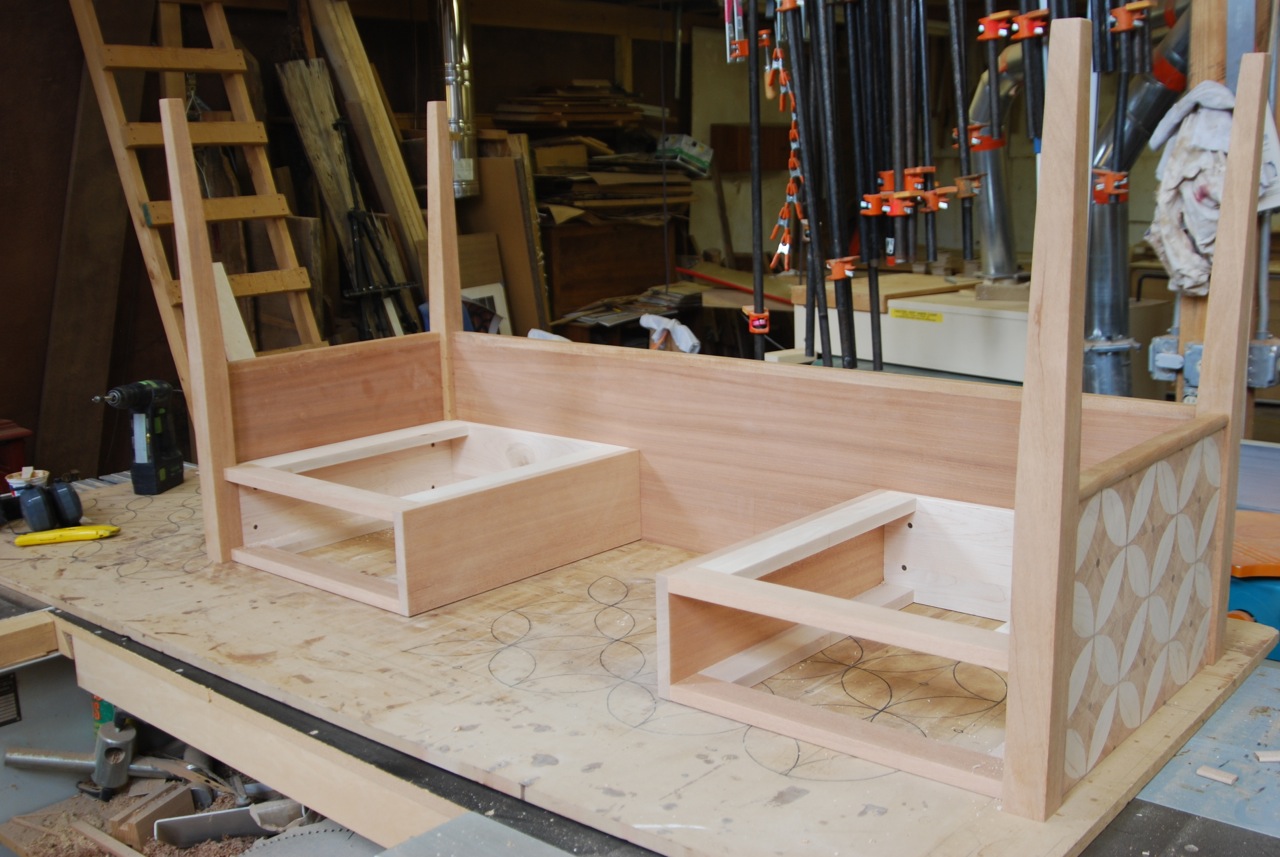
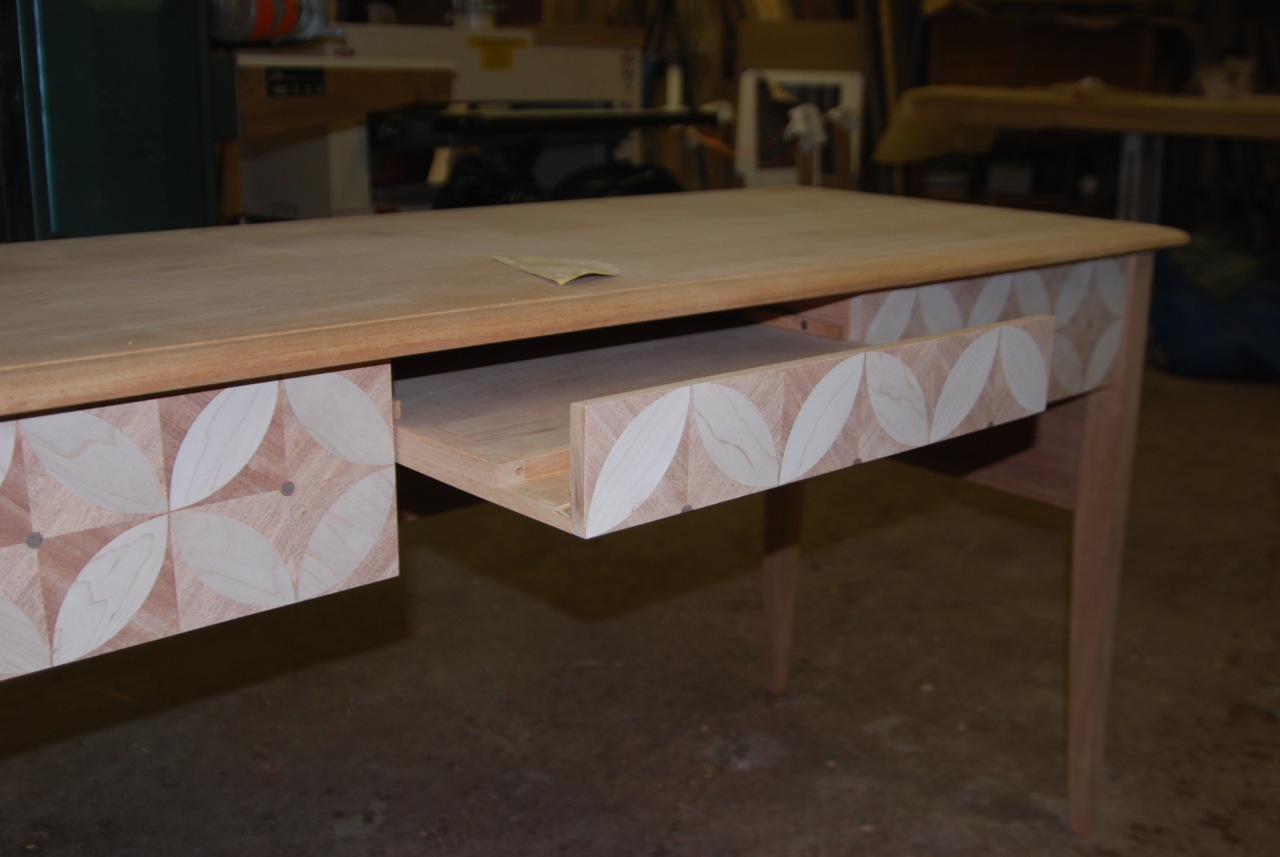
Instead of a drawer in the knee hole, I decided to make a keyboard tray with a face that folded down flush with the work surface. I mounted runners for the tray on the outsides of the drawer boxes.
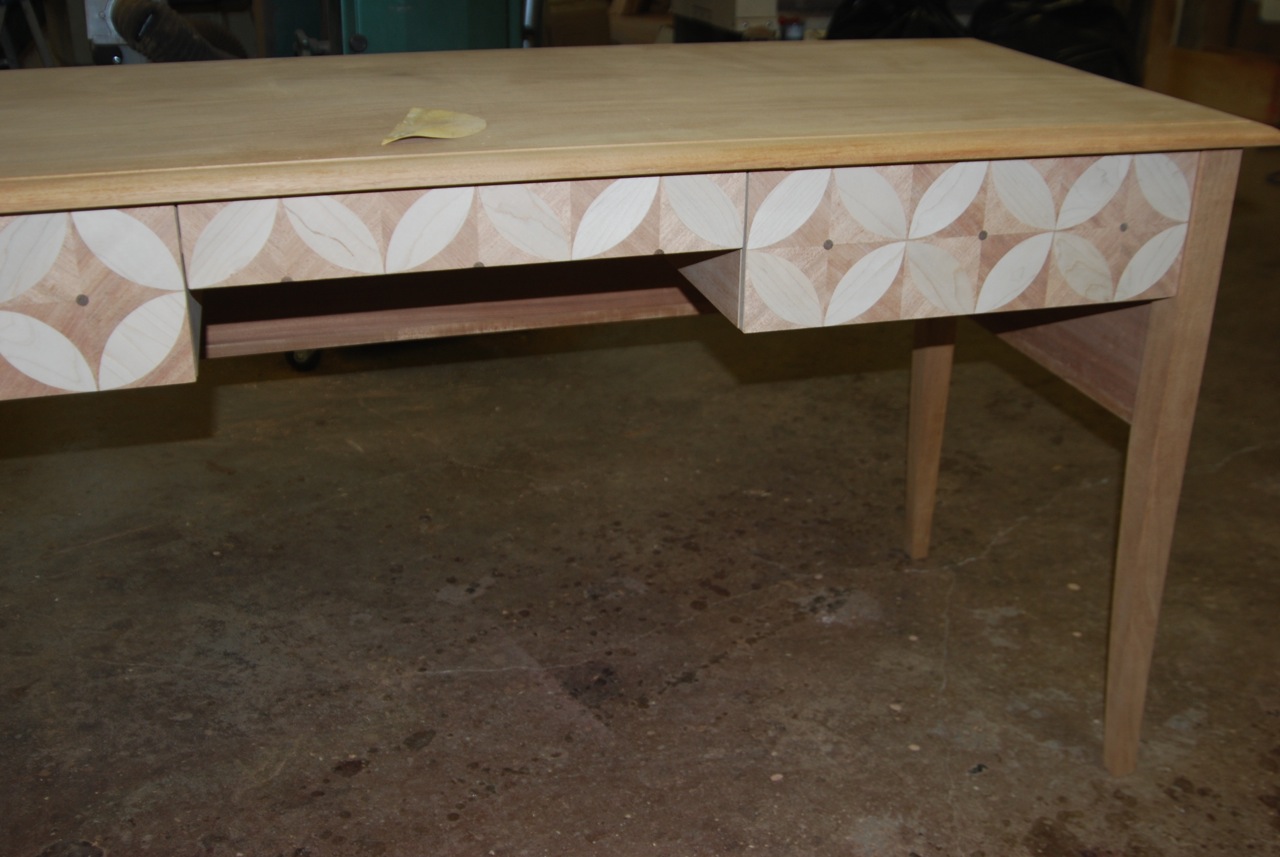
With all the woodworking done I hauled it off to my finisher for a spritz of lacquer.
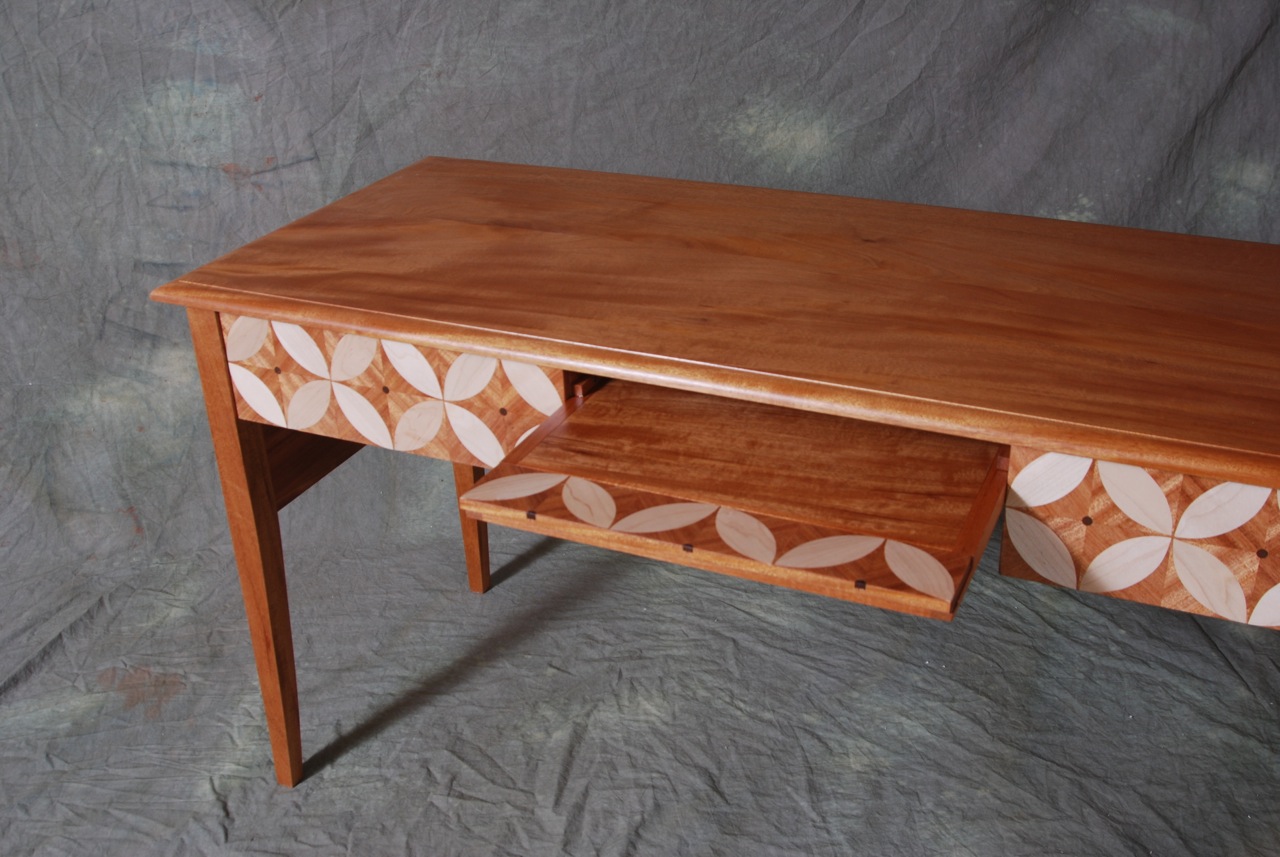
You can see more of my custom desks in the galleries on the website.